My coffee setup: roast, grind, brew, drink

A very good cup of coffee first thing in the morning

A very good cup of coffee first thing in the morning

Coffee can be a deep topic. While quite ordinary on the surface, serious coffee geeks know about the many variables which affect the final cup. Like any agricultural product, it starts with the grower's ability to consider the soil, climate, and their team of workers. After harvesting, there is fermentation, cleaning, and drying. In the roaster's hands, the skill is in controlling time, temperature, and movement to bring out the best characteristics of each bean. Understanding the general flavor tendencies of growing regions is important, and the best roasters will know the differences in specific farms and microclimates. Then the barista decides the grind size, water ratio and temperature, contact time, brewing method, serving vessel, and any flavorings such as cream, sugar, spices, and extracts. Finally drinker can drink it. Coffee geeks might use all their senses to contemplate what they perceive.

My own coffee geekery began with a home coffee roaster from Sweet Maria's. They have always been my source of green coffee beans and anything coffee related. There is a vast amount of useful information on the website for anyone interested in learning more. The beans from Sweet Maria's are always of the highest quality, and I especially appreciate their direct relationship with growers in making sure business is handled respectfully and responsibly. I've never ordered it, but you can also get roasted coffee there. They are a superior company.

I roast every 5 – 6 days, usually rotating between several origins. I use a burr grinder for consistency and control of grind size. The water is filtered and heated to 200 F in an electric kettle. I have used many brewing methods over the years, but my current device is the Clever Dripper. This unique hybrid method allows you to control contact time like French press while using a paper filter (my favorite filter is Filtropa) like the pour-over style. There is a silicone stopper mechanism on the bottom where the coffee drains when you set it on a cup. One drawback is that it's a bit precarious and one bump could make the whole thing go flying. My cup is double walled and I notice a big difference in heat retention over a regular cup.

I would understand if all this sounds a bit obsessive. In my mind, this is the distinction between geekery and snobbery: geeks seek out knowledge for their own enjoyment while snobs are more concerned with status and self image. This concept can be applied to pretty much anything. Go geeks.


High quality beans from Sweet Maria's

High quality beans from Sweet Maria's

Freshly roasted coffee has an intoxicating aroma

Freshly roasted coffee has an intoxicating aroma

Assistant roaster used to think I was pouring cat treats into the bowl, but now knows it's just green coffee

Assistant roaster used to think I was pouring cat treats into the bowl, but now knows it's just green coffee

Simple home air roaster allowing for pretty good control

Simple home air roaster allowing for pretty good control

Burr grinder is nice to have

Burr grinder is nice to have

How to make kimchi the way you like it

This could be a controversial statement, but I think kimchi is just another variation of sauerkraut. If you go back and read my post on sauerkraut, the basic technique is to cut cabbage, add salt, pack into a jar, and ferment at room temperature. We can add other greens, fruit, herbs, and spices to add variation as long as the technique and salt level remain intact. My kimchi method is the same as my sauerkraut method except that it has a few additional ingredients. Realizing this commonality was enlightening because it freed me from needing to follow recipes. Through experimentation and diligent note taking, I have dialed in a basic recipe that works for my palate, but I would encourage everyone to make kimchi the way you like it. Heck, you can even skip the red pepper if you are not a fan of spicy hot food since this was the traditional way kimchi was made until chile peppers were introduced to Korea around the 17th century.

One book I would highly recommend is The Kimchi Cookbook by Lauryn Chun. According to her, "there are more than 160 foundational recipes for kimchi, and every Korean family has its own version of the basic recipe based on their regional style." Not only does this book cover a wide variety of recipes categorized by season, there are also some very exciting ideas about cooking with your kimchi such as kimchi slaw, kimchi risotto, grilled kimchi cheese sandwich, red curry mussels with kimchi, and kimchi grapefruit Margarita. My favorite recipe from this book is the scalloped potatoes with kimchi where thinly sliced potatoes are layered with cream, cheese, and kimchi and baked. To call this flavor combination brilliant is no overstatement as I have made this fantastic dish many times.

There is no particular reason for the weights of cabbage and daikon in the recipe below - I just cut it up and weighed it so that I knew how much salt to add. It turned out that this batch was about 1 cup too big to fit in the jar, but the little jar fermented just as well as the big one. I add the salt to the cabbage and daikon, let sit for a couple of hours for the liquid to release, then add everything else before stuffing into the jar. I ferment for two days at room temperature, which is just before I detect sourness. The kimchi is stored in the refrigerator where it will slowly develop acidity over weeks and months. In addition to salt level and flavorings, the sourness is another variable that can be adjusted to suit your preference. Just taste a sample daily. 

I have tried a lot of different vegetables including carrots, turnips, beets, gobo, radishes, tops of daikon/turnip/radish, kale, mizuna, watercress, green/red/savoy cabbage, shiso, cucumber, eggplant, and more. They all work well as long as the salt level is consistent and the vegetables are fresh (organic is better) so that the naturally occurring bacteria has vitality. My salt percentage is a little lower here because the anchovy sauce and salted shrimp are included. If omitting fish products, umami could be added by using shiitake, konbu, wakame, shoyu, miso, or shiokoji. 


1. add salt, mix, and let sit for a couple of hours to release liquid or speed up the process by manually massaging the salt in

1. add salt, mix, and let sit for a couple of hours to release liquid
or speed up the process by manually massaging the salt in

Kimchi
1120g napa cabbage, 1 - 2 inch pieces
670g daikon, 1/4 inch slice
35g sea salt (2% of the weight of cabbage & daikon)
1 bunch green onion, thin slice on angle
3 inch piece of ginger, grated
2 cloves garlic, grated
1 TB Korean anchovy sauce (can substitute fish sauce)
1 TB salted fermented shrimp
1 tsp sugar
1 cup Korean red pepper (coarse powder)

2. after the first step, add all other ingredients and mix well

2. after the first step, add all other ingredients and mix well

3. finally, a sunny day...

3. finally, a sunny day...

4. all mixed and ready to pack into a jar a wide canning jar funnel makes this step a bit quicker and less messy

4. all mixed and ready to pack into a jar
a wide canning jar funnel makes this step a bit quicker and less messy

6. ferment 2 days at room temperature airlock is not at all necessary I just like to see the bubbling of active fermentation

6. ferment 2 days at room temperature
airlock is not at all necessary
I just like to see the bubbling of active fermentation

5. it didn't all fit into one jar but no big deal the little jar kimchi tasted just as good

5. it didn't all fit into one jar but no big deal
the little jar kimchi tasted just as good

Making simple sauerkraut at home

For anyone who thinks that sauerkraut is not delicious, I would urge you to try making it yourself at least once.  Like most things, homemade is quite different from store bought.  For the rest of us who love the stuff, it's fun and rewarding to make.  And it couldn't be simpler.  My fermentation guru is Sandor Katz, who has extensively researched and written about fermentation traditions around the world in his two indispensable books, Wild Fermentation and The Art of Fermentation.  I highly recommend both.

The most important factor for the best sauerkraut is the quality of the cabbage.  Fresh, organic cabbage from the farmer's market is best (unless you grow it yourself - the kraut made from my garden's cabbage was the best I've ever had).  Because we're relying on the natural bacteria (lactobacillus) already on the cabbage, organic makes a lot of sense, and the same is true for freshness.  Another detail is the salt ratio.  I use a scale to weigh the salt at 2.5% of the weight of the cabbage because I have one and it's the best method for batch-to-batch consistency.  Of course you can salt to taste and it will probably be just fine, but weighing allows you to make salt adjustments to suit your preference.  I use unrefined sea salt (Korean sea salt in this batch) because it tastes better and the minerals (calcium) help keep the cabbage texture crunchy.  The final element is fermentation time, which depends on bacteria vitality, salt level, fermentation temperature, and personal taste preference.  This batch was fermented for 5 days where the room temperature was in the low to mid 60s F.  The acidity is medium low and it has a slightly fruity aroma and notes of horseradish on the palate.  The airlock is not necessary at all but I use it because it's fun and I have a lot of them lying around.  The lid is Tattler and I drilled a hole to fit the rubber stopper that holds the airlock.  The jar is the 1.9 liter Ball, the largest I can find that takes the standard wide-mouth lids.  This jar would hold at least 300 grams more cabbage than what I used.  I also have a little glass weight holding the cabbage under the liquid.  Here I used a mix of green and red cabbage, but any cabbage is fine - savoy, napa, or any other greens like kale, mizuna, etc.  A mandolin can make the cutting easy, but for me the task is just as fast with my very sharp knives.  Playing with spice additions is fun too - juniper, caraway, lavender, coriander, and such.  Don't forget to label!  Painter's tape is great for that.


mix the cabbage and salt, let sit at least 1 hour for the juices to release

mix the cabbage and salt, let sit at least 1 hour for the juices to release

Purple Sauerkraut
1300g shredded cabbage (1 red, 1/2 green)
32.5g sea salt (2.5% of the weight of cabbage)

squeeze the cabbage to get enough liquid out to cover the cabbage

squeeze the cabbage to get enough liquid out to cover the cabbage

airlock is fun but not at all necessary a glass weight helps keep the cabbage under the liquid

airlock is fun but not at all necessary
a glass weight helps keep the cabbage under the liquid

pet the kitty if he's in a friendly mood

pet the kitty if he's in a friendly mood

it came out red (magenta) but it was purple when I labeled it it tastes really good!

it came out red (magenta) but it was purple when I labeled it
it tastes really good!

My homemade bread method

freshly baked rye bread

freshly baked rye bread

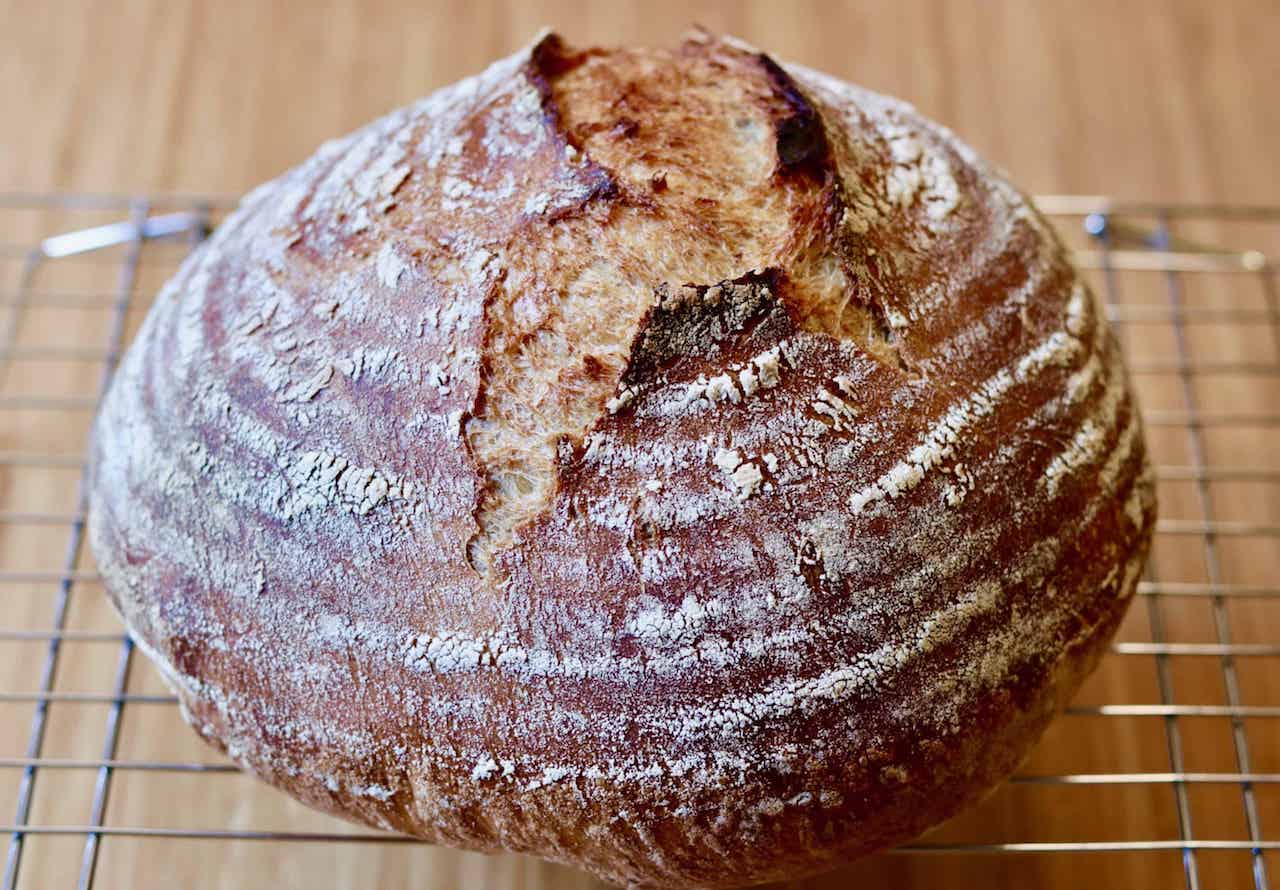
I've been baking bread at home for over ten years, trying several different methods during that time.  The first book that helped me get more serious about bread was Dough by Richard Bertinet.  After that was Mark Bittman's New York Times article about Jim Lahey's revolutionary no-knead method and book My Bread.  Finally, Ken Forkish's Flour Water Salt Yeast is the source of my current recipe and technique.  His Portland restaurants' bread and pizza simply speak for themselves and I rushed out to get his book after tasting his bread.  I really appreciate Forkish being very detailed in using scales (in grams), thermometers, and percentages so that we can get a handle on the relationship of the ingredients.  This allows for very easy up and down scaling of batch size, plus makes it easier to experiment and adjust to our own tastes.  The basic recipe makes two loaves, and here I've baked one and stored the other dough in the fridge to bake later or for pizza or focaccia.  Once you get the hang of the white bread, it's easy to substitute whole wheat, rye, or other flour, as well as throw in dried fruits, nuts, and seeds to your liking.  The important points are hydration level, long fermentation with less yeast, and high heat baking in the cast iron dutch oven.  Forkish has some good videos explaining and demonstrating these steps.  Making this bread is easy and inexpensive and the joy you can bring to others by sharing a loaf is even better than the happiness of seeing your beautiful bread come out of your own oven.


Overnight White Bread
1000g all purpose flour
750g water around 90F
20g sea salt
1g instant yeast (less when the house is warmer)

2. mix the dry, add water, and mix until the dry clumps are gone cover and ferment 12 - 18 hours at room temp find a warm spot if the house is cold

2. mix the dry, add water, and mix until the dry clumps are gone
cover and ferment 12 - 18 hours at room temp
find a warm spot if the house is cold

4. next day, 15 hours later it's ready to divide in half and form into rounds

4. next day, 15 hours later it's ready to divide in half and form into rounds

6. after a couple of hours covered, it has doubled and is ready to bake

6. after a couple of hours covered, it has doubled and is ready to bake

1. ingredients and equipment the small scale is not necessary because the yeast amount can vary

1. ingredients and equipment
the small scale is not necessary because the yeast amount can vary

3. assistant: "ok, now you have time to play! where's da bird!"

3. assistant: "ok, now you have time to play! where's da bird!"

5. I'm baking one and refrigerating the other to use later in the week

5. I'm baking one and refrigerating the other to use later in the week

7. preheat cast iron dutch oven in 475F oven (use oven thermometer) bake the bread covered 30 min, then remove lid and bake 15 min longer cool completely on rack before eating

7. preheat cast iron dutch oven in 475F oven (use oven thermometer)
bake the bread covered 30 min, then remove lid and bake 15 min longer
cool completely on rack before eating

Miso making

Homemade miso

Homemade miso

Miso making on Valentine's Day - why not?  I can think of several reasons as to why it's a good idea to make your own miso at home:

1. Quality control - I used fresh homemade koji, organic soybeans, really good sea salt, and will be deciding the time and conditions of the fermentation.  Mass-produced miso doesn't even come close in flavor.  Making your own allows full control of the salt level and other variables to suit your palate.

2. It's far cheaper than buying miso, especially if you make the koji yourself.  But even if you're buying koji and the best organic beans and salt, you will still be saving.

3. Making miso is fun and rewarding because of the long fermentation time as well as how incredibly useful it is in the kitchen.  And it's pretty easy to do.

4. You can make your friends very happy by giving them some, or by cooking for them using your miso.  It's a great idea to make a big batch and plan on giving some away and aging what you don't use within one year.

5. Great for learning - making something yourself deepens your knowledge and sharpens your appreciation of it.  Using your own miso makes you a more mindful cook overall.

For anyone who might be interested, I'm providing the recipe and photos from my 2016 batch here.

One-Year Miso
2.4 kg dry organic soybeans (soak 24 hrs)
1.4 kg koji (fresh homemade)
646g sea salt (17% of the weight of dry beans & koji)
1/4 c seed miso (from my 2013 batch)
4 c bean cooking liquid
 

soybeans after 24 hr soak

soybeans after 24 hr soak

a talkative sous chef

a talkative sous chef

koji, salt, seed miso

koji, salt, seed miso

mashing beans with a 1 liter glass bottle (beans pressure steamed 45 min)

mashing beans with a 1 liter glass bottle (beans pressure steamed 45 min)

mix everything when beans are below 100F

mix everything when beans are below 100F

press down to get out air pockets, sprinkle salt on top

press down to get out air pockets, sprinkle salt on top

plastic wrap on miso, then 1cm kosher salt

plastic wrap on miso, then 1cm kosher salt

I will check the progress in about 5 - 6 months.  Usually it takes over a year to reach the flavor I'm looking for.  Some mold growth on top is not a problem (just scrape away) but it's good to be careful of bugs and other critters wanting a taste.  One memorable incident was when the miso was stored in a shed and a rat chewed through the plastic and ate through the salt layer and then a good amount of miso.  It was heart-rending to dump that year's batch, but lesson learned.

plastic wrap on top, taped, labeled

plastic wrap on top, taped, labeled


I had leftover koji and decided to try a sweet-style miso with azuki.  This has much less salt and much more koji.  It should be ready in about 2 months.

Azuki Sweet Miso
170g azuki (no soak, boiled 75 minutes)
340g koji (fresh homemade)
30.5g sea salt (6% of the weight of dry beans & koji)
1/2 c bean cooking liquid

azuki pre-rinse

azuki pre-rinse

mashing with a glass

mashing with a glass

I will probably check this in 4 - 6 weeks.  Next up is experimenting with black turtle bean miso and garbanzo miso.

salt and koji

salt and koji

luckily just fits a 1 liter mason jar

luckily just fits a 1 liter mason jar