How to make yuzu kosho

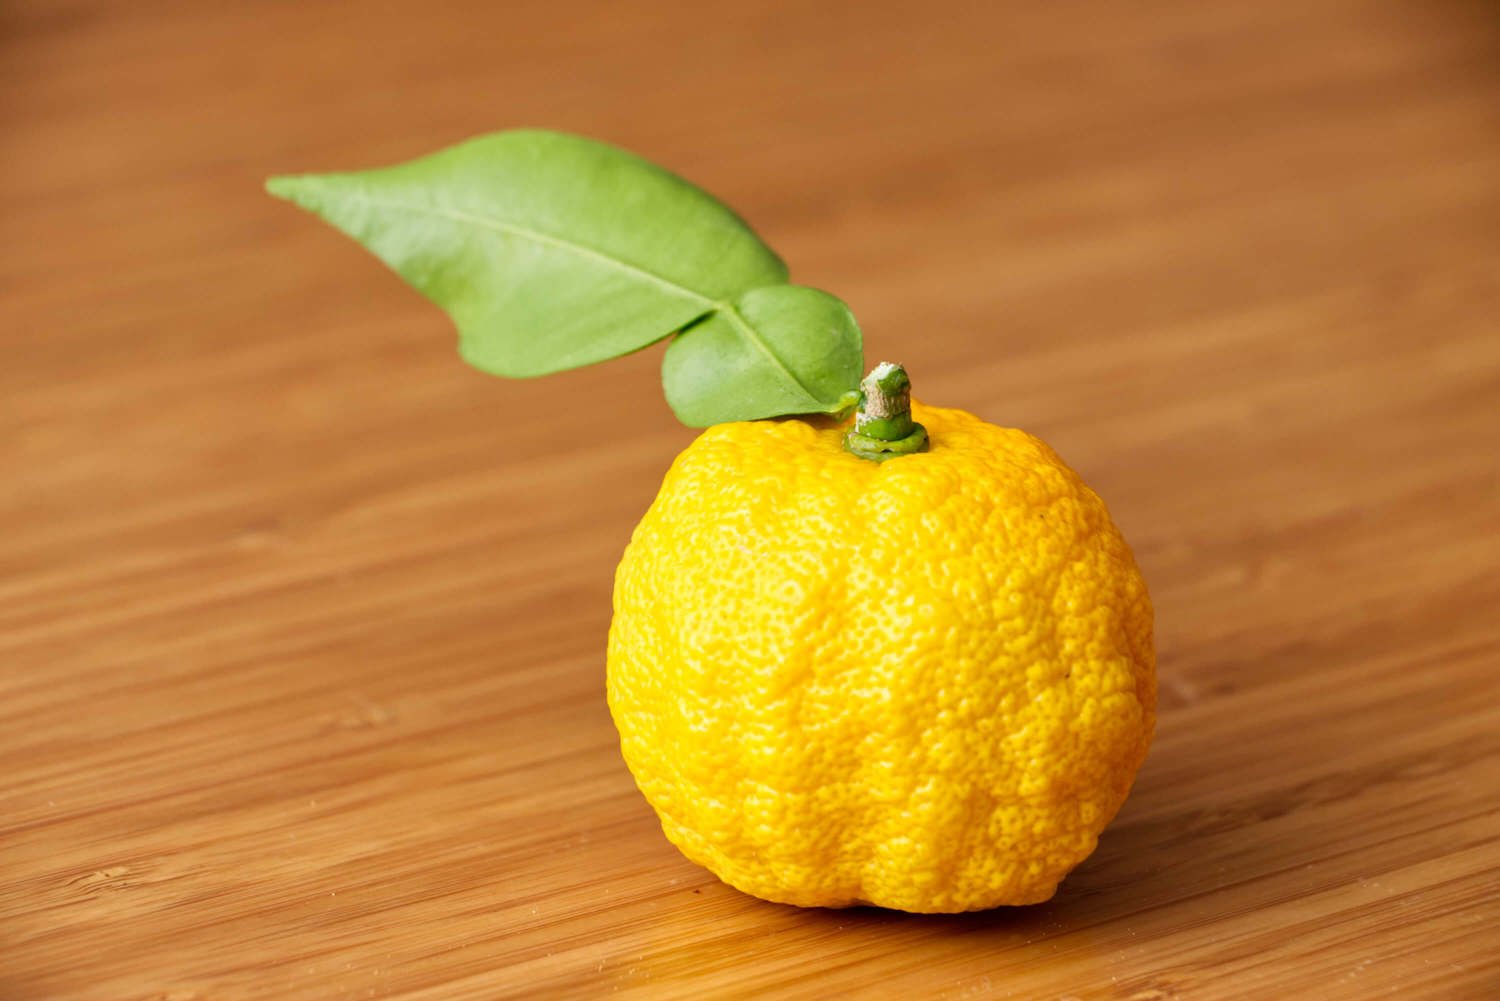
Is there a citrus fruit more amazingly intoxicating than yuzu? It’s my favorite by far, and I don’t think it’s only because I grew up with a huge yuzu tree in the back yard. I often see aroma descriptors that combine lemon, grapefruit, and orange but to me they don’t quite convey the magic of yuzu. Outside of Japan, they are hard to find, expensive, and typically not fresh and vibrant, so my solution was to grow it at home. After buying a small potted yuzu tree at the local nursery 3 years ago, it finally produced around 20 fruits this year. I can’t overstate how precious these yellow fruits were as they slowly grew from flower to pea-size to lime-size and finally turning yellow in late fall.

Yuzu peel is great on so many things like udon, soba, nabemono, pickles, salad, and pretty much anything. The juice mixed with equal parts shoyu makes a fantastic ponzu for dipping anything. I decided to make yuzu kosho to take full advantage of the fresh fruit by stretching it out with green chiles and preserving it with salt for longer storage. I found various recipe in books and online with a wide range of methods and ingredient ratios, but most only contain 3 ingredients. I decided to use equal parts yuzu peel and jalapeno with 10% salt by weight. This salt amount is on the lower side of the recipes I saw but I think it’s more than enough. I would use less salt if eating the yuzu kosho while fresh, but more salt if the goal was longer storage in the fridge.

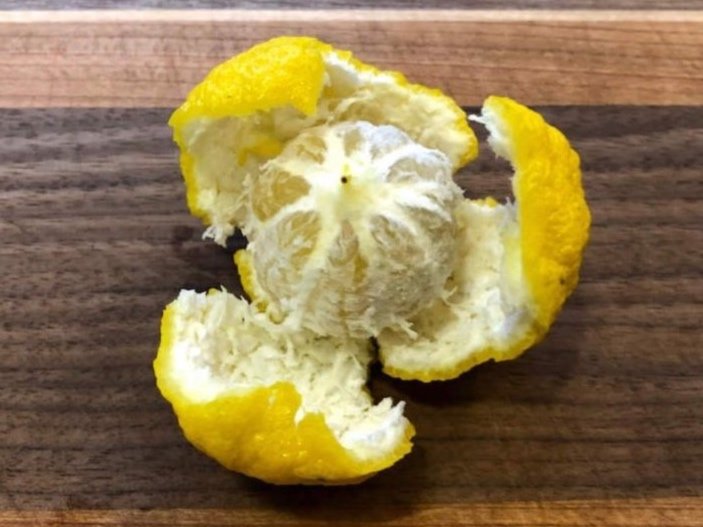
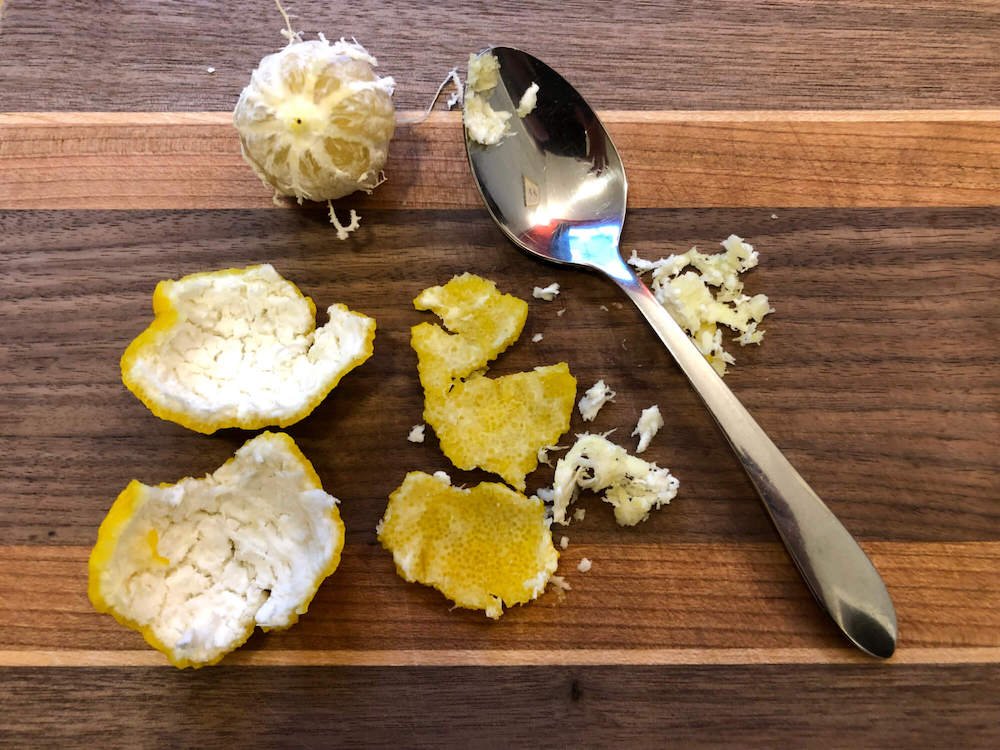
While many recipes use a food processor, I decided to make it in batches in my biggest mortar and pestle. For this method, it’s important to mince the yuzu peel and chiles as finely as possible. I learned about a great way to maximize the yield of yuzu peel without getting the white pith on this MIKLIA recipe where you peel it by hand and use a spoon to gently remove the pith. It works great and I will always process yuzu peel this way in the future.

This recipe turned out to be very delicious, but I would prefer a more pronounced chile flavor and heat. In late December I wasn’t able to find the variety of chiles that are available in summer and early fall so jalapeno was the only option I had. The had virtually no heat so my yuzu kosho was more mild than the typical versions in Japan where green or red togarashi chile are often used. I think a blend of chiles such as serrano, togarashi, habanada, habanero, and cayenne would add a lot of fruity and spicy character. Next year, I will try to work on the timing of my yuzu ripening with the availability of home-grown chiles. I am satisfied with this ratio of yuzu, chile, and salt.
Yuzu kosho is delicious when added to noodles, hotpot, sashimi, tofu, soup, tenpura, and many other foods. I added some to natto and it was spectacular. Of course you can purchase shelf-stable jars of yuzu kosho at an Asian grocer with the understanding that the home-made version is something completely different. If yuzu is unavailable, I think it’s worth trying the recipe with a blend of other citrus. I might try 3 meyer lemon, 1 grapefruit, and 1 navel orange (or blood orange) as a starting point. Or make them separately and blend after to find the ratio you enjoy. Have fun mixing your yuzu kosho into anything you like, although I would personally not put it into the bathtub.
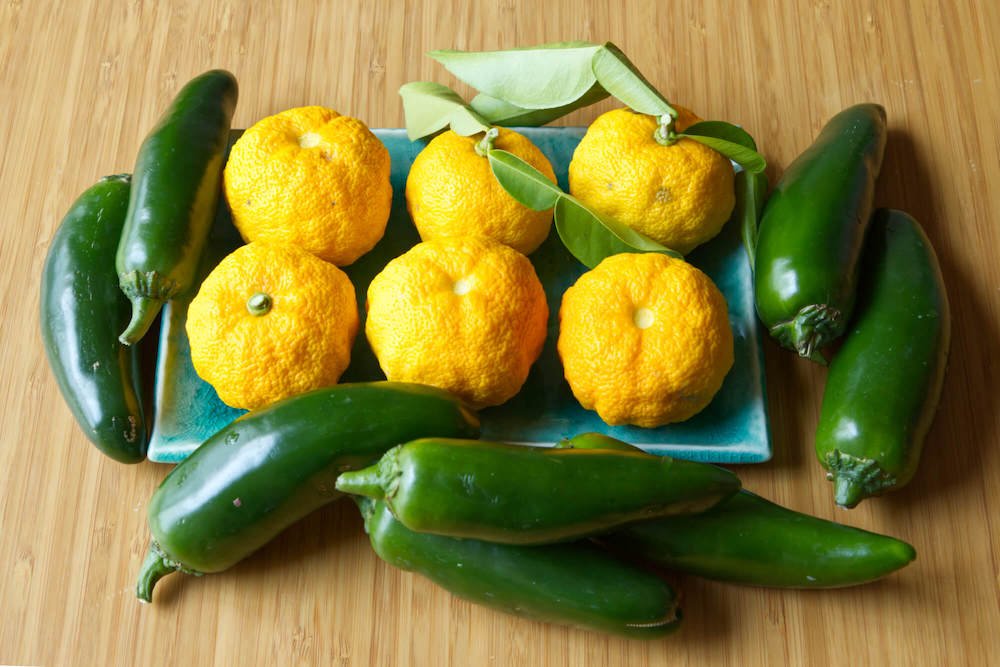

Yuzu Kosho
150g yuzu peel, fine mince (around 8 medium)
150g jalapeno, fine mince (around 6 large)
30g sea salt (10% of total weight of yuzu and jalapeno)

  1. Peel yuzu by hand and remove pith with a spoon, then mince finely.

  2. Remove seeds from jalapeno chiles and mince finely.

  3. Combine with salt and pound into a paste in mortar and pestle (in batches depending on amount).

  4. Store in fridge or freezer.

Japanese Knife Sharpening Tutorial Videos

4-part Japanese Knife Sharpening Tutorial

4-part Japanese Knife Sharpening Tutorial

I have been receiving requests to create how-to videos on Japanese knife sharpening. Previously, I would explain that there are already many online videos that cover this topic and therefore it was not necessary. Yet I became increasingly aware of the fact that there are actually very few knife sharpening tutorial videos which I felt comfortable fully recommending. Some of the best content is published by my sharpening teacher Jon Broida of Japanese Knife Imports, who has many excellent videos on his youtube channel. I encourage everyone to check them out. You can also learn more about Jon by reading my blog post about him.

Interview: Jon Broida of Japanese Knife Imports answers my 6 questions
https://www.eienhunterishikawa.com/blog/interview-jon-broida-knives

Japanese Knife Imports Sharpening Playlist
https://www.youtube.com/playlist?list=PLEBF55079F53216AB

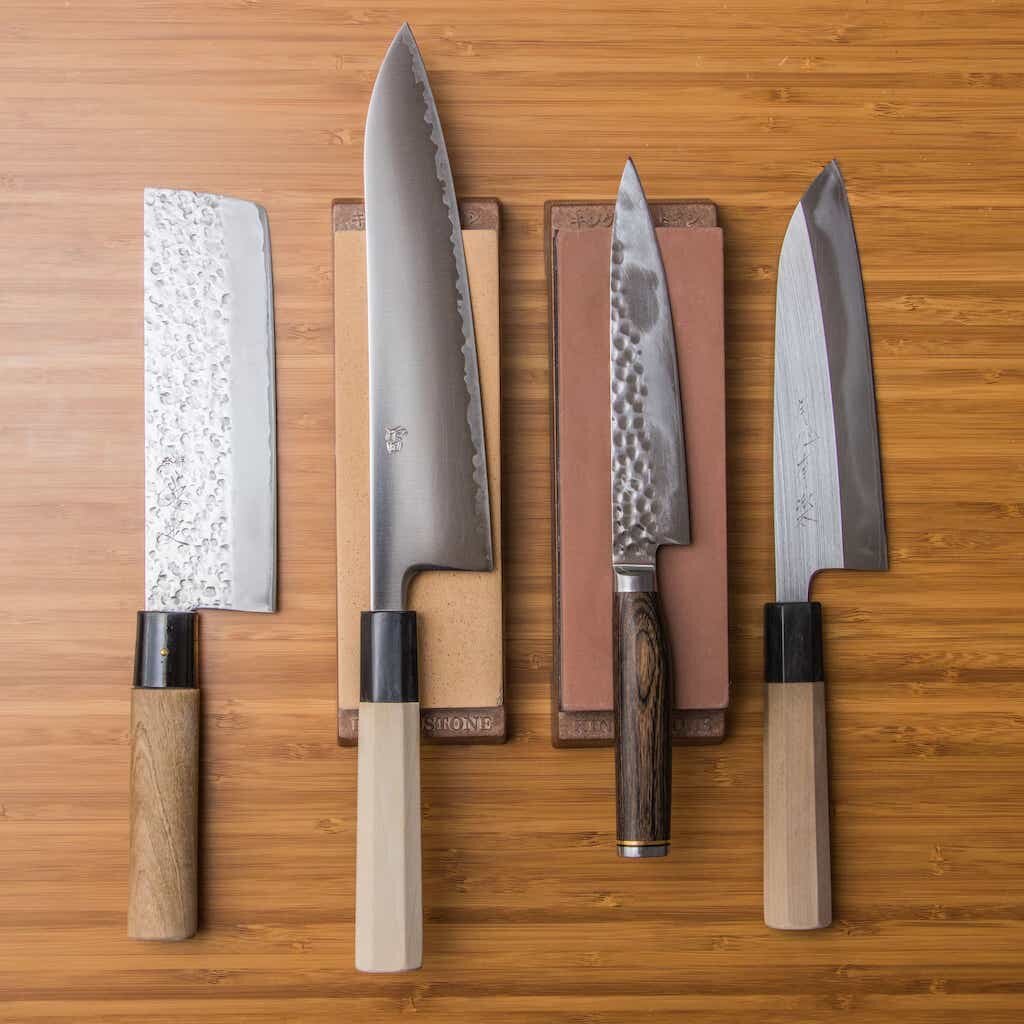
Japanese knives and sharpening stones

Japanese knives and sharpening stones

My 4-part tutorial covers every sharpening step from beginning to end - first on a cheap-junky knife and later on my high-quality gyuto. With just a few supplies, anyone should be able to get similar results by following my instructions and demonstrations. This method works for double-bevel Japanese and western knives, both stainless steel and carbon steel. Traditional single-bevel knives such as yanagiba and deba will require a different technique, and serrated bread knives and ceramic knives cannot be sharpened on whetstones. Practicing is important. Once your own knives are done, it’s a good idea to ask friends and family if they would like their knives sharpened. Many people worry about ruining their nice knives as they learn to sharpen, but if you start with good technique and mindfulness, it’s highly unlikely that any harm will be done. Thrift stores are also an option as they usually stock many cheap and dull knives (please be careful digging through bins of naked knives).

It is worth noting that this kind of video resource is just a starting point for learning about Japanese sharpening fundamentals. In order to establish good technique and understanding of concepts, we need to seek feedback from a good teacher and then incorporate those insights into our practice. Anyone who has taken my sharpening workshops will likely agree that our one-on-one interaction and Q&A as well as handing the knife back and forth for inspection is a crucial part of the learning process. I am available for private lessons and workshops - both online and in person - so please send me an email if you are interested in scheduling a session. Feel free to ask any questions or submit requests for future videos.

I have also made videos about Japanese knife types and sharpening supplies, which are included at the bottom of this page. If you are interested in supporting this kind of content, you can donate any amount using the button below. Thank you.

Donate to support my videos

Japanese Knives and How to Choose One https://youtu.be/oGohHtSOcjY Japanese Knife Sharpening Supplies https://youtu.be/hL8Nu5cXzjU Leave questions or comment...

How to Sharpen Japanese Knives - Part 1 https://youtu.be/LG8RCqTjP30 Japanese Knives and How to Choose One https://youtu.be/oGohHtSOcjY Japanese Knife Sharpe...

How to Sharpen Japanese Knives - Part 1 https://youtu.be/LG8RCqTjP30 How to Sharpen Japanese Knives - Part 2 https://youtu.be/F_Hfz9fvXwk Japanese Knives and...

How to Sharpen Japanese Knives - Part 1 https://youtu.be/LG8RCqTjP30 How to Sharpen Japanese Knives - Part 2 https://youtu.be/F_Hfz9fvXwk How to Sharpen Japa...

Find more information about knives on my blog: https://www.eienhunterishikawa.com/blog/interview-jon-broida-knives

More information on my blog about knives and sharpening: https://www.eienhunterishikawa.com/blog/interview-jon-broida-knives

Playing with Vinegar: Making, Infusing, and Recipe Ideas

Lavender vinegar

Lavender vinegar

I have been having fun experimenting with vinegar over the past several weeks. As a home fermenter of beer, cider, mead, wine, and sake, acetobacter (acetic acid bacteria that makes vinegar) is something I’m careful not to expose to these yeast fermentations. In the presence of oxygen, this hardy bacteria converts ethanol into acetic acid, which has its own distinct characteristics different than acids found in yogurt (lactic), lemon (citric), and green apples (malic), and wine (tartric, citric, malic). It’s an interesting exercise to search for words that accurately describe the differences between these acids as they are usually broadly categorized as sour, or tart. Even at low concentrations, vinegar’s acidity is often felt at the back of the throat and reminds me of how highly carbonated drinks can feel prickly as you swallow. It can be made from a variety of base ingredients and is included in a huge range of condiments we use everyday including pickles, mayonnaise, vinaigrette, ketchup, mustard, hot sauce, chutney, barbecue sauce, relish, and so on. Vinegar has the great ability to lift and brighten any food by balancing fat, richness, sweetness, or blandness with acidity. Below are some ways I have been playing with vinegar.

Making Vinegar
I had the opportunity to watch a live online vinegar-making presentation by Pascal Baudar where he demonstrated his simple process. Behind him was an impressively packed shelf which held bottles of vinegars and other colorful things he was making, and I felt inspired to try creating my own. The typical advice is to start with a beer or wine and make sure the ABV (alcohol by volume) is in the 4% - 8% range. Most beer is fine as is, but wine and sake will need to be diluted down by adding water. I had some unpasteurized apple cider vinegar in the pantry so I added about 20% raw vinegar to 80% homemade hard cider (around 6% ABV) in a mason jar and covered with a layer of paper towel secured with a rubber band. After three weeks at room temperature, the vinegar tasted great and I bottled it. That vinegar developed a pellicle, or mother, so I cut it in half and started other vinegars with it. Currently I have a porter vinegar, ESB vinegar, and rose wine vinegar fermenting in the kitchen. Because the paper lid is breathable, there is a vinegar aroma that is noticeable during fermentation. I don’t mind it, but others might want to find a spot away from daily activity.

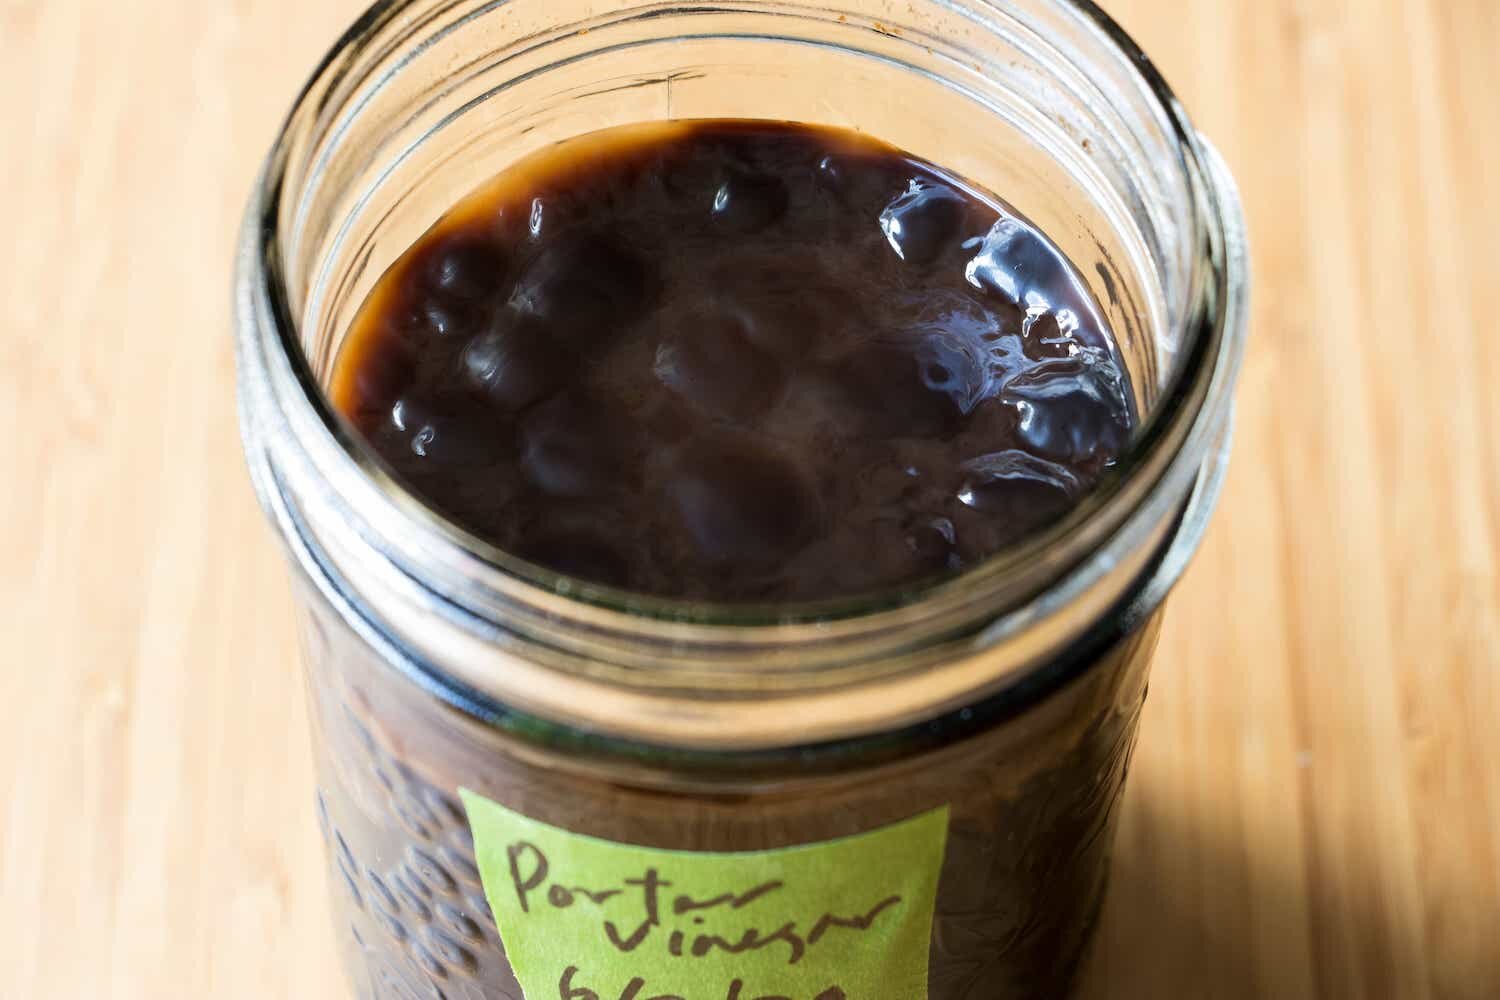
Making vinegar with homemade porter and store bought rose wine

Making vinegar with homemade porter and store bought rose wine

Great mother on my porter vinegar

Great mother on my porter vinegar

Very mild and versatile vinegar for infusing

Very mild and versatile vinegar for infusing

Infusing Vinegar
I recently bought a great book called Vinegar Revival by Harry Rosenblum. There is a lot of useful information in it, especially the section on infused vinegars. I already had a gallon of rice vinegar at home so it was as simple as adding ingredients to some vinegar and letting it steep for different lengths of time. The dashi vinegar was particularly eye opening.

2 cups vinegar
1 oz shredded konbu
1/2 cup packed katsuobushi

Simmer the vinegar and konbu for 3 minutes, remove from heat, add katsuobushi and let stand for 2 minutes. Strain and bottle.

This vinegar was unexpectedly delicious and I have found many uses for it. Some other infusions I have made are rhubarb and strawberry, lavender, and earl grey tea. They all have slightly different methods and they result in very aromatic and interesting vinegars. I ordered a 12 pack of clear 12 oz bottles online and they are exactly the right size for my one-pint experiments.

Strawberry Rhubarb, Cider, Dashi, and Earl Grey vinegars

Strawberry Rhubarb, Cider, Dashi, and Earl Grey vinegars

Very aromatic lavender vinegar

Very aromatic lavender vinegar

Vinegar infused with strawberry and rhubarb

Vinegar infused with strawberry and rhubarb

Vinegar Revival book

Vinegar Revival book

Strawberry-rhubarb shrub

Strawberry-rhubarb shrub

Shrub and Drinking Vinegar
One of the easiest and tastiest ways to enjoy a variety of vibrant vinegars is to make a quick soda. I have settled on a 1 - 1 ratio of vinegar with honey or agave nectar. It helps to whisk them together before adding soda water because these ingredients don’t automatically combine. It’s worth experimenting with the ratios and other flavors to find your preferred versions.

1 1/2 tablespoon strawberry-rhubarb vinegar
1 1/2 tablespoon honey (or agave nectar)
1 can chilled soda water (12 oz)

Whisk together vinegar and honey in a bowl and pour into a pint glass. Add some soda water and mix, and then add the rest. Add a 2 - 3 ice cubes. Garnish optional.

Many people have heard that drinking vinegar is good for our health, and that’s great, but this drink is actually very refreshing and satisfying. The key is to use some interesting vinegar because the flavor carries through very well after mixing. It would be interesting to try some other types of honey too. Earl grey and buckwheat honey sounds like a good shrub for autumn after an afternoon of raking leaves and such, paired with apple or pumpkin pie.

Finally, one use of vinegar left me underwhelmed - su natto (vinegar natto). This is a recent health fad in Japan where it's said to benefit people on a diet. I tried it for the first time by mixing 50g natto with 1 tsp rice vinegar and a bit of shoyu. This was more than enough vinegar for my taste although many online Japanese recipes call for more. I can't say I'm a fan of this combo because the acidity covers up the desirable natto flavors of nutty richness and dark chocolate. The vinegar converts the nebaneba stringiness into foam, which looks interesting but definitely weakens the stickiness. If you try it, let me know if you liked it.

Vinegar natto

Vinegar natto

A Simple Recipe for Cauliflower Vinegar Pickles

Vinegar-pickled cauliflower, carrot, and celery

Vinegar-pickled cauliflower, carrot, and celery

Vinegar-pickled vegetables are easy to make and I always have some in my fridge along with jars of fermented vegetables. In contrast to fermented pickles where the acidity is produced by lactobacillus fermentation, vinegar pickles - often called ‘quick pickles’ - are made simply by covering the vegetables with a vinegar brine and stored in the fridge. There are many recipe variations out there but it’s good to start with one recipe as a baseline and adjust the ingredient ratios to please your own taste. Here I decided to use cauliflower because I recently tasted a good version at Aloha Beer Co in Honolulu (I usually make vinegar pickles with red onions or cucumbers). Tart pickles make a great accompaniment to any foods that will benefit from a sharp counterpoint. There are many classic examples of such pairings out there: capers on pizza, dill pickles on burgers, sauerkraut on hot dogs, pickled daikon on bahn mi, rice and egg with kimchi. Condiments like ketchup, mustard, relish, yogurt, lemon juice, and hot sauce all serve the same purpose of accenting and complementing the main elements.

Pickled red onion

Pickled red onion

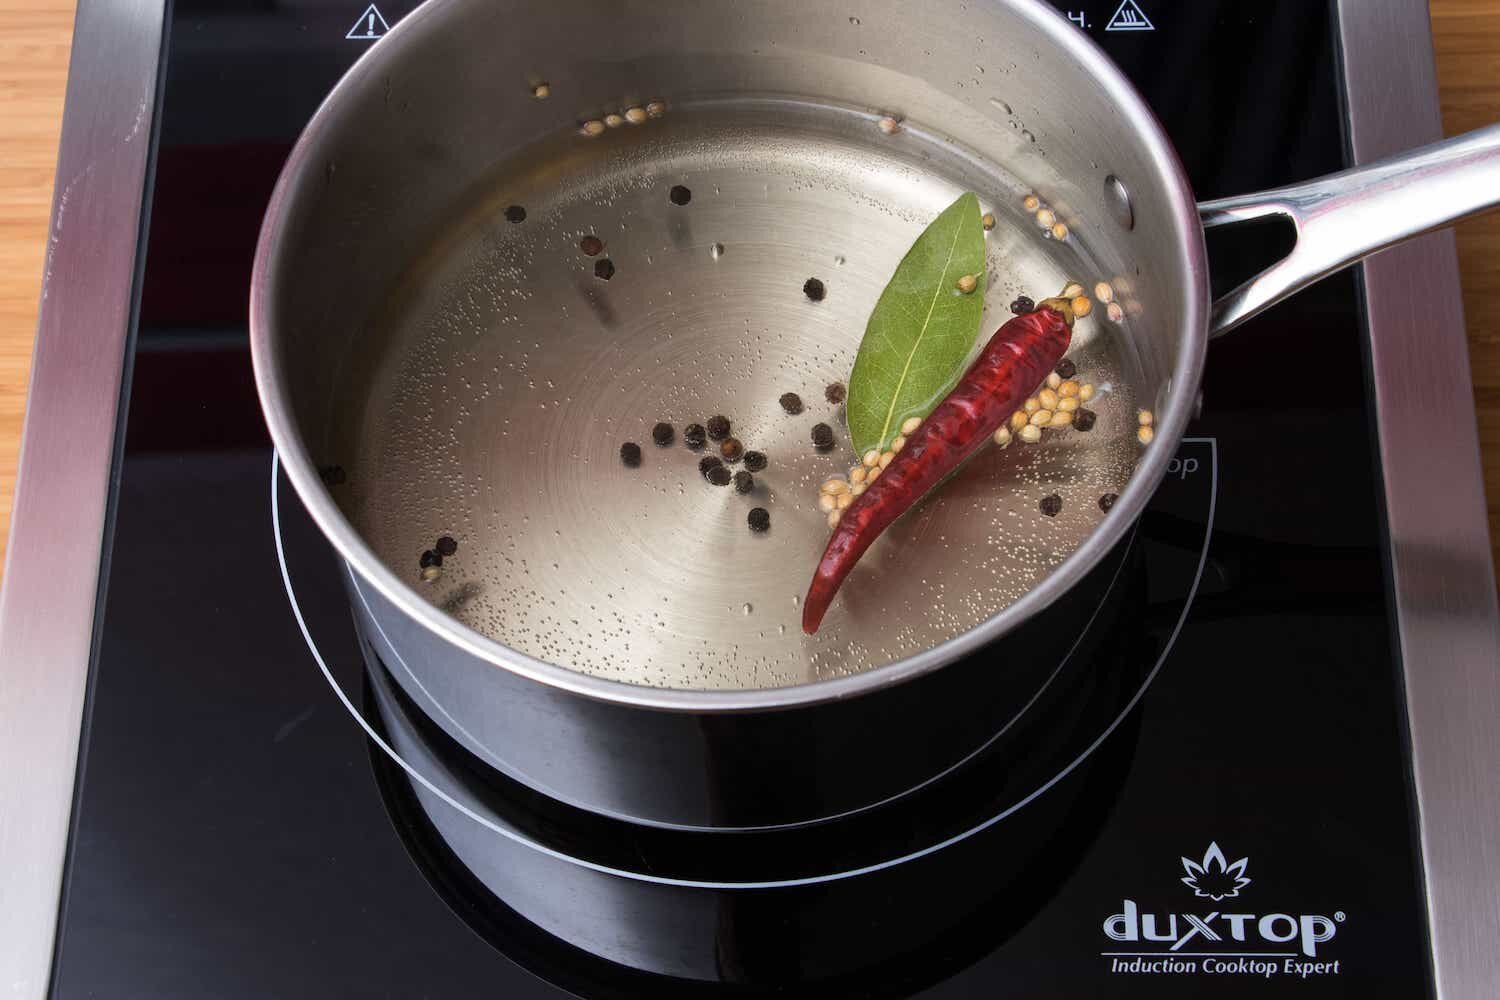
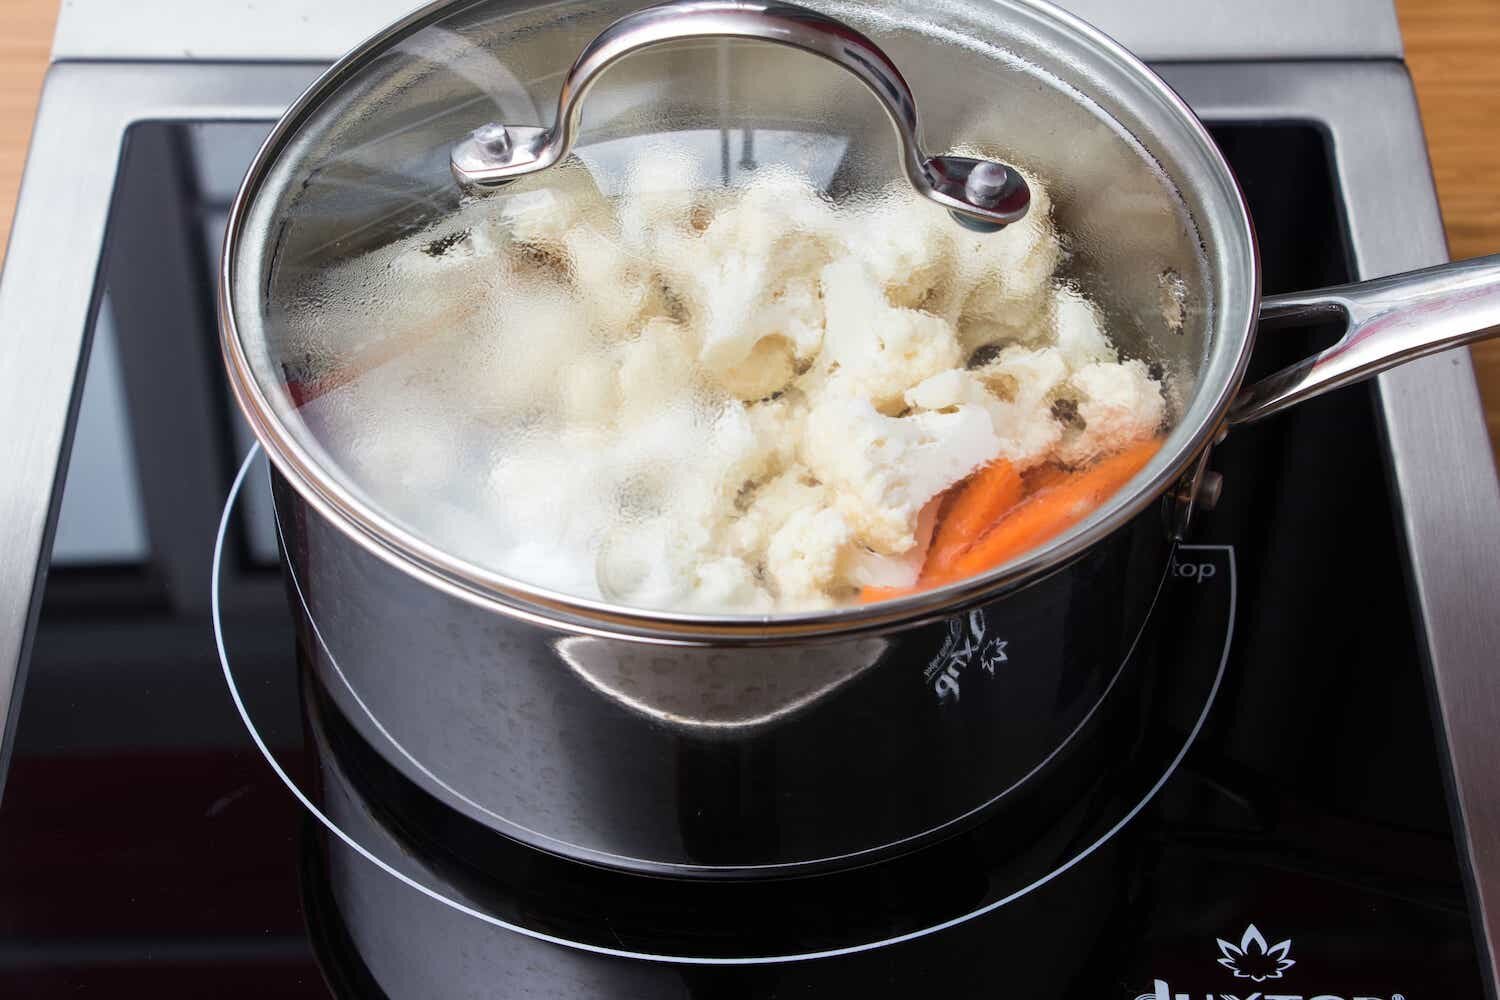
This basic method calls you to heat the brine ingredients (vinegar, water, salt, sugar, spices) until everything is dissolved. The vinegar-water ratio is flexible depending on the preferred acidity. I usually make a 1-1 brine with rice vinegar, but here I made it slightly less tart because of the relatively subtle flavor of cauliflower. Other vinegars like apple cider or distilled can be used as long as you are aware of the varying acidity levels found in different vinegars. The salt and sugar amounts will also make a difference so you can change the amounts depending on how sweet and salty you like these pickles. The seasonings are completely interchangeable. I almost always try a different blend of spices each time, and it always tastes good. These pickles involve very little time and monetary investment so it’s easy to experiment with any ideas you come up with. One optional step is to blanch the vegetable before adding the brine. I usually don’t precook the vegetables but several recipe sources for cauliflower pickles instructed a quick blanch. Instead of doing this separately, I decided to toss it in the pan with the brine and let simmer for 1 minute. I’m not sure if this step was necessary - you can decide for yourself if you think it’s worth doing. You can eat this pickle immediately, or place it in the fridge after cooling where it will keep for many months without a problem. This recipe fits a 1 quart Mason jar easily.


Cauliflower Vinegar Pickle
250g cauliflower florets (about 1/2 of a large head)
1 carrot, in sticks
1 stalk celery, in sticks
1 cup water
3/4 cup rice vinegar
1 tablespoon salt
1 tablespoon sugar
2 garlic cloves
1 dried cayenne
bay leaf
black pepper
coriander seed

All ingredients prepped

All ingredients prepped

Vinegar, water, salt, sugar, spices - simmer and stir until dissolved

Vinegar, water, salt, sugar, spices - simmer and stir until dissolved

Add cauliflower, carrot, celery - cover and simmer 1 minute

Add cauliflower, carrot, celery - cover and simmer 1 minute

Pack everything into a 1 quart Mason or Ball jar, let cool, cover, and refrigerate

Pack everything into a 1 quart Mason or Ball jar, let cool, cover, and refrigerate

All dry ingredients on a board

All dry ingredients on a board

How to Make Miso Butterfish at Home

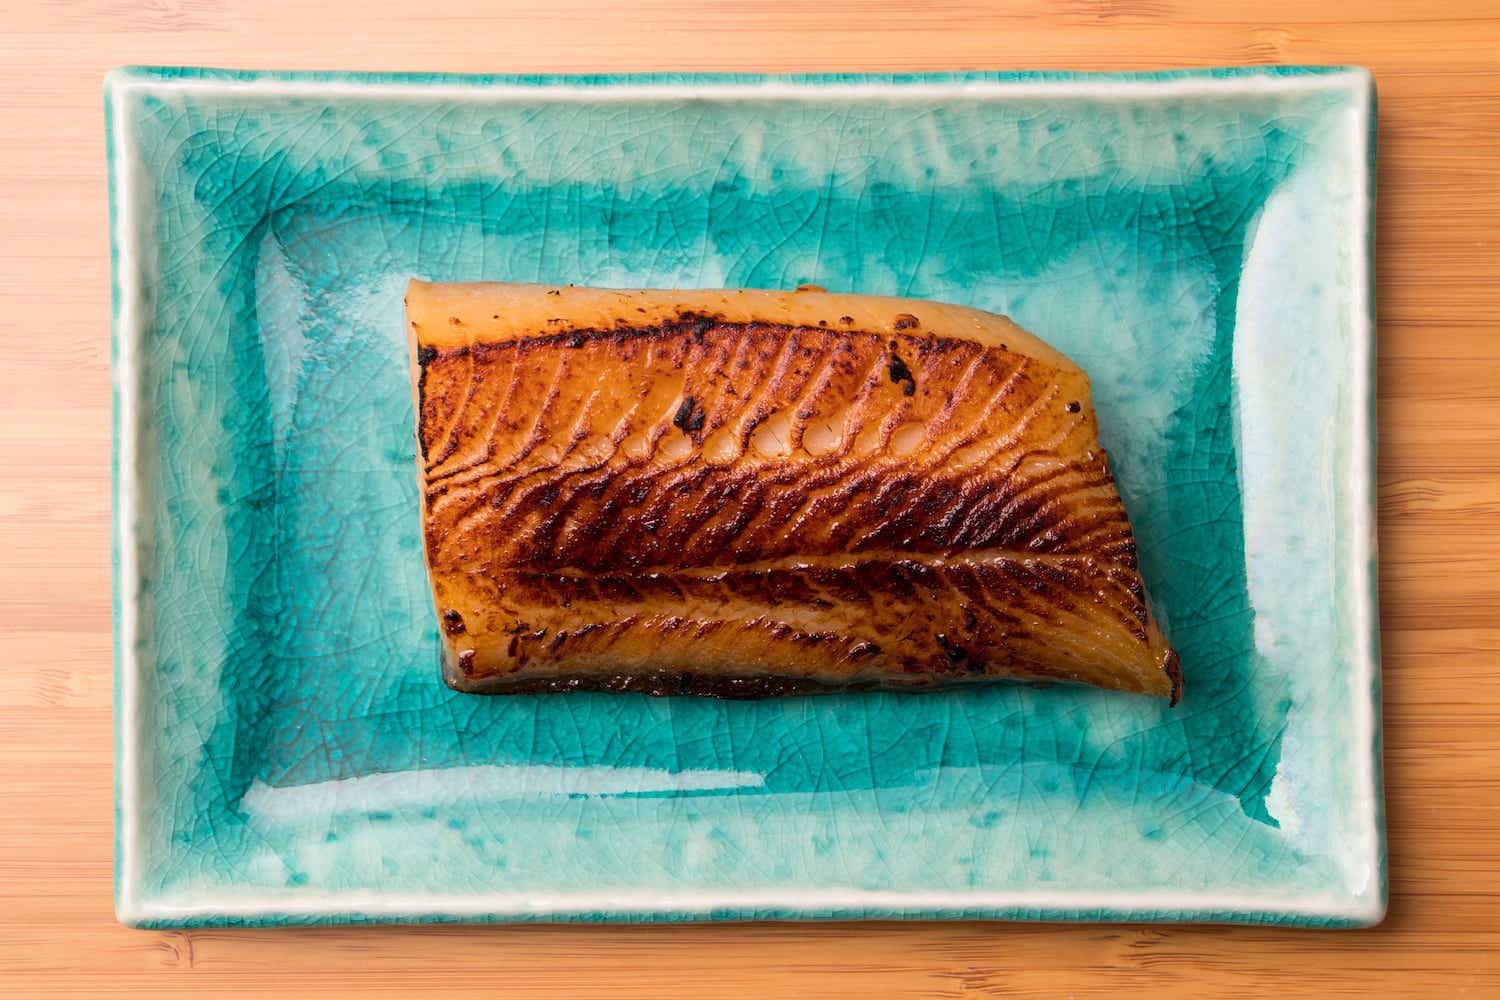
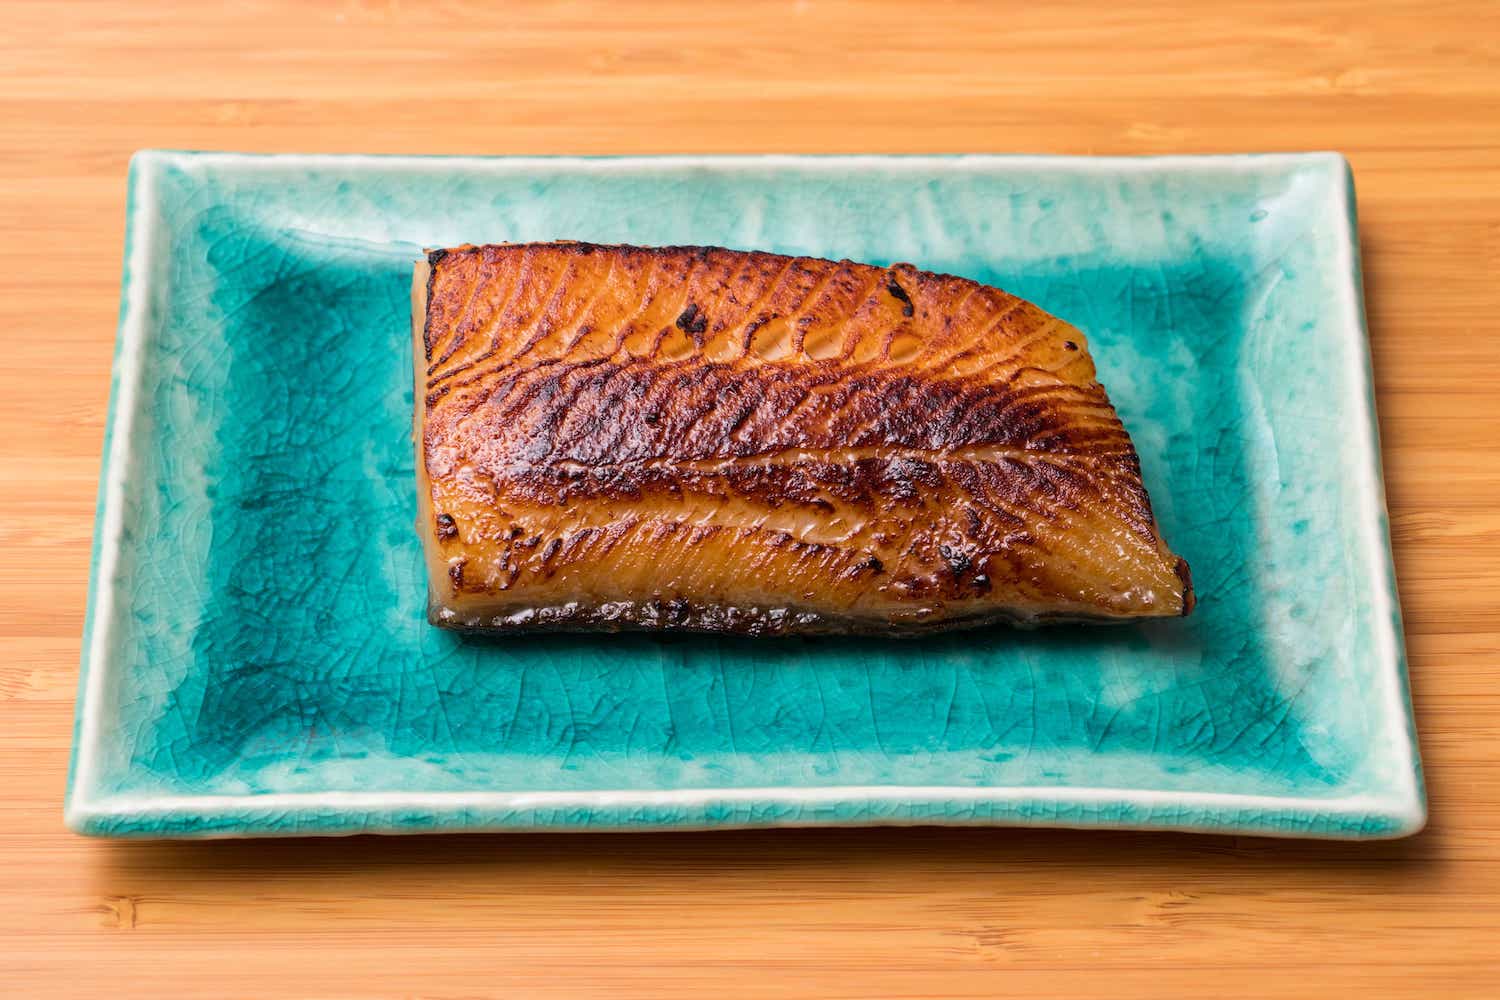
Delicious miso butterfish

Delicious miso butterfish

Miso butterfish is simple to make and incredibly delicious. It really hits many of our buttons: rich texture, fermented umami flavor, caramelization, sweetness, and salt. Most people credit the chef Nobu Matsuhisa for popularizing this recipe which contains only five ingredients. My version is messily penciled on a small piece of paper and I don’t recall where I found this ratio or exactly when I wrote it down (it was a long time ago). You can find the Nobu version with a quick online search too, and I would encourage experimentation with the balance of the four marinade ingredients in order to find the ratio that tastes best to you. I often change the amounts or even leave out ingredients or steps, and it still tastes very good. 

Butterfish is also known as sablefish and black cod, and in Japan, gindara. It has very high oil content, which makes it a great pairing with sweet-salty miso and the umami of sake. Because of the fattiness, butterfish is quite forgiving compared to other fish so the danger of overcooking is not as imminent. This recipe can work well with other oily fish like sockeye salmon and albacore tuna. It can be made with fillets or steaks, as long as the fish is fresh and of high quality. You can easily scale this recipe up or down depending on how much fish you have.

Miso Butterfish
1/4 cup sake
1/4 cup mirin
1/4 cup white miso
3 tablespoons white sugar
1 or 2 butterfish fillets or steaks

  1. In a small pan, heat the sake and mirin, and boil for 20-30 seconds to burn off the alcohol.

  2. Remove from the heat and whisk in the sugar, followed by the miso.

  3. Chill the marinade, and add it to the fish in a container or ziplock bag.

  4. Marinate in the fridge for 2 - 4 days.

  5. Wipe off (don’t rinse) the marinade and cook. Grilling or broiling is best, but you can also brown it in a pan (nonstick or cast iron to avoid sticking to the pan). Sometimes I will cook it sous vide at 115F for 40 minutes, then brown it with a torch.

Keep in mind that the marinade is full of sugars and proteins so the fish can brown and burn quickly. The best way to be consistent is to monitor the internal temperature with an instant-read kitchen thermometer. My preference is 115 - 130F internal temperature, but some people might prefer to go higher for firmer texture or food safety concerns. Most sources cite 145F as the absolutely safe internal temperature for fish. To go lower, it’s recommended to freeze the fish for one week to kill any potential parasites. It’s always good to do your own research across multiple sources so that you can make informed decisions on topics like these.

Miso butterfish ingredients: miso, butterfish, sugar, mirin, sake

Miso butterfish ingredients: miso, butterfish, sugar, mirin, sake

Boil sake and mirin to vaporize the alcohol

Boil sake and mirin to vaporize the alcohol

Turn off heat and add miso and sugar

Turn off heat and add miso and sugar

Cool the marinade and place in a ziplock bag with the butterfish, then place in fridge for 2 - 4 days

Cool the marinade and place in a ziplock bag with the butterfish, then place in fridge for 2 - 4 days

Grill, broil, pan fry, or sous vide

Grill, broil, pan fry, or sous vide