How to Make Onigirazu - A Step by Step Pictorial

Willamette Valley rose with onigirazu (nori, brown rice, canned sardines, grilled zucchini and peppers, lettuce, shiso, and shoyu-balsamic vinaigrette). There are no rules.

Willamette Valley rose with onigirazu (nori, brown rice, canned sardines, grilled zucchini and peppers, lettuce, shiso, and shoyu-balsamic vinaigrette). There are no rules.

Onigirazu is a fairly new food preparation which has been getting more popular in Japan over the last few years. Apparently, the idea first appeared in a comic book series 30 years ago, but it seems to be a newer trend among home cooks. I learned about it recently through an online article on the website of the Japanese supermarket Uwajimaya. The Japanese word onigirazu (おにぎらず) means ‘to not grip, or unsqueezed,’ referring to its main difference from the traditional rice ball called onigiri (おにぎり). Onigiri is a popular snack food where a flavorful ingredient (such as umeboshi, salted salmon, spicy cod roe, shiso, pickles, etc.) is placed into the center of the rice ball before squeezing into a triangle with wetted and salted hands. Wrapping nori around the onigiri is optional. Another similar preparation is makizushi (巻き寿司), which is rolled sushi made with seasoned sushi rice. To me, makizushi requires the most technical skill to build, along with the added step of having to make seasoned rice.

I was excited to discover the onigirazu concept because the format encourages improvisation. You can think of it as a sandwich but with the satisfying flavor and texture of rice. Because the nori contains everything like a burrito, the onigirazu can be stuffed with ingredients that might fall out of a sandwich, and the higher filling-to-rice ratio differentiates it from onigiri and makizushi. As I learn to make better onigirazu, it’s clear that there are still techniques waiting to be discovered for improving upon this basic method. In terms of ingredients, anything goes. Here, I had some leftover grilled vegetables and sausage to which I added some fresh cucumber, tomato, and herbs from the garden. It’s good to think about how sandwiches are made - adding condiments to the bread is typical - in order to make sure the rice is seasoned properly. Whereas bread has salt in it, rice does not and therefore needs seasoning. The onigiri has its exterior salted, but it makes more sense to season the inside of the onigirazu. Finally, every online recipe instructs us to wrap it tightly in plastic wrap for a couple of minutes so that the nori can adhere better. This works, but I’m skeptical that it is the single best method. More experimentation is needed to find alternative ways.


Making Onigirazu

IMG_4404 copy.jpg

The filling is prepped while the rice is cooking. Grilled vegetables (corn, sweet onion, zucchini, yellow pepper) and sausage, cucumber, and cherry tomato. I find it easier to eat if the ingredients are cut into smaller pieces.

IMG_4405 copy.jpg

One sheet of nori is placed on a piece of plastic wrap. The nori’s shiny side is facing down.

Hot rice is placed in a square shape. It helps to press down so that the shape is maintained for later steps.

IMG_4407 copy.jpg

It’s important to season the rice with salt (or furikake) and…

…sauce made with homemade mayonnaise, homemade miso, and shichimi. Anything can be used, and a good source of inspiration might be to ask yourself, “what do I like on sandwiches, burgers, hotdogs, tacos, onigiri, makizushi, or anything else resembling such foods?”

IMG_4409 copy.jpg

Begin stacking with the flatter filling items. I like to think about contrasting sweet, salty, rich, and acid. Grilled corn (sweet) and tomatoes (sweet, acid).

IMG_4410 copy.jpg

The richer ingredients of sausage and zucchini are added.

IMG_4411 copy.jpg

Finally, freshness is provided by the shredded shiso and other herbs and greens.,

IMG_4412 copy.jpg

Carefully mound more hot rice on top.

IMG_4413 copy.jpg

Bring in the opposing corners of nori and press lightly, holding for a moment for the nori to adhere to the rice.

IMG_4414 copy.jpg

Repeat with the other two opposing corners of nori. It takes some practice to fold it neatly like a wrapped present.

IMG_4416 copy.jpg

Tightly envelop with the plastic wrap, and then press down firmly. Let this sit for about one minute. This is the step that could use some rethinking.

IMG_4419 copy.jpg

Unwrap and use a sharp knife to cut into triangles because science has proven that triangles actually taste better than rectangles. Here, I poured my own Centennial IPA (using homegrown hops from 2017) in my Heater Allen glass. Located in McMinnville, Oregon, Heater Allen makes some of the very best lagers in the country.

How to improvise with nabe (Japanese hot pot)

delicious nabe ready to eat

delicious nabe ready to eat

One of the most comforting things to make when the weather turns cold is nabe ryouri (Japanese hotpot cooking). I think of nabe as the opposite and equally satisfying seasonal meal of cold somen in the middle of the summer's heat. In Japan, the common cooking method involves heating broth or water in a clay pot (called donabe) over a portable stove at the table. It wasn't until a few years ago that my fairly narrow concept of nabe was liberated by the book Japanese Hot Pots (Ono & Salat). While the traditional method is lots of fun, we don't necessarily need the special equipment in order to experience delicious nabe cooking. Learning how to improvise is just a matter of understanding the key points, and our reward is freedom to try whatever we want to.

Here are my guidelines:

1. The cooking vessel – a donabe is great, but any large pot or pan works just fine. I use an enameled cast iron pan, which has the advantage of retaining heat after it comes off the stove. A lid is needed.

2. The liquid – homemade dashi is what I use most, but any fish, vegetable, poultry, or meat stock will work. Even using granulated instant dashi or concentrated broth in jars (such as Better Than Bouillon brand) will make good nabe. The main thing to watch is the salt level, knowing that you can always add more later.

3. The ingredients – this is where we want an open and adventurous perspective. Vegetables, fish, tofu, meat, noodles, and anything else in the fridge can be considered. Some things require more time to cook: for example, I will place daikon on the bottom and start cooking before adding fresh greens like shungiku (chrysanthemum leaf) or delicate things like cod fillets. When everything is added to a dry pan before pouring the liquid in, your beautiful arrangement will stay intact during cooking.

4. The shime – meaning to "tie up," the shime is how nabe dining is concluded, with a starch such as rice, noodles, or mochi. After all of the ingredients have been simmered, the delicious broth is most valuable and a neutral flavor vehicle is used to enjoy the broth and make sure we are satisfied. I don't see any good reason to exclude other starches like bread, crackers, potato, pasta, flat breads, beans, or other whole grains.

As an example, here is how I typically do nabe.

ingredients for classic dashi

ingredients for classic dashi

First I soak some konbu in 4 cups of cold water (for better flavor extraction and fuller bodied broth) for 30 minutes to several hours depending on my schedule. Then I will shave the katsuobushi while the konbu water heats on the stove. As it comes to a boil, the konbu comes out and the katsuobushi goes in. I let it steep for 10-20 minutes off heat and then strain. To this dashi, I add 1/3 cup usukuchi shoyu and 1/3 cup mirin. These flavorings can be switched out with miso, salt, fish sauce, kimchi, spices, or anything to get the salt level into the appropriate range. 

ingredients in the pan before adding liquid

ingredients in the pan before adding liquid

Next, I start cutting and arranging ingredients into the dry pan. Here, I have daikon and dry harusame scattered on the bottom. In the middle is medium firm tofu cut into 2 - 3cm blocks, which is another excellent flavor vehicle when simmered in broth. Around the tofu are enoki and shimeji mushrooms (the more mushroom varieties, the better), hakusai, negi, gobo fish cake, and shungiku. Cutting diagonally helps increase surface area, allowing for better flavor transfer. Because the quality of these ingredients is directly related to how the broth tastes, I tend to be flexible, letting freshness and integrity dictate what goes in rather than what might be 'proper.' In my example, I have several areas covered: oniony negi, meaty mushroom, fish cake richness, and added dimension from roots and greens. The noodles and tofu soak up flavor and provide contrasting texture.

hanging out by the heat vent until the kotatsu is turned on

hanging out by the heat vent until the kotatsu is turned on

Once the ingredients are all arranged, I pour the liquid in, cover, and place over high heat. As it starts to bubble, lower the heat and let boil gently until the hardest ingredient is soft enough for your liking (in this case daikon). Then, simply place the whole pot in the center of the table with spoons and chopsticks nearby. The common way to finish is to boil pre-cooked rice in the broth, helping it to break down a bit and absorb flavor. But I usually just combine the rice and broth in a bowl and enjoy. Try both ways to see if the extra step is worth it.

Nabe is really fun, especially when we allow ourselves the freedom to improvise. Keeping in mind these few guidelines not only helps avoid failures, but also provides a structure in which we can exercises our individual creativity. A very experienced performer and teacher once told me that "improvisation is problem solving." That concept took a while for me to understand, but like many things stated simply, I think it makes a lot of sense. For nabe, the 'problems' could involve what's in the fridge, the limitation of the pan size, what kind of shime to use, the dietary preferences or restrictions of the eaters, and so on. Improvising on the solutions is the fun part, and you get a comfort food that is perfect for winter. I think of pizza as another fun theme to improvise on, but that will have to be covered in a future entry.

Japan trip Part 3 - food and scenery


This third and final Japan trip recap is about the food and scenery from my recent visit. Eating delicious things is always a major part of my trips there and this time was no exception. The first stop was the famous Omoide Yokocho area in Shinjuku where old, narrow alleys are filled with the smell of yakitori stands grilling meat and vegetables over hot coals.

Here is a fancy sashimi platter at a Kawagoe izakaya that specializes in seafood. A friend mentioned that the beer must be watered down in places like these because they go down too easily.

A friend gave me this Niigata made Echigo IPA to try and it was very good. This is one of the most striking beer cans I've ever seen.

Kawagoe has one of Japan's earliest pioneering craft breweries called Coedo. Adjacent to their cafe-like taproom is a good sushi restaurant where you can order their beer from next door. The session IPA was a great match with the kaisen donburi. Because Kawagoe is known for it sweet potates, Coedo also makes a sweet potato ale that has a beautiful red color and medium-low fruity aroma. The potato flavor is very subtle and I'm not sure I could pick it out in a blind test.

In Nagatoro, you can take the ride in traditional riverboats through the peaceful waters surrounded by spectacular scenery. I didn't go on this trip but the time I did many years ago is still a vivid memory.

In the part 2 entry, I described the local kabuki presentation in Chichibu. In addition to the great theater and music, the food was some of the best on my entire trip. This little plate of soba looks a very simple, but it was made right there with fresh local sobako (buckwheat flour) and the flavor was magnificent. This tray also looks fairly ordinary, but the konnyaku and miso sauce were handmade by a man running a food booth who was happy to answer all of my questions about his process and ingredients. It was unlike any konnyaku I've had – far more flavor than the usual ones. The karaage was also incredibly delicious and paired perfectly with the local sake, which fully expressed Chichibu's pristine water.

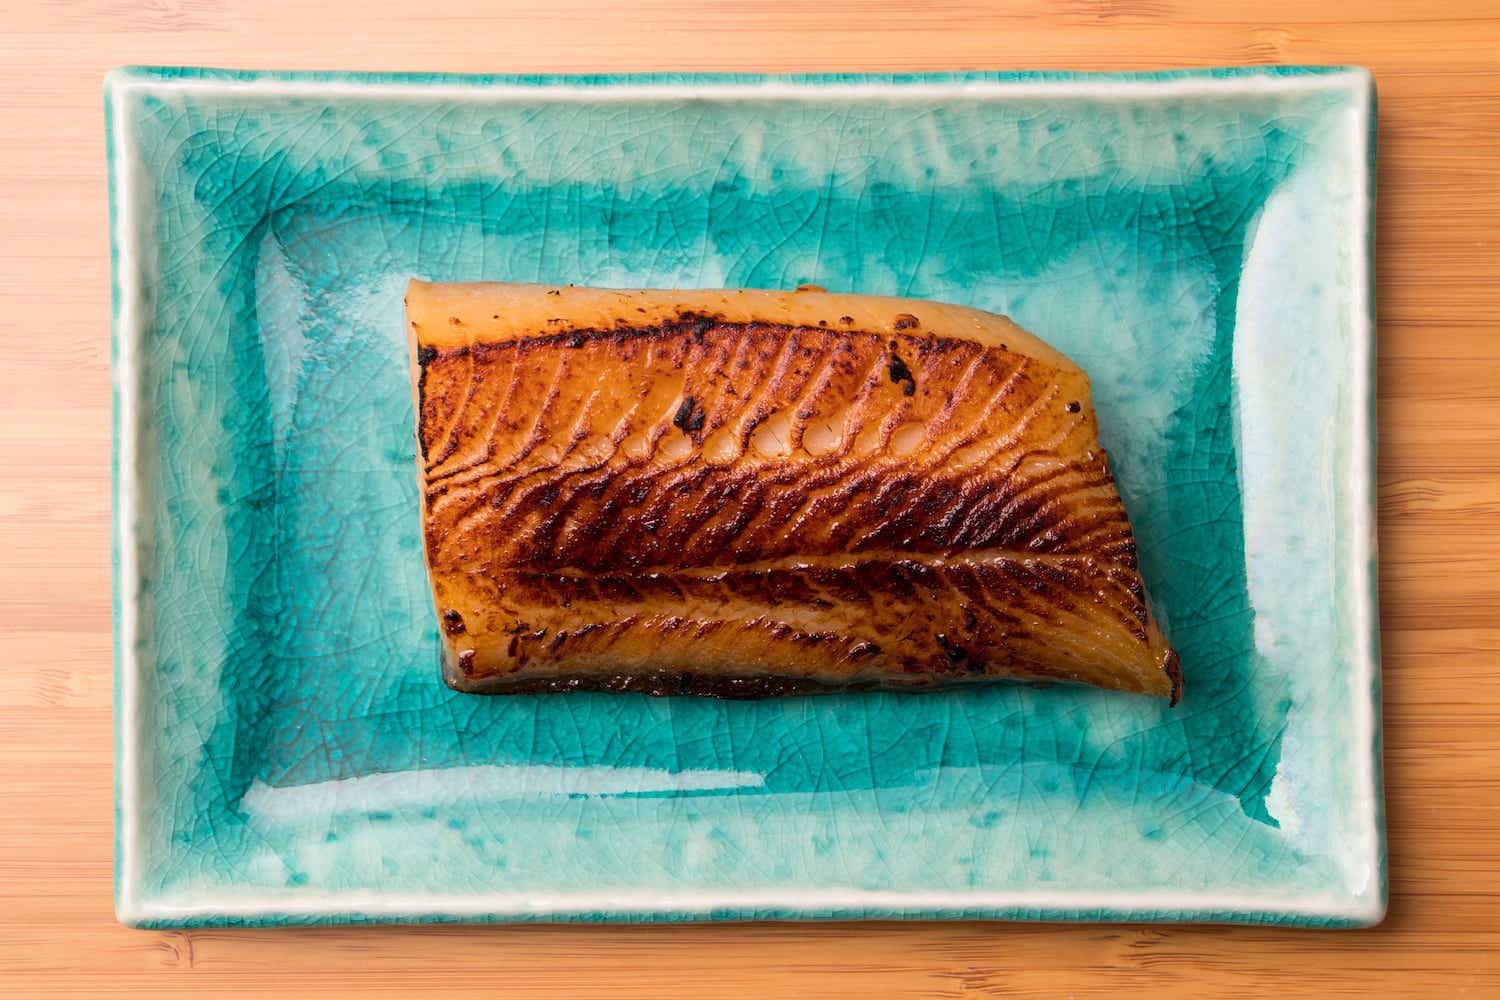
Nikko is a popular destination, and I passed through just as the fall colors were ending. The sulfur smell of the natural hot springs was pleasant in the cool, quiet air. Nearby was a roadside stop with food windows, and an unusual fish name caught my eye: おしょろこま (oshorokoma). The man grilling them on the fire explained that it was a kind of iwana (char) from Hokkaido and the name came from the Ainu language. The flavor was very good – mild, fresh, and slightly sweet.

I received this Nagano-made beer from someone who had just visited that area. It was a well made kolsch-style ale, but the unusual feature was the explanation that water from Suwa Onsen (hot spring) was used to brew it. The interesting can illustration shows local attractions such as Suwa Lake, the local shrine and castle, and even the famous Onbashira Kiotoshi festival where people get on top of enormous logs and slide down a steep hill.

Another activity I mentioned in part 2 was the kabuki performance at the national theater in Tokyo. During one of the intermissions, I enjoyed a traditional makunouchi bento. This feast for the eyes was like a continuation of the beautiful staging and costumes of the play, and it was also delicious.

At the Bettara Ichi Festival in Tokyo's Nihonbashi, the featured food is bettara zuke, which is whole daikon pickled in koji. Between the Wakayama Shachu performances (described in Part 1), I walked around the dozens of vendors and tried almost all of the pickles available with the intention of buying some to take home. However, they seemed to all contain sugar and were too sweet for my taste. Perhaps I wanted to cut the lingering sweetness from all the pickle samples because I ended up at a shichimi booth and picked up a custom mixed bag. There were all kinds of festival-style foods available: dango, colorful chocolate covered bananas, and many others.

Not surprisingly, I couldn't get enough shin soba (fresh-flour soba). This double decker with tempura in Nagatoro was exquisite.

Yet another Japanese craft beer that was given to me which I had never heard of, tasted good, and came in an interesting can design.

Kamameshi is one of those nostalgic dishes for me, and unfortunately restaurants specializing in them seem to be disappearing. Happily there was a small restaurant in Asakusa away from the busy touristy area specializing in this cuisine. This mushroom kamameshi was delicious and satisfying. I also had my first-ever taste of hirezake there, which is charred fugu fin dropped in warm sake. It's not something I would look to order again.

More shin soba in Katashina with the people who make the Swiss horns from bent cedar that I described in Part 2. Local beer was ordinary but the soba was incredible.

This cat was napping under an ice cream window. It drew me in and I considered getting a cone until the person working there gave a disinterested look that was rather uninviting. Too bad, because the combination of a cute kitty and a friendly server would have been impossible to resist.