Audio Recording Part 2: A More In-Depth Talk with Isaku Kageyama

Recording gear Part 2.jpg

This is Part 2 of my conversation series with Isaku Kageyama about audio recording gear and how to use it effectively in your home studio. In Part 1 we covered some basic information to get started, and you can find it here:

https://www.eienhunterishikawa.com/blog/isaku-home-studio-recording-gear

This time, we go further in depth and address some topics which had been requested over the past few weeks. Thank you to everyone who provided feedback and engaged with us through email and social media. I’m also very appreciative of Isaku’s willingness to sit down with me and spend so much time sharing his knowledge and experiences. Largely due to his help, I have been able to substantially improve my own audio recordings and gain a deeper understanding of important concepts and terminology over the past two months.

Isaku and I talked for quite a long time and I have split the audio into four downloadable parts. We readily admit that the sound quality of Part 1 was subpar, especially considering our conversation topic (the unfortunate result of a built-in recorder of a video call software with a name that does not start with z and rhymes with gripe). The Part 2 audio is much, much better.

If you would like to see a Part 3 in the future, please let us know. Feel free to send in topic requests or any questions you would like answered.

Links for the topics we discuss:

Isaku’s taiko mic comparison video
http://isakukageyama.com/best-mic-for-taiko-drums/

UnitOne virtual concert
https://youtu.be/uL2Fdsx_nO0

Isaku’s youtube channel - Garageband Basics, Fue EQ, Parallel Compression, Mixing, and More
https://www.youtube.com/c/IsakuKageyama/videos

Isaku’s directed study program
http://isakukageyama.com/directed-study-program-learn-taiko-music-production-and-more/


1. Taiko microphone test, audio samples, UnitOne concert audio

2. Tempo changes, mixing, midi keyboard and drum pads, recording fue, reverb, room importance

3. Potential income from recording, livestream concerts, click tracks, simplifying our playing

4. Isaku’s directed study online lessons, importance of feedback for effective learning


image-asset.jpeg

Isaku Kageyama is a taiko artist, well versed both in live performance and in the studio. His resume includes performances at venues such as Carnegie Hall and Lincoln Center, networks such as NBC, VH1 and BET, tours with the Japan Foundation, and residencies with The Pew Center for Arts and Heritage. He’s also an overall nice guy. :D:D:D

On stage and in the classroom, Isaku brings a breadth of experience performing and teaching both traditional and contemporary styles. A versatile collaborator in the studio, Isaku contributes to projects by bringing his extensive knowledge of composing, recording, and mixing to the table. When none of that is needed, his job is to make sure there is cold water in the fridge for everyone.

Isaku currently works as an instructor at Los Angeles Taiko Institute, performs with Asano Taiko US UnitOne, and records for virtual reality creators Rhythm of the Universe, and video game composers Materia Collective.

Formerly a principal drummer of Amanojaku, he holds a Bachelor of Music from the Berklee College of Music and a Master of Arts in Teaching from Longy School of Music of Bard College.

He is also a two-time National Odaiko Champion, becoming the youngest person to win highest honors at the Mt. Fuji Odaiko Contest in 2000, and Hokkaido in 2003.

From 2011-2014, Isaku was the resident instructor at Wellesley University and the University of Connecticut, and has held clinics at Berklee College of Music, Brown University, Rochester Institute of Technology, North American Taiko Conference, East Coast Taiko Conference, and Intercollegiate Taiko Invitationals.
A Discussion with Isaku Kageyama about Home Studio Recording Gear

Recording gear copy.jpg

Last week I had a great time talking with Isaku Kageyama about recording gear for home studios. Isaku has a lot of experience as a performing musician, instructor, composer, and producer. He is one of my go-to resources for information about recording music. You can learn more about his interesting background by checking out the interview we recorded previously.

Interview: Isaku Kageyama talks taiko, music school, and teaching

This conversation covers the basic needs for starting out with home recording. I am grateful for Isaku’s willingness to spend time answering my questions and providing very valuable advice based on his years of experience in the music industry. This is how we normally talk while hanging out and exchanging ideas about our work and life. Whether you are a complete beginner or have some experience with modern recording gear and methods, I think there is a lot of valuable information offered here.

I have separated the conversation into six broad topics. The audio files below are downloadable. We are planning a part 2 of this topic where we talk more in-depth about recording. If you have any questions or topics for us to address in a future discussion, please let us know.

Send a question or topic for Part 2


1. Audio Interface

2. Microphones

3. Headphones & Monitor Speakers

4. Digital Audio Workstation (DAW)

5. Accessories

6. Used Gear, Mic Placement, & Bachi Selection


image-asset.jpeg

Isaku Kageyama is an eclectic music composer and producer. His music has been broadcast in countries such as the United States, UK, Italy, South Korea, and Norway. Isaku is the co-founder of Los Angeles-based music production company Audio Music Productions. His knowledge of composition, production, and Japanese music have led to a resume that includes brands such as BET, VH1, NBC, Microsoft, and the world’s largest taiko manufacturer Asano Taiko. In 2015, Isaku was commissioned by Asano Taiko US to compose a piece for the professional taiko ensemble UnitOne. The composition premiered at North American Taiko Conference, the largest taiko event in the US. As a producer, Isaku’s resume includes projects such as Microsoft video game Phoenix Force, O2O Theatre in Greece, and Kuma Outdoor Gear in Japan. He is currently the rehearsal director of Bataré, a production that combines taiko with progressive metal. He holds a holds a degree in Contemporary Writing and Production with a minor in Writing for TV and New Media from Berklee College of Music, as well as a Master of Arts from Longy School of Music of Bard College.

Isaku’s website
http://isakukageyama.com

Isaku’s youtube
https://www.youtube.com/c/IsakuKageyama/featured

Shimedaiko Rope Types and How to Choose One

Shimedaiko rope used for testing

Shimedaiko rope used for testing

This guide is for anyone looking for information about shimedaiko rope. I prefer using the traditional rope-tightened style of shimedaiko over the bolted kind for several reasons:

  1. They sound better to my ears.

  2. They look better to my eyes.

  3. They feel better to my arms when I carry them.

  4. They are kinder on my stands, floors, limbs, and any surface that comes in contact with the drum.

  5. They are still the only type used by professionals in many traditional arts such as kagura, noh, kabuki, and Edo Bayashi.

Obviously, the bolt-style drums are legitimate and have many fans, mainly due to the ease of tightening and loosening the drum quickly and evenly. To tighten properly, both drum styles require lots of practice and careful attention to detail to get the best sound and longevity of the instruments. I believe that rope shimedaiko can be more fun, rewarding, and beneficial to your growth as a player once you gain the knowledge and develop the skills required to care for it correctly. This blog entry is only about rope types, so send me an email if you are interested in learning more about the advantages of the wooden mallet tightening technique described here:

https://www.eienhunterishikawa.com/blog/my-favorite-shimedaiko-tightening-met

Kuremona (9mm)

Kuremona (9mm)

Vintage 3 strand (10mm)

Vintage 3 strand (10mm)

When I started my research about rope options for shimedaiko, I was surprised at how little information I could find online. There is a huge variety of rope types out there and this overabundance of choice is confusing when you are trying to compare materials, pricing, diameter, color, stretch, and the ability to hold knots. Hopefully this guide will help you narrow down the sea of choices and focus your own quest for the best rope. A special thanks to Chris Huynh for helping with my research.

The two most important characteristics for shimedaiko rope performance are: not stretching and not slipping. The rope needs to hold knots during tightening, and then hold the tension after the drum is tightened. With these requirements in mind, here are the ropes I eliminated from my list of acceptable materials:

Nylon - too stretchy, too slippery
Cotton - too weak, too stretchy
Sisal - too hard, brittle, and rough
Kevlar - no good options available
Dyneema - too slippery
Spectra - too slippery
Hempex & Unmanilla/Promanilla - these are said to stretch and slip, but I haven’t tried it
Any braided rope - too smooth, and therefore too slippery

Below are the ropes that work, with pros and cons for each. They are all 3-strand twist because of their ability to hold knots better. Some of these ropes can tend to unravel, so I would recommend always keeping a tight twist for better durability and limiting the stretchiness. The first two are natural ropes - the texture is rougher so it’s a good idea to use gloves when working with them. The other synthetic ropes are generally easier on the hands.

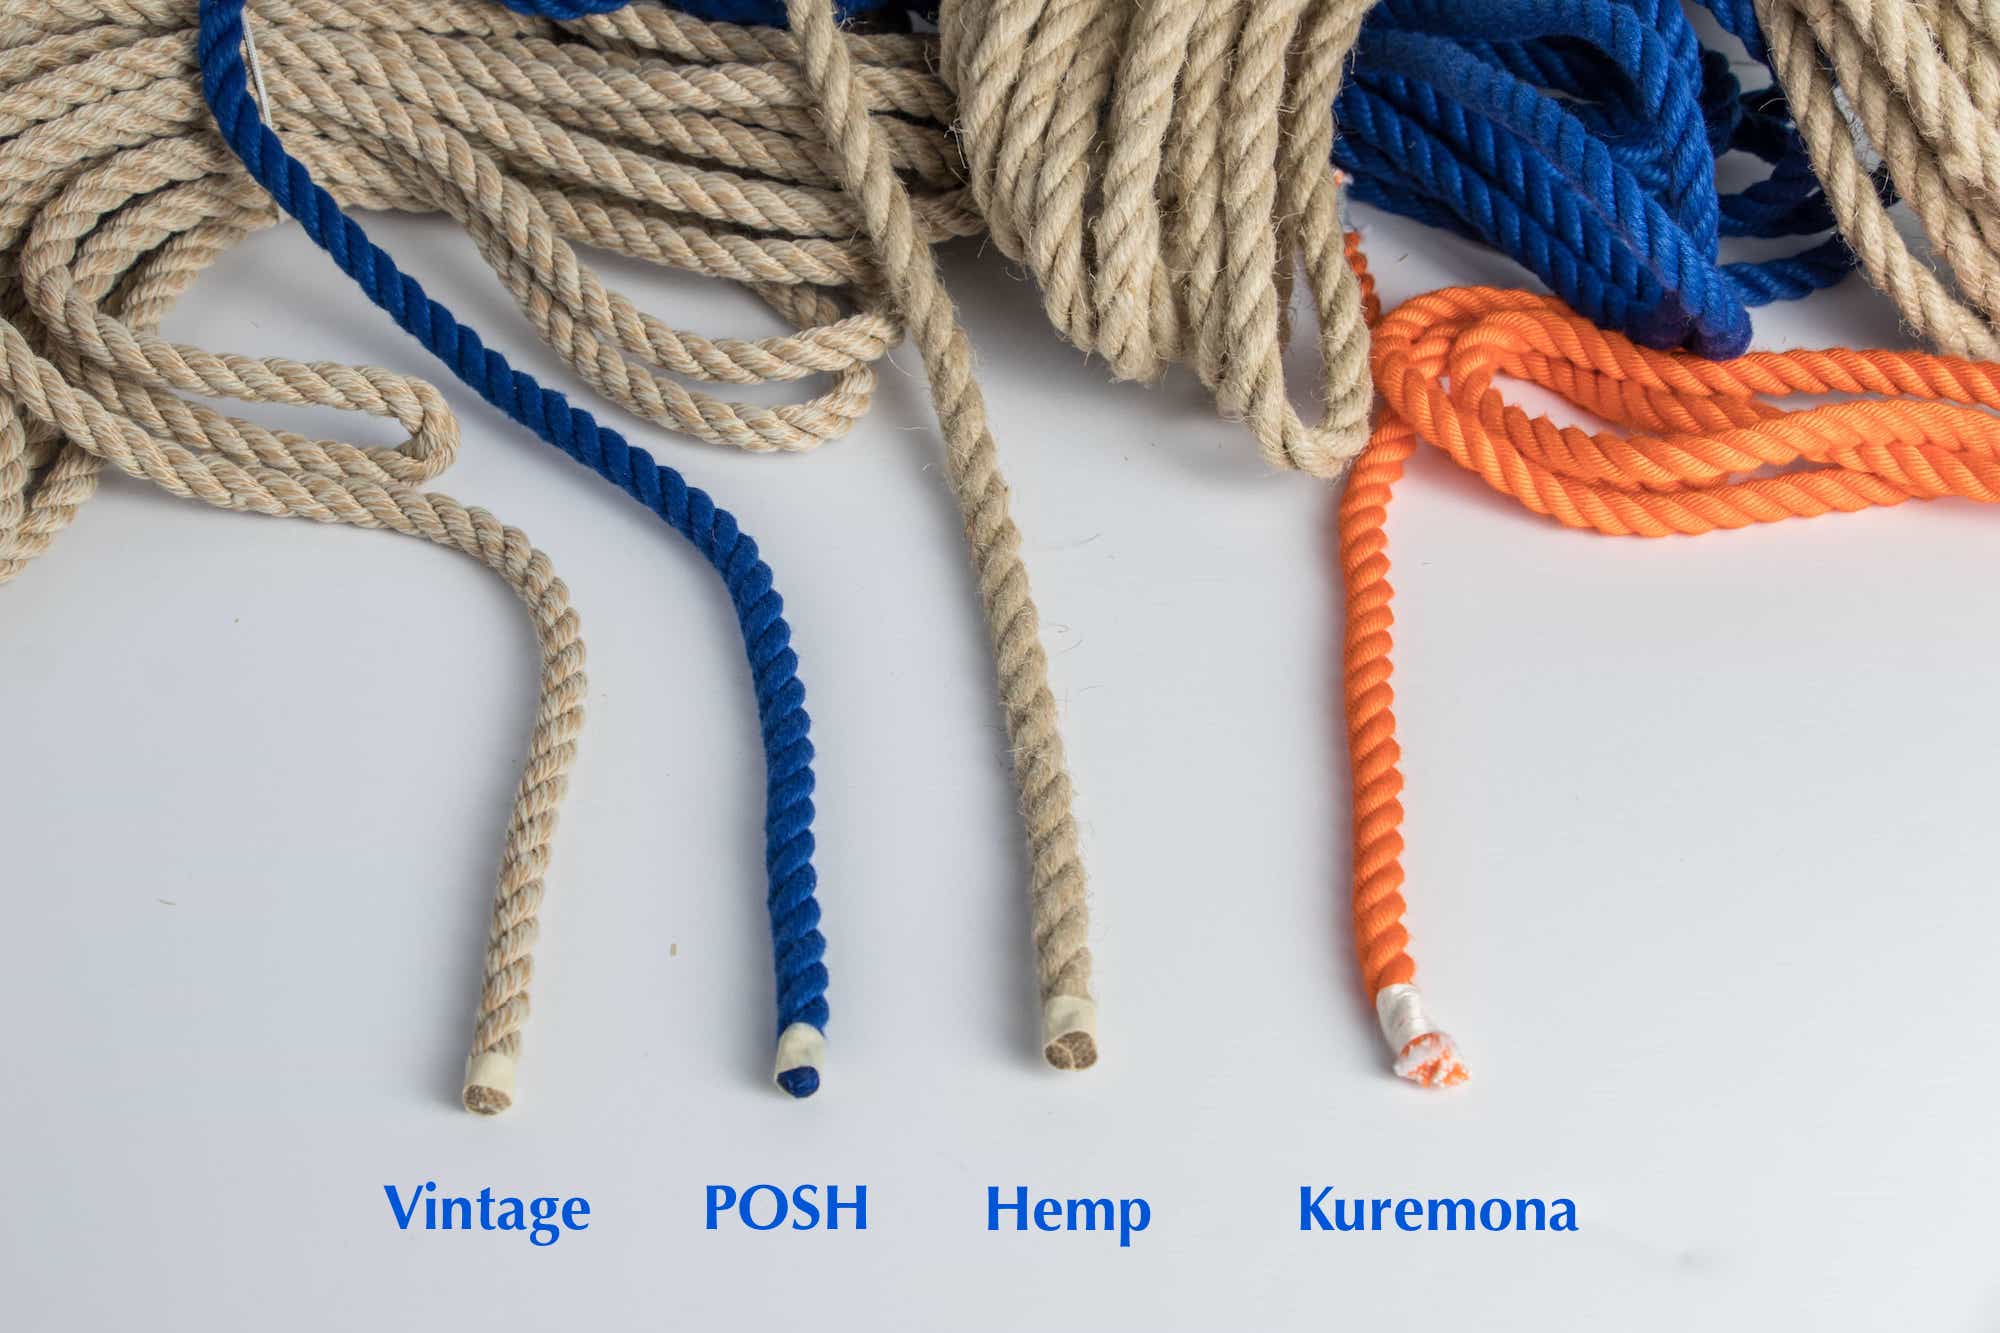
  1. Hemp - the traditional rope, best for not stretching and holding knots. The main disadvantages: the rope is rough on your hands, they ‘shed’ material on the floor, your clothes, and into the air. Depending on the supplier, some hemp rope (like the one I bought, even after days of sun exposure and spraying with vinegar solution) smells so bad that I don’t want to handle it. Although I haven’t personally used them yet, the hemp rope sold at Miyamoto Unosuke Shoten and Asano Taiko are of high quality and don’t seem to have any offensive smell. They also seem to only carry the natural rope, with no dyed-color options. Asa is the Japanese word for hemp. I have been told that hemp shrinks over time, so that’s something to keep in mind.

  2. Manila - a very inexpensive and easy-to-find alternative to hemp, it performs very well by holding knots and not stretching. Depending on the supplier, it can be rougher on the hands and shed even more than hemp. But it’s cheap and available everywhere. If there are higher-quality manila ropes out there, I would be interested in trying them out.

  3. Kuremona - a synthetic rope that both Miyamoto and Asano carry. I would think that there are different types of kuremona, but my only experience with this rope is on the Edo Bayashi taiko made by Miyamoto. It stretches and slips more than the natural rope mentioned above, but it is within the acceptable range of performance. The advantages: the variety of colors available, and the rope feels nice in the hands.

  4. POSH - a synthetic rope I recently became aware of and decided to try out. It stretches less and holds knots better than kuremona, but the main disadvantage is its stiffness. I would think that the rope will eventually soften, but I have only used it once. The lack of suppleness make it hard to get the slack out of knots before you tighten, and this doesn’t allow you full control of how much tension the rope creates on the drum heads. If this rope softens, it would be my top choice. I purchased this rope online at R & W Rope. It has been suggested that perhaps putting the rope through a wash cycle might soften it. The photo below shows the impressive array of POSH color options at R & W Rope. This photo was emailed to me by Ray, who was very helpful in helping me narrow down the choices. The online store shows less color selection, so you might need send them an email to order a specific color.

  5. Vintage 3 Strand - another synthetic rope I recently learned about and purchased to try. This is softer and easier to handle than POSH, but with slightly less knot-holding ability. It also only comes in one color, a natural beige. Because it’s cheaper and easier to work with, I would place this rope slightly ahead of POSH in terms of performance. This was also purchased at R & W Rope.

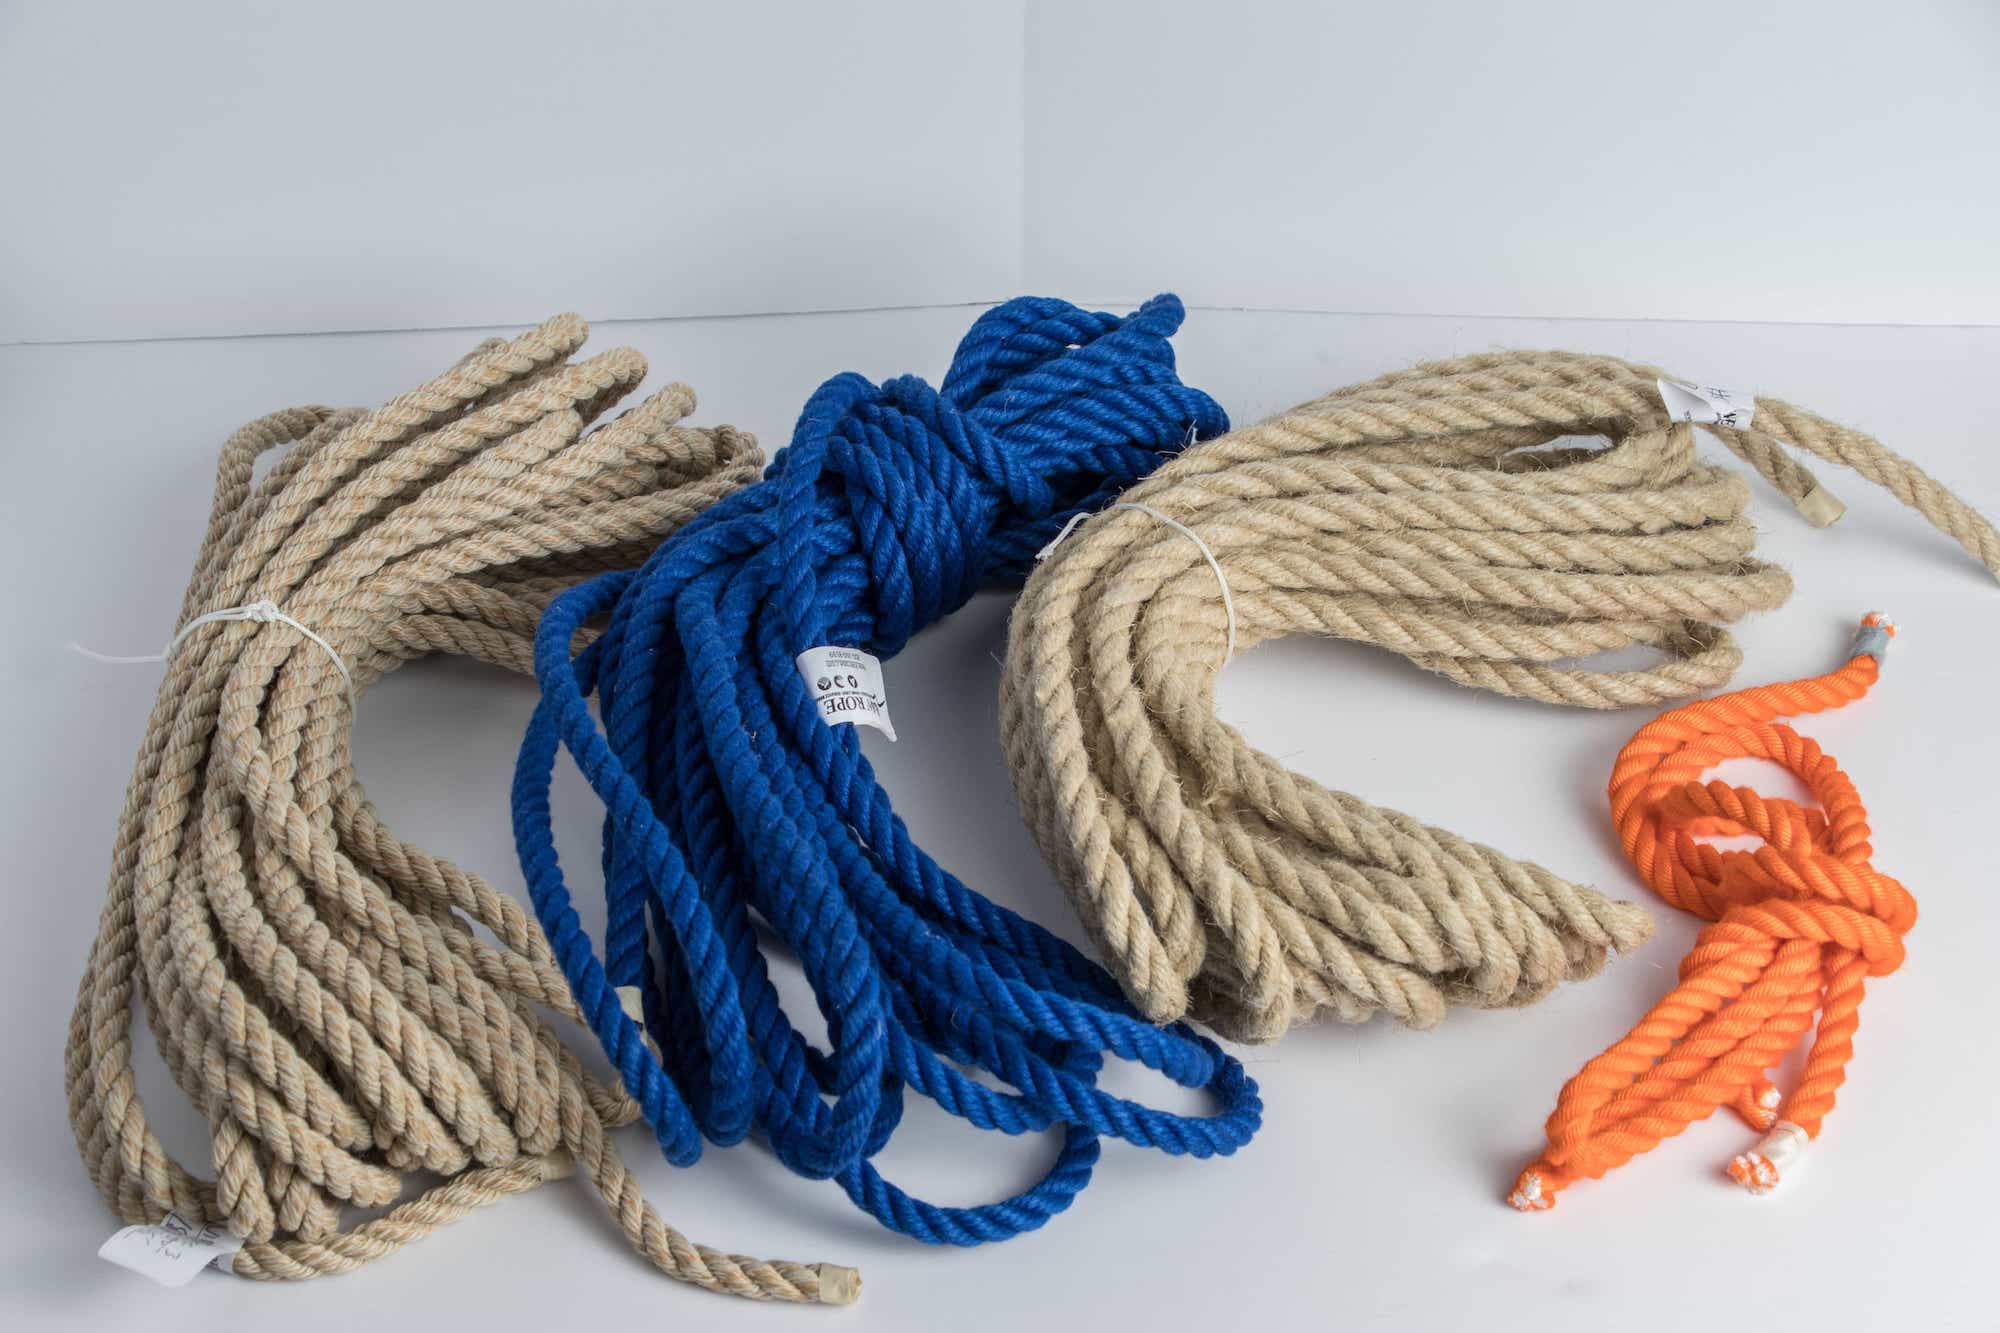
The 4 ropes I tried back-to-back to compare

The 4 ropes I tried back-to-back to compare

Rope samples from Miyamoto - five kuremona colors and hemp (far right)

Rope samples from Miyamoto - five kuremona colors and hemp (far right)

POSH colors available at R & W Rope

POSH colors available at R & W Rope

Rope Diameter and Length

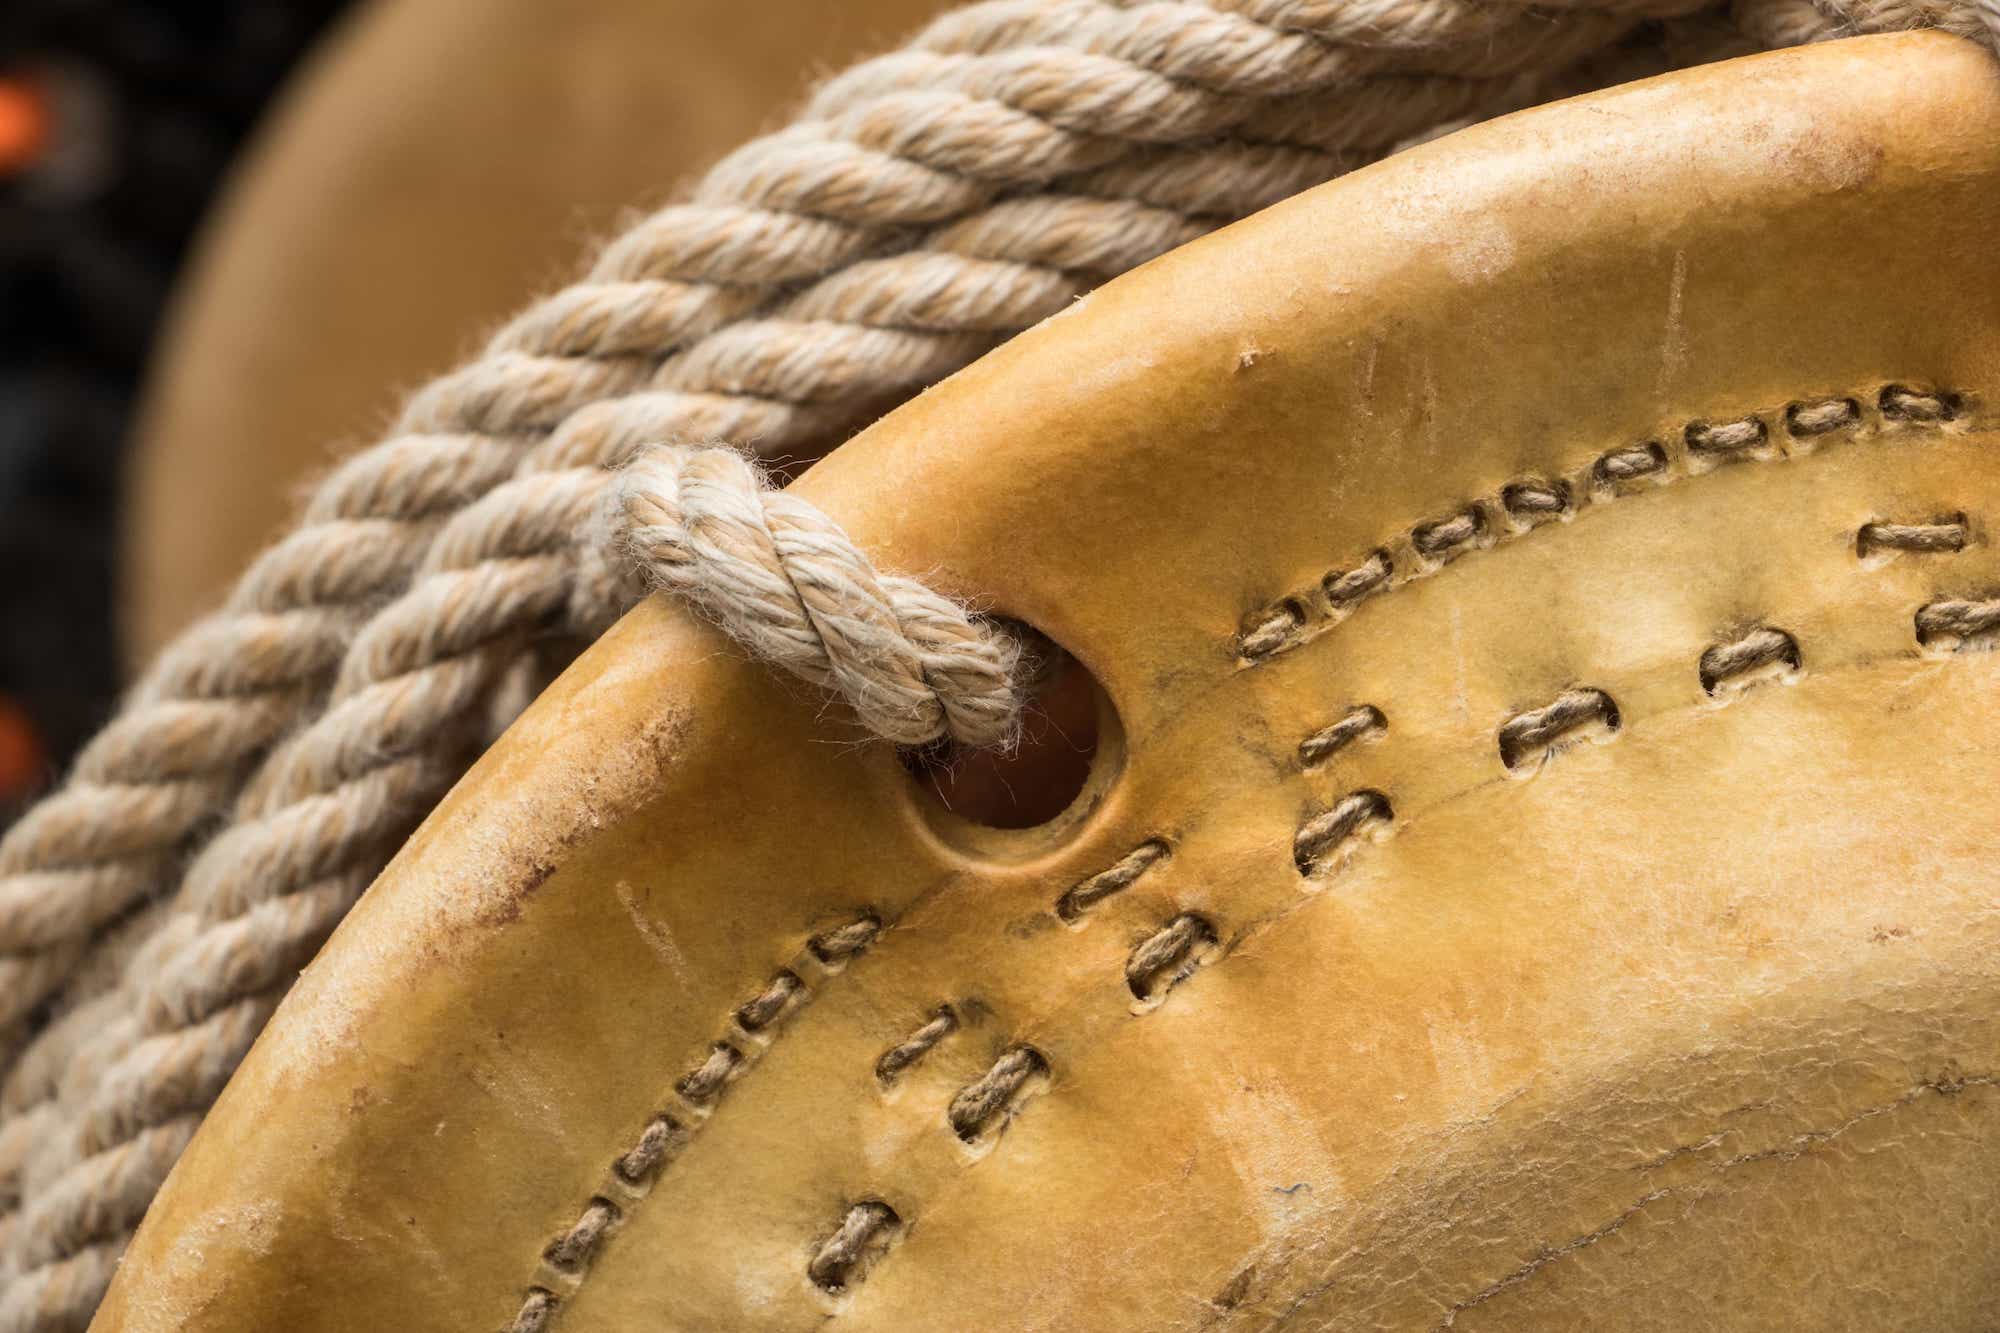
It makes sense to use the appropriate diameter rope for the size of shimedaiko you use. For the typical medium sized (2 or 3 chogake) drum, I think 10 - 12mm works well. A smaller drum might take 8 - 9mm and the biggest drums (4 or 5 chogake) could use 12 - 13mm, depending on the drum maker and rope type. In the US, 3/8 inch (9.5mm) rope is very common and easy to find. Thicker diameter is better for durability and less stretch but a rope too thick can be hard to work with. Take into consideration the depth of the body, how stretched the skins are already, and how large the holes near the rings are. For example, the Edo Bayashi taiko pictured below has a 9mm kuremona rope - it works fine, but I would prefer something slightly thicker for this drum. You can see that the holes are definitely wide enough for a bigger rope. I have learned that both Miyamoto and Asano sell a preset diameter rope for each shimedaiko size, which makes it simpler to order the appropriate rope for each drum size. However, you might want to ask for more detail about the material and diameter of the ropes so that you can choose one that best fits your needs. It’s common in Japan to use the traditional unit ‘bu’ (3mm) for rope, and for our purposes we would look for 3 or 4 bu (9mm or 12mm). But I’m pretty sure that other diameter ropes would be available in 1mm increments, and will continue my research to learn more about our options.

Miyamoto Edo Bayashi shimedaiko with 9mm kuremona

Miyamoto Edo Bayashi shimedaiko with 9mm kuremona

The taiko companies also seem to provide a set length for each shimedaiko size, but I think it would be possible to place a custom order. After the drum is tightened, I prefer to follow the common practice of winding the rope 3 times around before tying off. I have noticed that Kodo and Hayashi Eitetsu both wind the rope 2 times, so I can understand people using this method as well. For me, it’s like the martini olives rule - you should have an odd number, and 1 is too few (and 5 won’t fit). Because each drum will have differences in the length of rope required, I ordered 36 feet (11 meters) of rope for my testing and cut off the excess after tightening the drum for the first time. I feel more at ease knowing that I will have plenty of rope to work with, but you can certainly order less than this. If you are ordering from Miyamoto or Asano, it might be a good idea to ask about the set rope length and see if you can purchase your preferred length in addition to the diameter.

Whipping on the end of the rope

Whipping on the end of the rope

General Tips

1. It’s worth learning how to tie a proper whipping knot on the end of the rope to prevent it from fraying or unraveling. Tape can do the job, but it’s less aesthetically pleasing and it can come off with some pressure. A quick online search will give you many photo and video tutorials on how to whip the end of a rope.

2. Prioritize function over appearance. I have seen many drums with beautiful ropes that don’t work well at all, resulting in less than ideal sound and tightening performance. Instead of trying to find a rope that takes dye well (such as cotton) at the expense of function, search for rope that is already the color you are looking for within the category of acceptable performance.

3. Experiment to learn your individual preferences on material, diameter, length, and price. Then ask questions so that the supplier is sending you exactly what you are looking for. For example, I should have asked the salesperson about the smell of their hemp rope before ordering. Ask other taiko players, makers, and stores for detailed information so that you can build your base knowledge and find the best rope for you. I also found it interesting to learn about the wide the variation in pricing, so don’t forget to make note of the differences carefully. Let me know if you have any recommendations and I will add them to my list.

4. Learn proper tightening technique so that you value the performance of the rope. There are several different tightening methods that are commonly used. Choose one that works best for you and practice a lot. And boosting your ability to play the drum will increase your appreciation of the sound and condition of the skins over time.

5. Understand that your treatment of your shimedaiko can impact not just the sound, but also the longevity. A clamshelled shimedaiko will not last as long as a more evenly tightened one. And keeping a drum tightened all the time will result in a shorter lifespan than one that is loosened between uses. Of course, other factors like stick selection, playing technique, stand design, weather, and general handling practices will all affect how long your heads will last.

6. Links to suppliers:

Miyamoto Unosuke Shoten

Asano Taiko US

R & W Rope

Partially tightened Edo Bayashi shimedaiko by Miyamoto Unosuke Shoten

Partially tightened Edo Bayashi shimedaiko by Miyamoto Unosuke Shoten

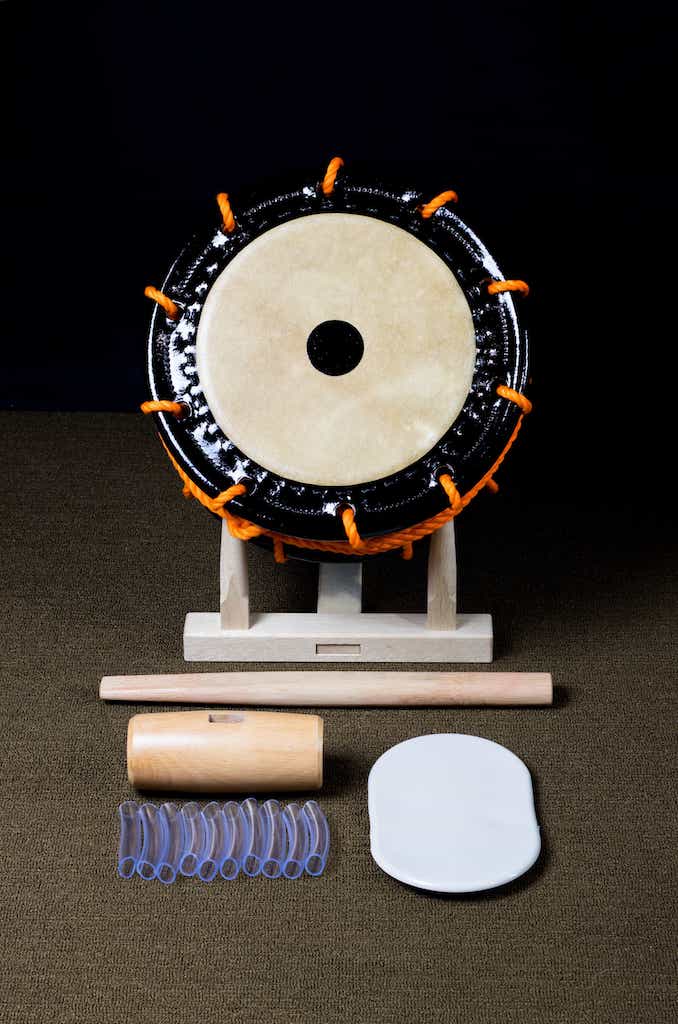
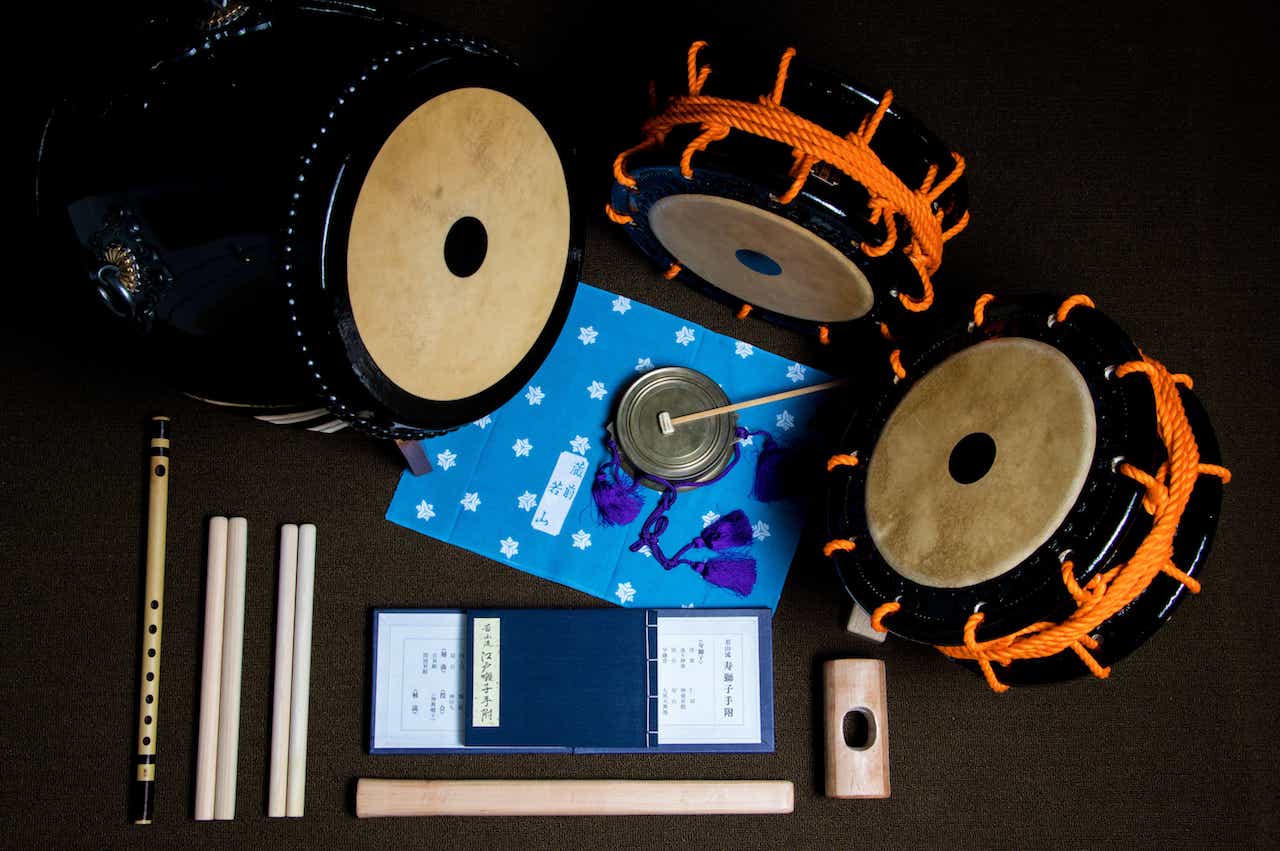
Complete set of Edo Bayashi instruments and accessories

Complete set of Edo Bayashi instruments and accessories

Decorative Knots for Atarigane and Shumoku

Angled kane and shumoku.jpg

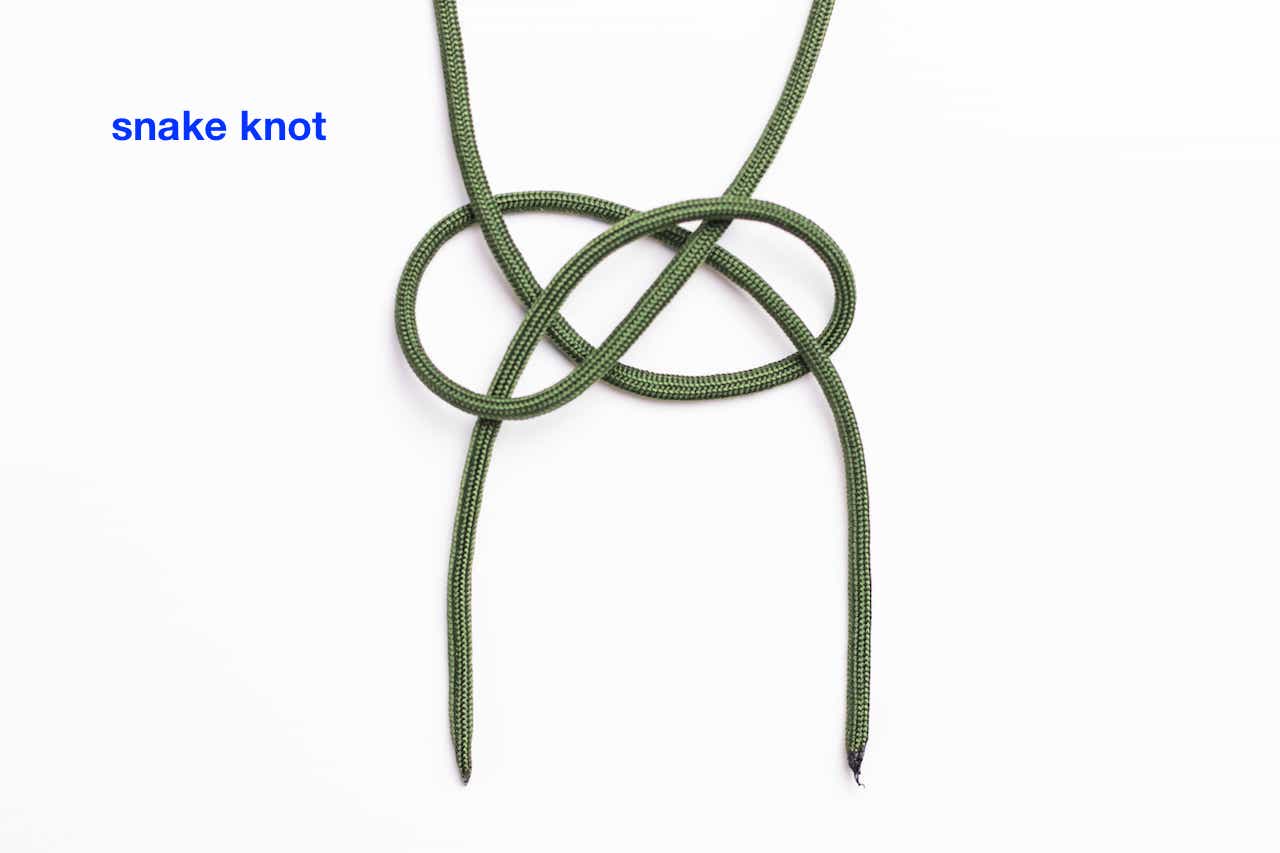
I recently started a serious study of knots and quickly found out how bottomless this world of knot-tying really is. During my Tokyo Edo Bayashi intensive (read about it here) last June, Suzuki sensei showed me his method of tightening shimedaiko including all of the knots. But for the atarigane and shumoku, sensei simply showed me his instruments and advised me to look up some decorative knots and experiment after I got home. While this was a fun activity, I realized the challenges of not only learning how to tie them, but to find the correct knots in the first place. The internet usually makes information searches fast and easy but my of lack prior knowledge made it frustrating to comb through hundreds of tutorial photos, videos, and useless web links. For knots, it turns out that you need to know the exact name of the knot before any good search results will show up. This was even more difficult when I was trying to find the English name of Japanese knots, or trying to reverse engineer knots from photos. Fortunately there are a lot of great tutorials online when you start with the correct knot names, and I list all of the ones I use here.

My research is knot done yet, but these labeled photos will provide a good starting point for anyone looking to add some color and style to their atarigane and shumoku. I don’t believe that there is a single correct way to approach this, and I would encourage everyone to experiment with different combinations of these and other knots. Much like the study of the Edo Bayashi music, there is no end once you start going deeper and deeper down this path. It would be fun to see everyone’s versions so please send me a photo if you try this yourself.

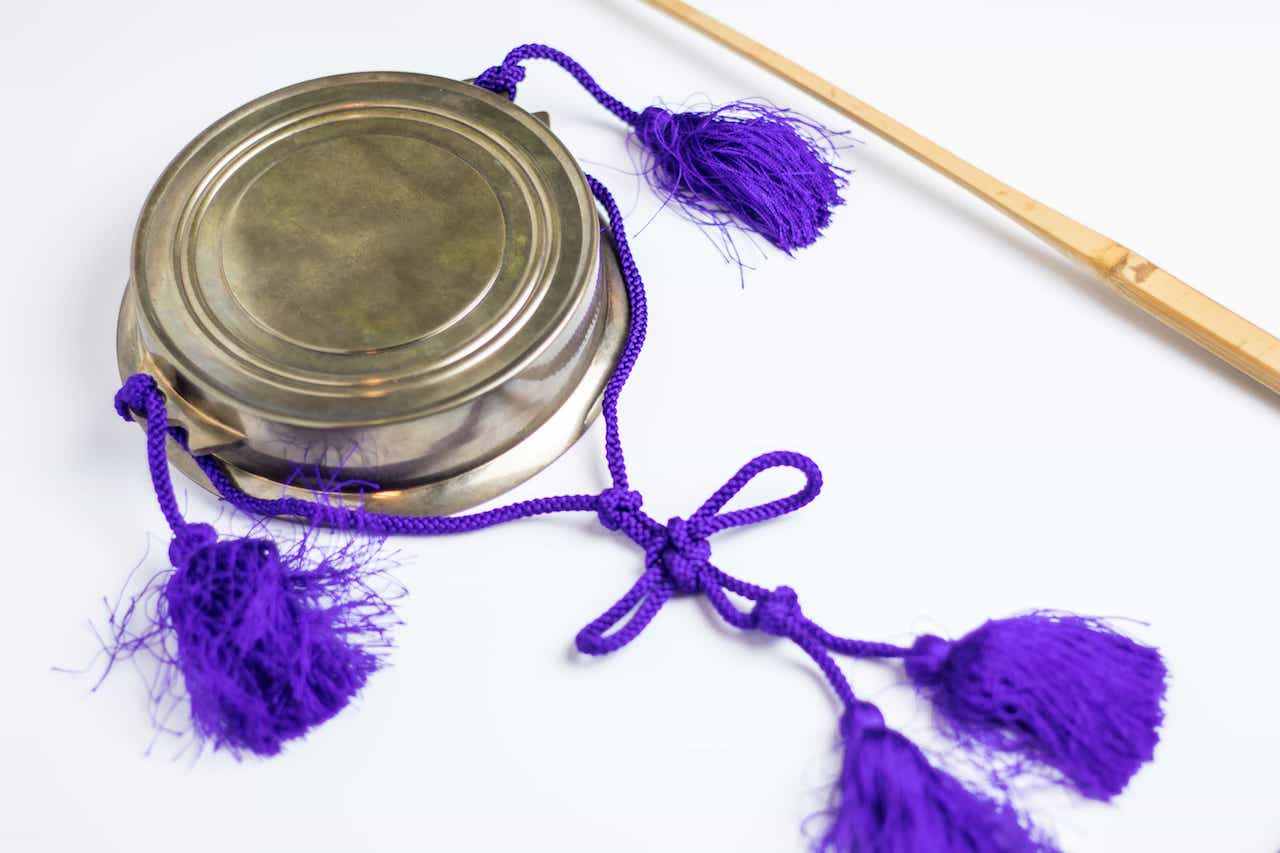
The left-side photo below shows a 5.5 Betsubiki atarigane with some decorative string I repurposed from a pair of chappa. The shumoku (Marukuma Edo Bayashi) string was originally on one of my other kane, and at 93cm it’s probably too long. I might go with something like 60 - 70cm for the shumoku string (length before tying). The common colors I see are purple, red, orange, and white, but it might be interesting to try other colors or combinations. The right-side photo (orange string) shows my experimentation with locking loop knots so that the string length is easily adjusted for different playing styles. Of the two, I prefer the adjustable grip hitch for its ability to hold more firmly. I added a variation so that the end of the string points down rather than out to the side. This photo also shows the proper orientation of the kane where the string holes are toward the bottom.

There are some bonus photos at the end showing two knots: the cowboy bowline and the snake knot. I used an old piece of string from my vibraphone to practice these knots before trying it on the real material. I would highly recommend doing this to get more familiar with the many different techniques. The cowboy bowline is typically used as the starting knot for shimedaiko and is called moyai musubi もやい結び in Japanese. Although I considered similarly breaking down all of the knots I list here, I decided knot to because doing your own research is invaluable, and I wanted to keep the length of this blog entry reasonable. Feel free to send me any follow-up questions. Good luck and happy tying!

Purple kane with shumoku.jpg
Orange kane and shumoku.jpg

Poacher’s knot

Adjustable grip hitch
(variation of passing the string through the last loop down)

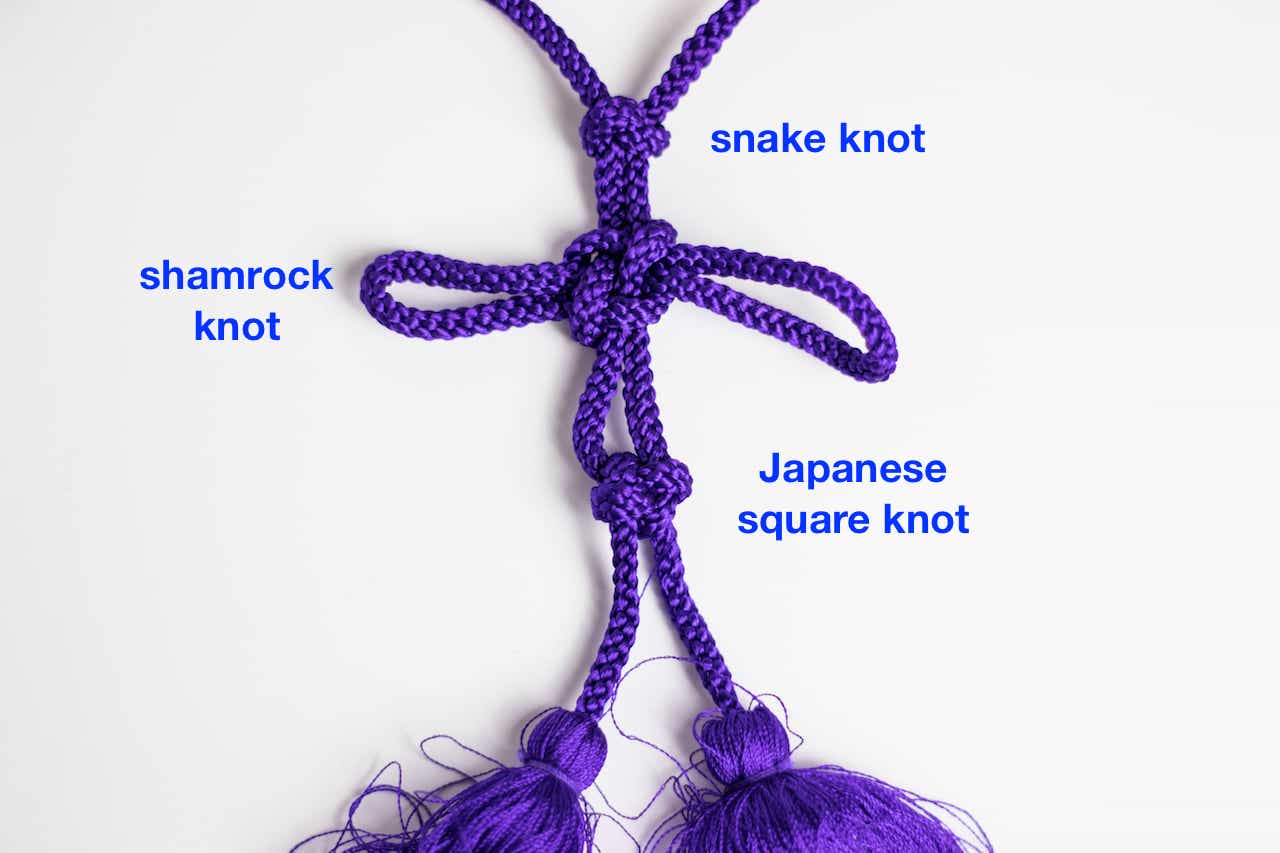
Snake knot
Tsuyu musubi つゆ結び

Shamrock knot (sailor’s cross)
Agemaki musubi あげまき結び

Japanese square knot
Kanou musubi かのう結び

Purple close up copy.jpg
Orange close up copy.jpg

Snake knot

Japanese square knot

Triangle lanyard knot

Double connection knot

Overhand knot

shumoku top copy.jpg
shumoku bottom copy.jpg

Snake Knot

snake knot loose copy.jpg
snake knot tight copy.jpg

Cowboy Bowline Knot

Cowboy bowline loose copy.jpg
Cowboy bowline tight copy.jpg
green string.jpg

My most important bachi & sticks for taiko

My most important taiko sticks

My most important taiko sticks

I am constantly on the search for new bachi and drumsticks at local drum shops, big music stores, Asano Taiko US in Torrance, Miyamoto Unosuke Shoten in Asakusa, or the marketplace vendors at the North American Taiko Conference. Japan is my favorite place to go shopping because it's very common to see a digital scale in the drumstick section for picky people like me to precisely match a pair of sticks by weight. There are many different materials used to make sticks, including bamboo, kashi (oak), hickory, maple, birch, hou (magnolia), and hinoki (cypress). In addition, you can find a wide variety of mallets, brushes, and other alternative sticks made by a number of different companies. Considering the enormous variety of drums, cymbals, and percussion instruments available to us, it might be easy to understand my obsessive search for the best stick for each application.

What are some of the factors involved with stick selection? This can be a deeply personal topic and each musician will have their own hierarchy of criteria. Here are mine:

1. Sound – the most important consideration. Sometimes it's a simple decision and other times it's necessary to compromise and make it work for a number of dissimilar instruments.

2. Feel – the stick needs to feel comfortable and work for my playing style. I check out the length, diameter, weight, finish, and balance to narrow down my choices.

3. Wear and tear – I make sure the sticks will not cause damage to the instruments. I also match the sticks to the instrument so that I don't have to replace broken sticks constantly.

4. Tradition and uniformity – there are times when it makes sense for an ensemble to use the same sticks in striving for uniformity of sound and visuals. I also consider traditional sticks with historical significance.

One of the workshop topics I have taught is called Taiko Sounds and Sticks, where I introduce ways to get many sounds out of one drum as well as discuss and demonstrate the common materials and dimensions of taiko sticks. My goal is to convey the depth of this topic and share my knowledge so that the participants leave with a foundation in stick selection details. It's a fun moment when someone hears the subtle difference between two similar sticks when I play them side-by-side on a drum.

This photo shows the collection of sticks I currently use. It is very close to the stick recommendations in my article called Ten Useful Sticks For Taiko Players. There are additional sticks I use depending on the situation, but these are my most important ones. The sticks labeled VF RH 36cm is a marching snare drum stick (Vic Firth Ralph Hardiman) that I cut off and sanded. This hickory stick works well in a mixed-taiko set up and has good sound and durability on rims and cymbals.

Taiko sticks labeled

Taiko sticks labeled

Old bachi from my childhood

Old bachi from my childhood

This other photo shows two pairs of sticks from my childhood. The smaller kashi bachi were given to me by my first taiko teacher Saburo Mochizuki, and I used them to play the Sukeroku Daiko repertoire he taught to our youth group in Saitama. The larger hou bachi are from a Miyake Taiko summer intensive I took on Sado Island at age 11, taught by Kodo members.

Workshops

Ten Useful Sticks for Taiko Players

Asano Taiko US

Miyamoto Unosuke Shoten

Japan Percussion Center