How to Make Miso Butterfish at Home
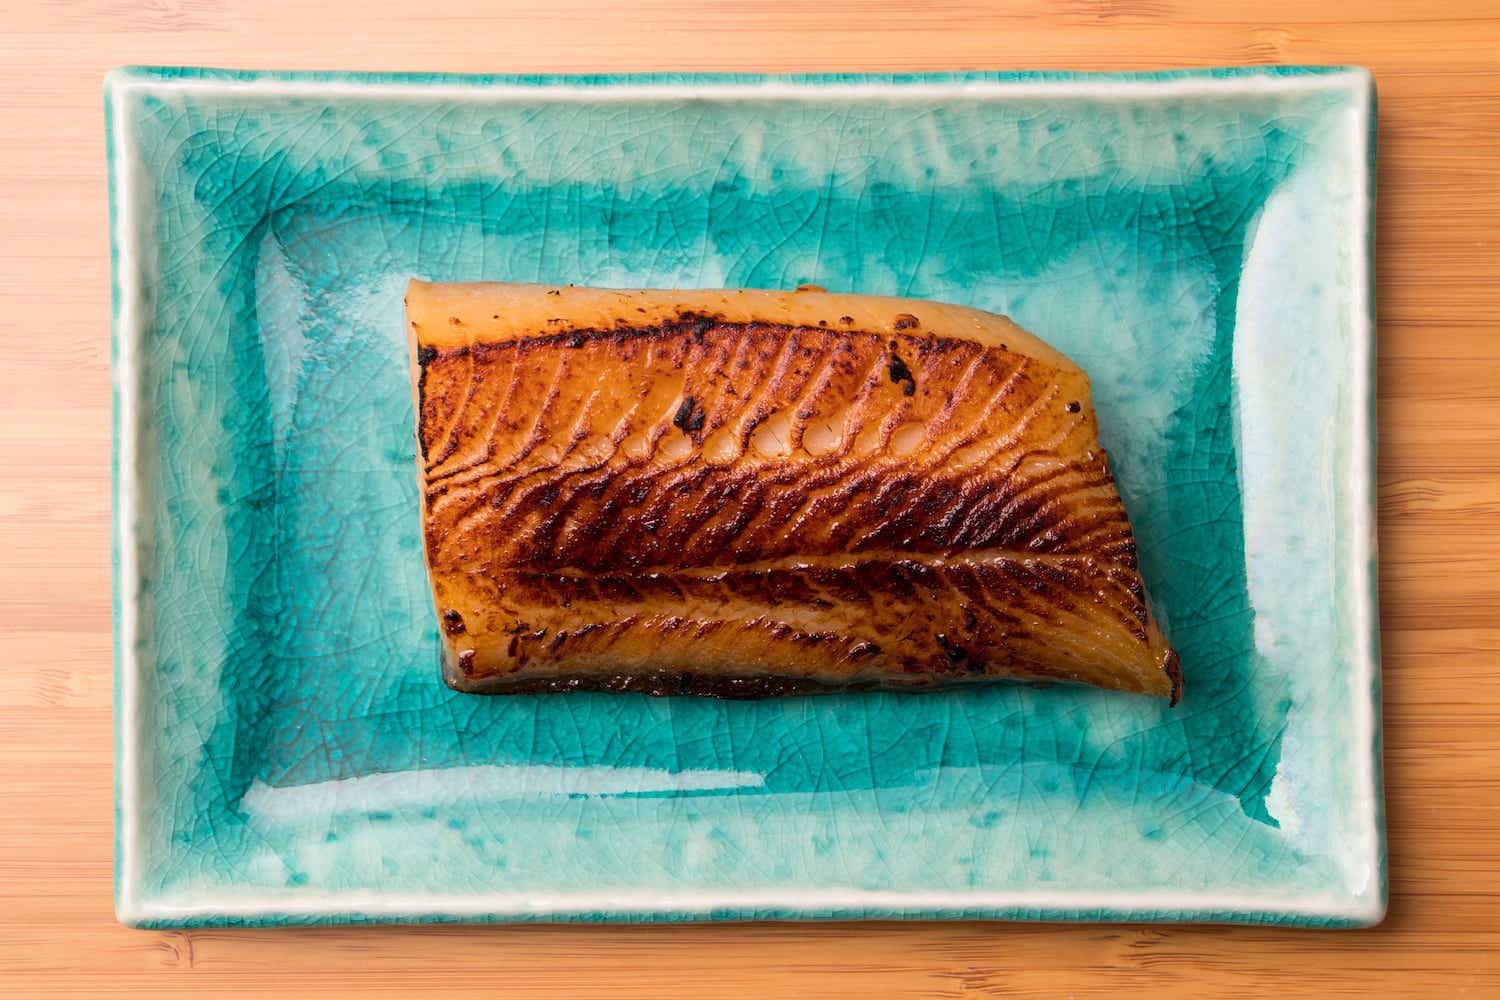
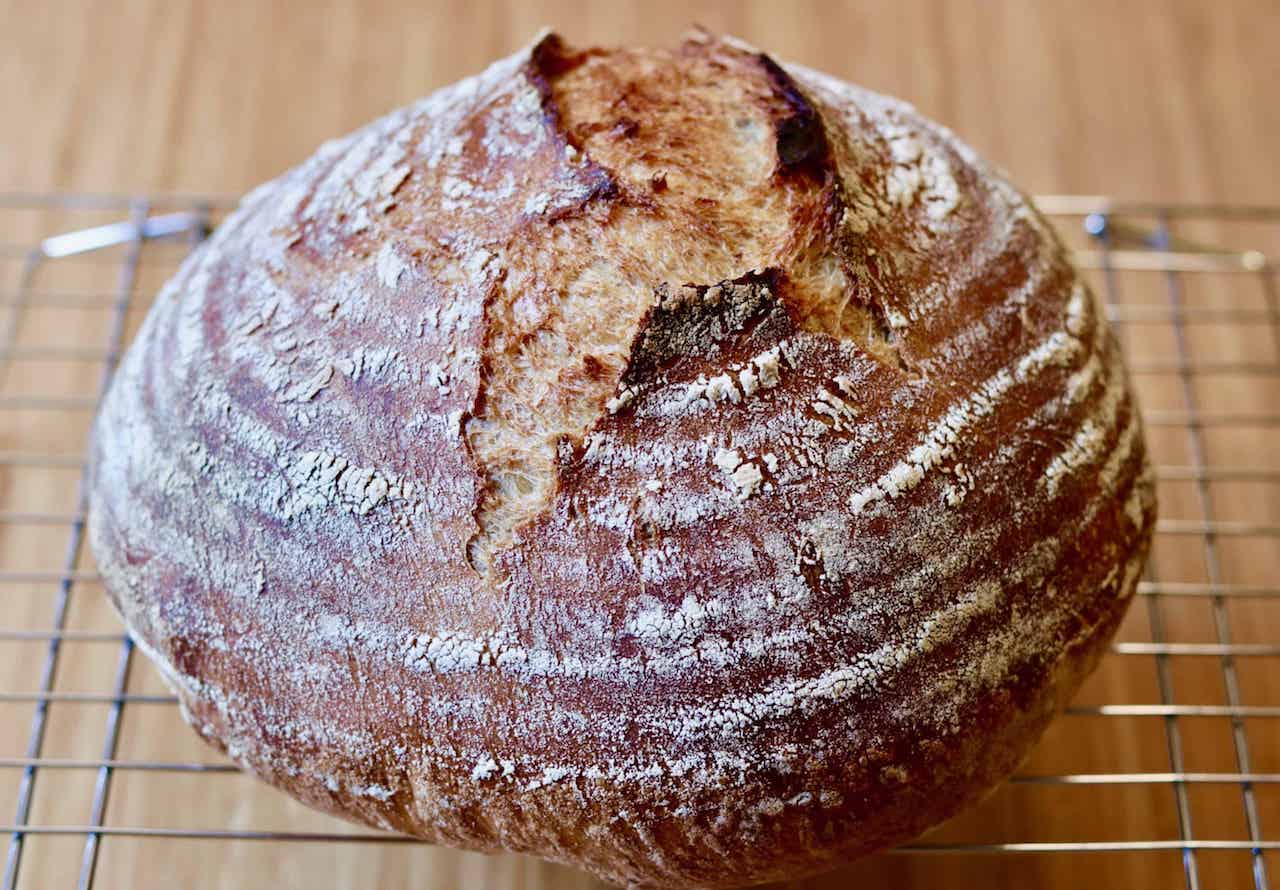
Delicious miso butterfish

Delicious miso butterfish

Miso butterfish is simple to make and incredibly delicious. It really hits many of our buttons: rich texture, fermented umami flavor, caramelization, sweetness, and salt. Most people credit the chef Nobu Matsuhisa for popularizing this recipe which contains only five ingredients. My version is messily penciled on a small piece of paper and I don’t recall where I found this ratio or exactly when I wrote it down (it was a long time ago). You can find the Nobu version with a quick online search too, and I would encourage experimentation with the balance of the four marinade ingredients in order to find the ratio that tastes best to you. I often change the amounts or even leave out ingredients or steps, and it still tastes very good. 

Butterfish is also known as sablefish and black cod, and in Japan, gindara. It has very high oil content, which makes it a great pairing with sweet-salty miso and the umami of sake. Because of the fattiness, butterfish is quite forgiving compared to other fish so the danger of overcooking is not as imminent. This recipe can work well with other oily fish like sockeye salmon and albacore tuna. It can be made with fillets or steaks, as long as the fish is fresh and of high quality. You can easily scale this recipe up or down depending on how much fish you have.

Miso Butterfish
1/4 cup sake
1/4 cup mirin
1/4 cup white miso
3 tablespoons white sugar
1 or 2 butterfish fillets or steaks

  1. In a small pan, heat the sake and mirin, and boil for 20-30 seconds to burn off the alcohol.

  2. Remove from the heat and whisk in the sugar, followed by the miso.

  3. Chill the marinade, and add it to the fish in a container or ziplock bag.

  4. Marinate in the fridge for 2 - 4 days.

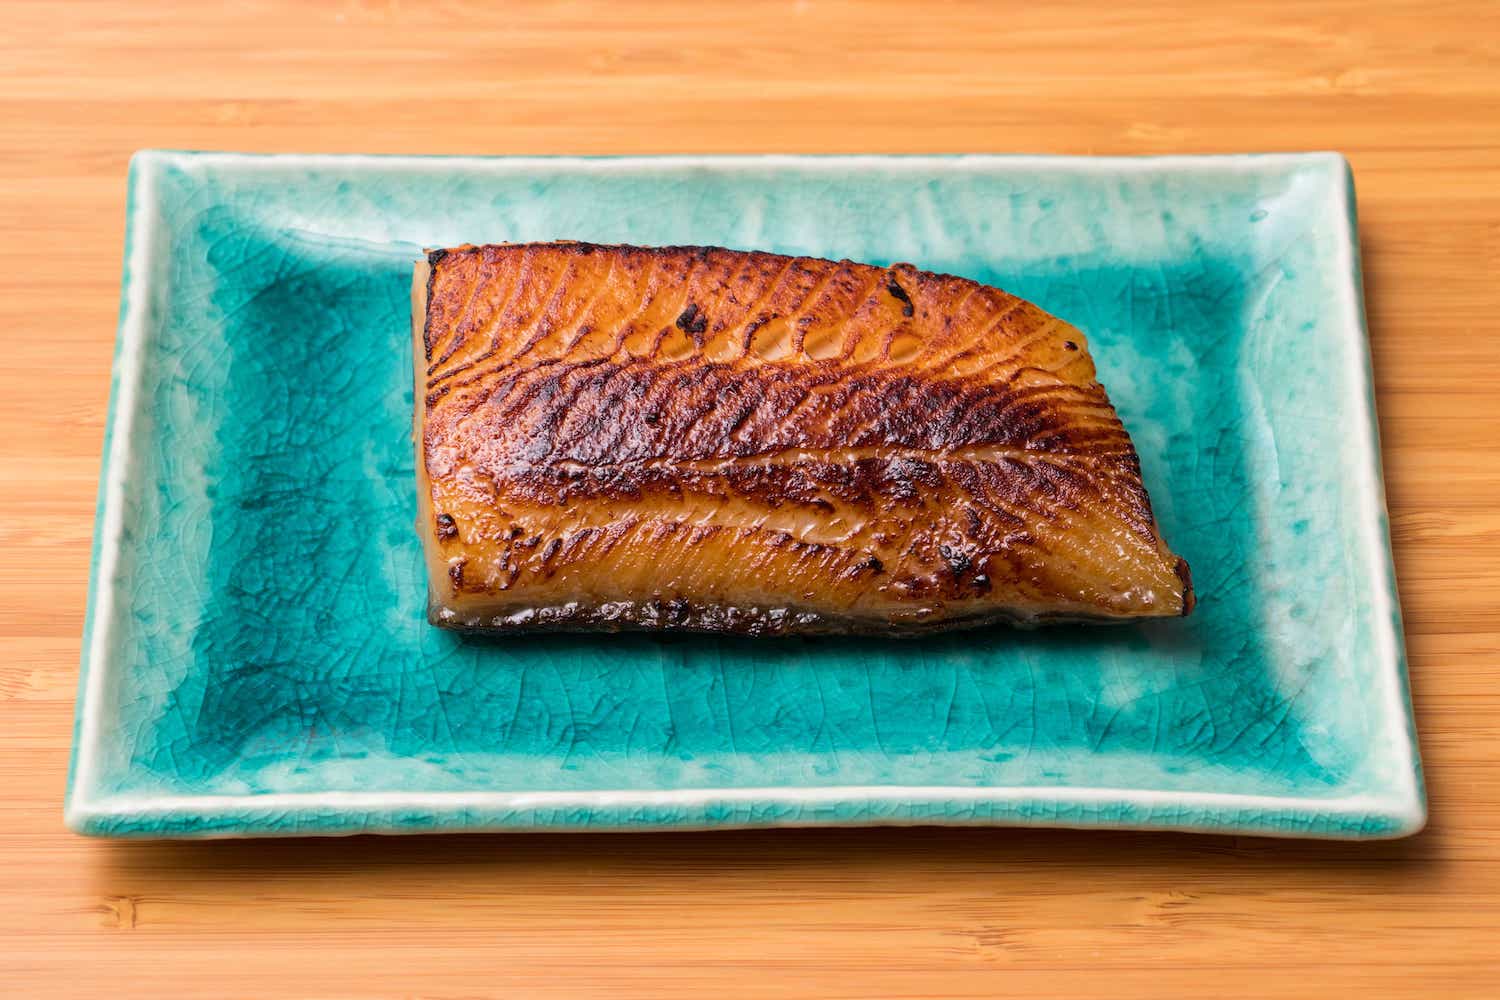
  5. Wipe off (don’t rinse) the marinade and cook. Grilling or broiling is best, but you can also brown it in a pan (nonstick or cast iron to avoid sticking to the pan). Sometimes I will cook it sous vide at 115F for 40 minutes, then brown it with a torch.

Keep in mind that the marinade is full of sugars and proteins so the fish can brown and burn quickly. The best way to be consistent is to monitor the internal temperature with an instant-read kitchen thermometer. My preference is 115 - 130F internal temperature, but some people might prefer to go higher for firmer texture or food safety concerns. Most sources cite 145F as the absolutely safe internal temperature for fish. To go lower, it’s recommended to freeze the fish for one week to kill any potential parasites. It’s always good to do your own research across multiple sources so that you can make informed decisions on topics like these.

Miso butterfish ingredients: miso, butterfish, sugar, mirin, sake

Miso butterfish ingredients: miso, butterfish, sugar, mirin, sake

Boil sake and mirin to vaporize the alcohol

Boil sake and mirin to vaporize the alcohol

Turn off heat and add miso and sugar

Turn off heat and add miso and sugar

Cool the marinade and place in a ziplock bag with the butterfish, then place in fridge for 2 - 4 days
Cool the marinade and place in a ziplock bag with the butterfish, then place in fridge for 2 - 4 days

Grill, broil, pan fry, or sous vide

Grill, broil, pan fry, or sous vide

Shimedaiko Rope Types and How to Choose One

Shimedaiko rope used for testing

Shimedaiko rope used for testing

This guide is for anyone looking for information about shimedaiko rope. I prefer using the traditional rope-tightened style of shimedaiko over the bolted kind for several reasons:

  1. They sound better to my ears.

  2. They look better to my eyes.

  3. They feel better to my arms when I carry them.

  4. They are kinder on my stands, floors, limbs, and any surface that comes in contact with the drum.

  5. They are still the only type used by professionals in many traditional arts such as kagura, noh, kabuki, and Edo Bayashi.

Obviously, the bolt-style drums are legitimate and have many fans, mainly due to the ease of tightening and loosening the drum quickly and evenly. To tighten properly, both drum styles require lots of practice and careful attention to detail to get the best sound and longevity of the instruments. I believe that rope shimedaiko can be more fun, rewarding, and beneficial to your growth as a player once you gain the knowledge and develop the skills required to care for it correctly. This blog entry is only about rope types, so send me an email if you are interested in learning more about the advantages of the wooden mallet tightening technique described here:

https://www.eienhunterishikawa.com/blog/my-favorite-shimedaiko-tightening-met

Kuremona (9mm)

Kuremona (9mm)

Vintage 3 strand (10mm)

Vintage 3 strand (10mm)

When I started my research about rope options for shimedaiko, I was surprised at how little information I could find online. There is a huge variety of rope types out there and this overabundance of choice is confusing when you are trying to compare materials, pricing, diameter, color, stretch, and the ability to hold knots. Hopefully this guide will help you narrow down the sea of choices and focus your own quest for the best rope. A special thanks to Chris Huynh for helping with my research.

The two most important characteristics for shimedaiko rope performance are: not stretching and not slipping. The rope needs to hold knots during tightening, and then hold the tension after the drum is tightened. With these requirements in mind, here are the ropes I eliminated from my list of acceptable materials:

Nylon - too stretchy, too slippery
Cotton - too weak, too stretchy
Sisal - too hard, brittle, and rough
Kevlar - no good options available
Dyneema - too slippery
Spectra - too slippery
Hempex & Unmanilla/Promanilla - these are said to stretch and slip, but I haven’t tried it
Any braided rope - too smooth, and therefore too slippery

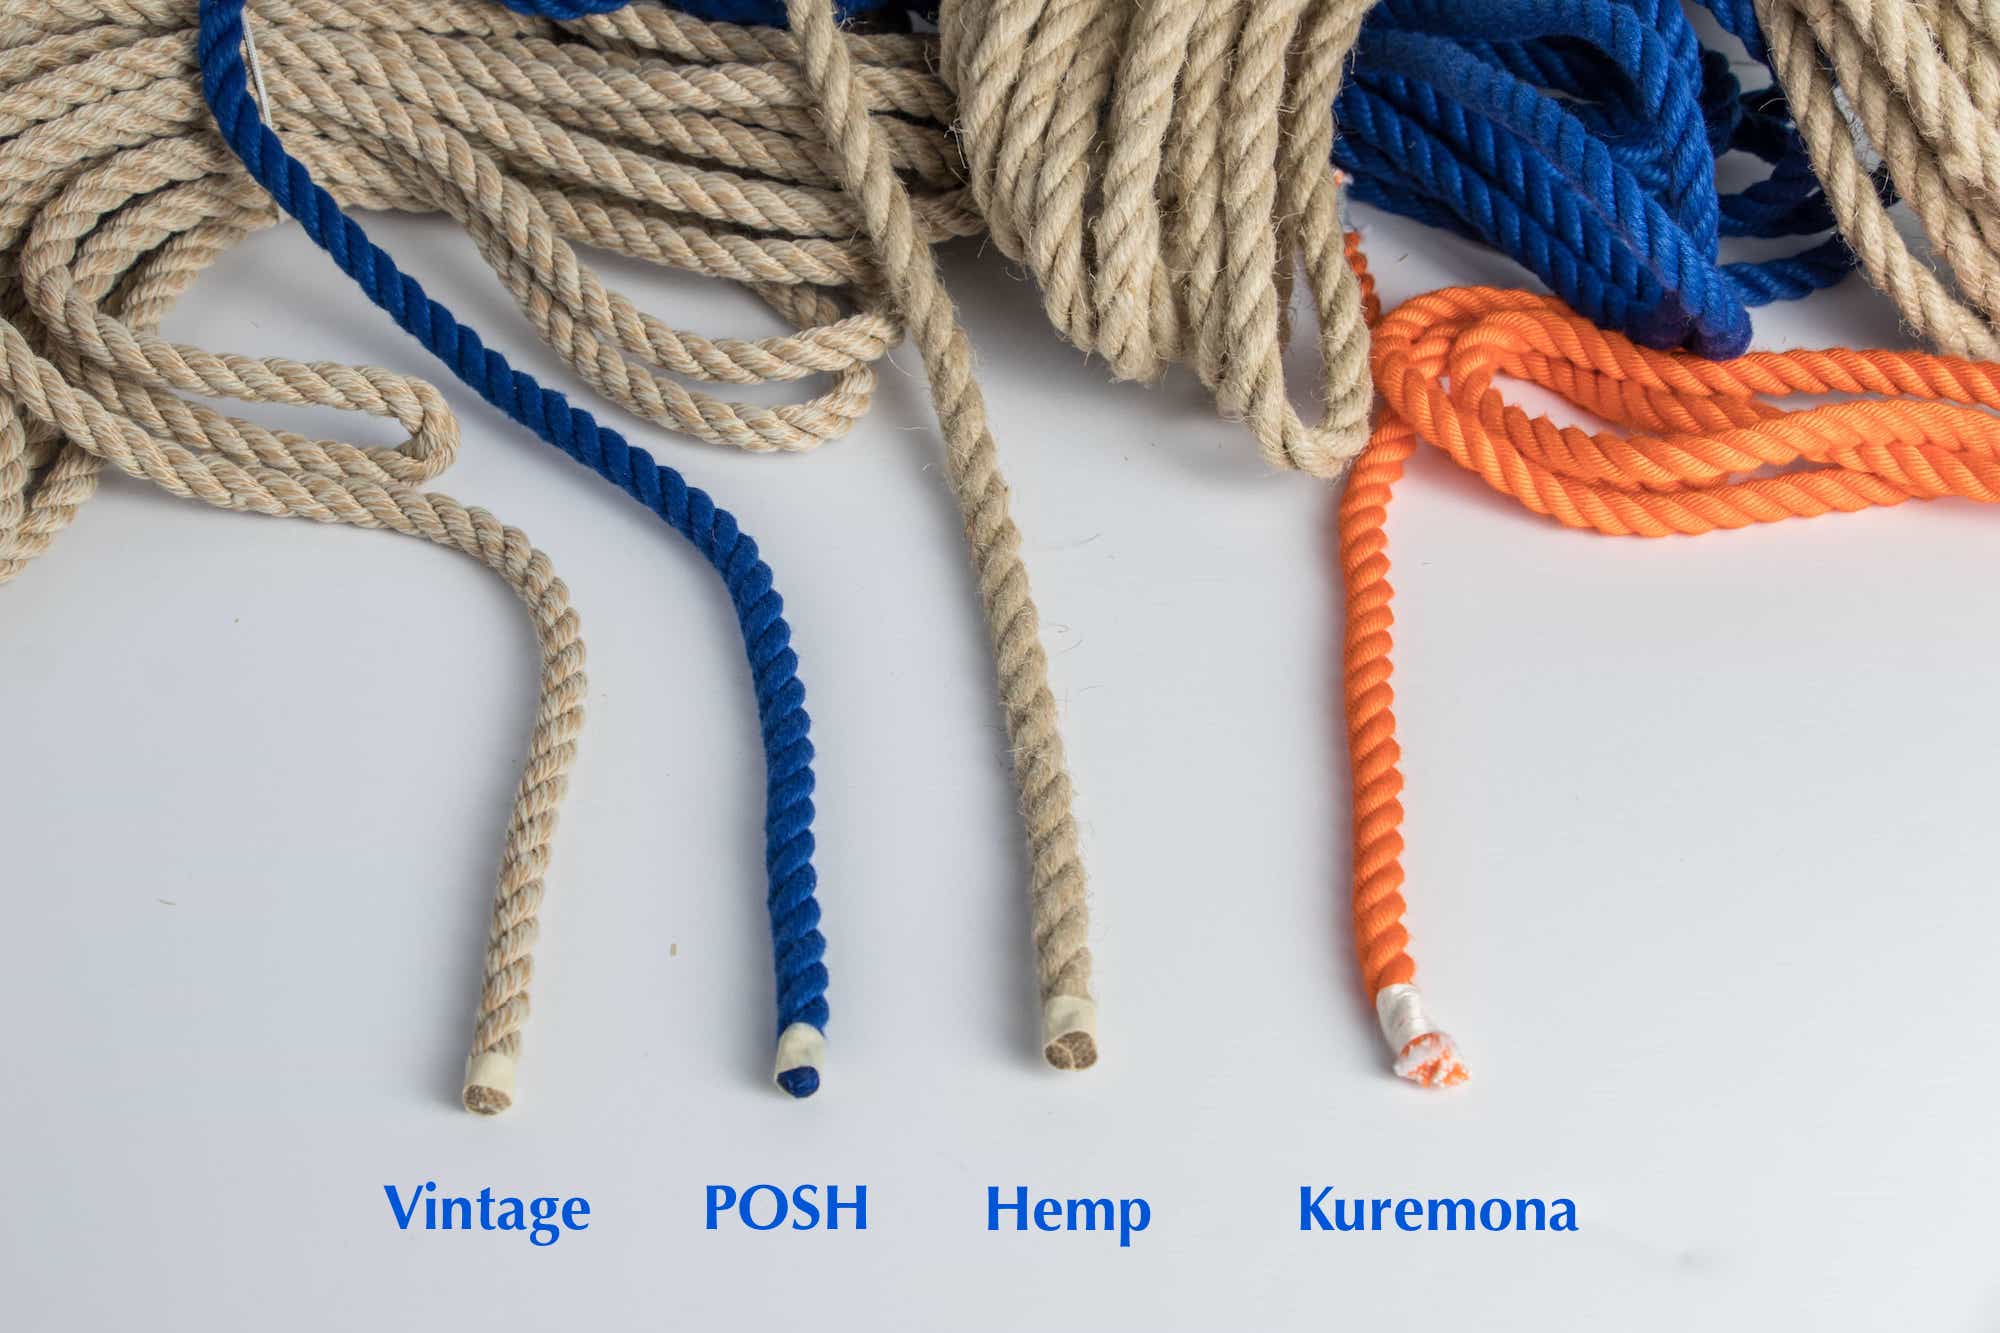
Below are the ropes that work, with pros and cons for each. They are all 3-strand twist because of their ability to hold knots better. Some of these ropes can tend to unravel, so I would recommend always keeping a tight twist for better durability and limiting the stretchiness. The first two are natural ropes - the texture is rougher so it’s a good idea to use gloves when working with them. The other synthetic ropes are generally easier on the hands.

  1. Hemp - the traditional rope, best for not stretching and holding knots. The main disadvantages: the rope is rough on your hands, they ‘shed’ material on the floor, your clothes, and into the air. Depending on the supplier, some hemp rope (like the one I bought, even after days of sun exposure and spraying with vinegar solution) smells so bad that I don’t want to handle it. Although I haven’t personally used them yet, the hemp rope sold at Miyamoto Unosuke Shoten and Asano Taiko are of high quality and don’t seem to have any offensive smell. They also seem to only carry the natural rope, with no dyed-color options. Asa is the Japanese word for hemp. I have been told that hemp shrinks over time, so that’s something to keep in mind.

  2. Manila - a very inexpensive and easy-to-find alternative to hemp, it performs very well by holding knots and not stretching. Depending on the supplier, it can be rougher on the hands and shed even more than hemp. But it’s cheap and available everywhere. If there are higher-quality manila ropes out there, I would be interested in trying them out.

  3. Kuremona - a synthetic rope that both Miyamoto and Asano carry. I would think that there are different types of kuremona, but my only experience with this rope is on the Edo Bayashi taiko made by Miyamoto. It stretches and slips more than the natural rope mentioned above, but it is within the acceptable range of performance. The advantages: the variety of colors available, and the rope feels nice in the hands.

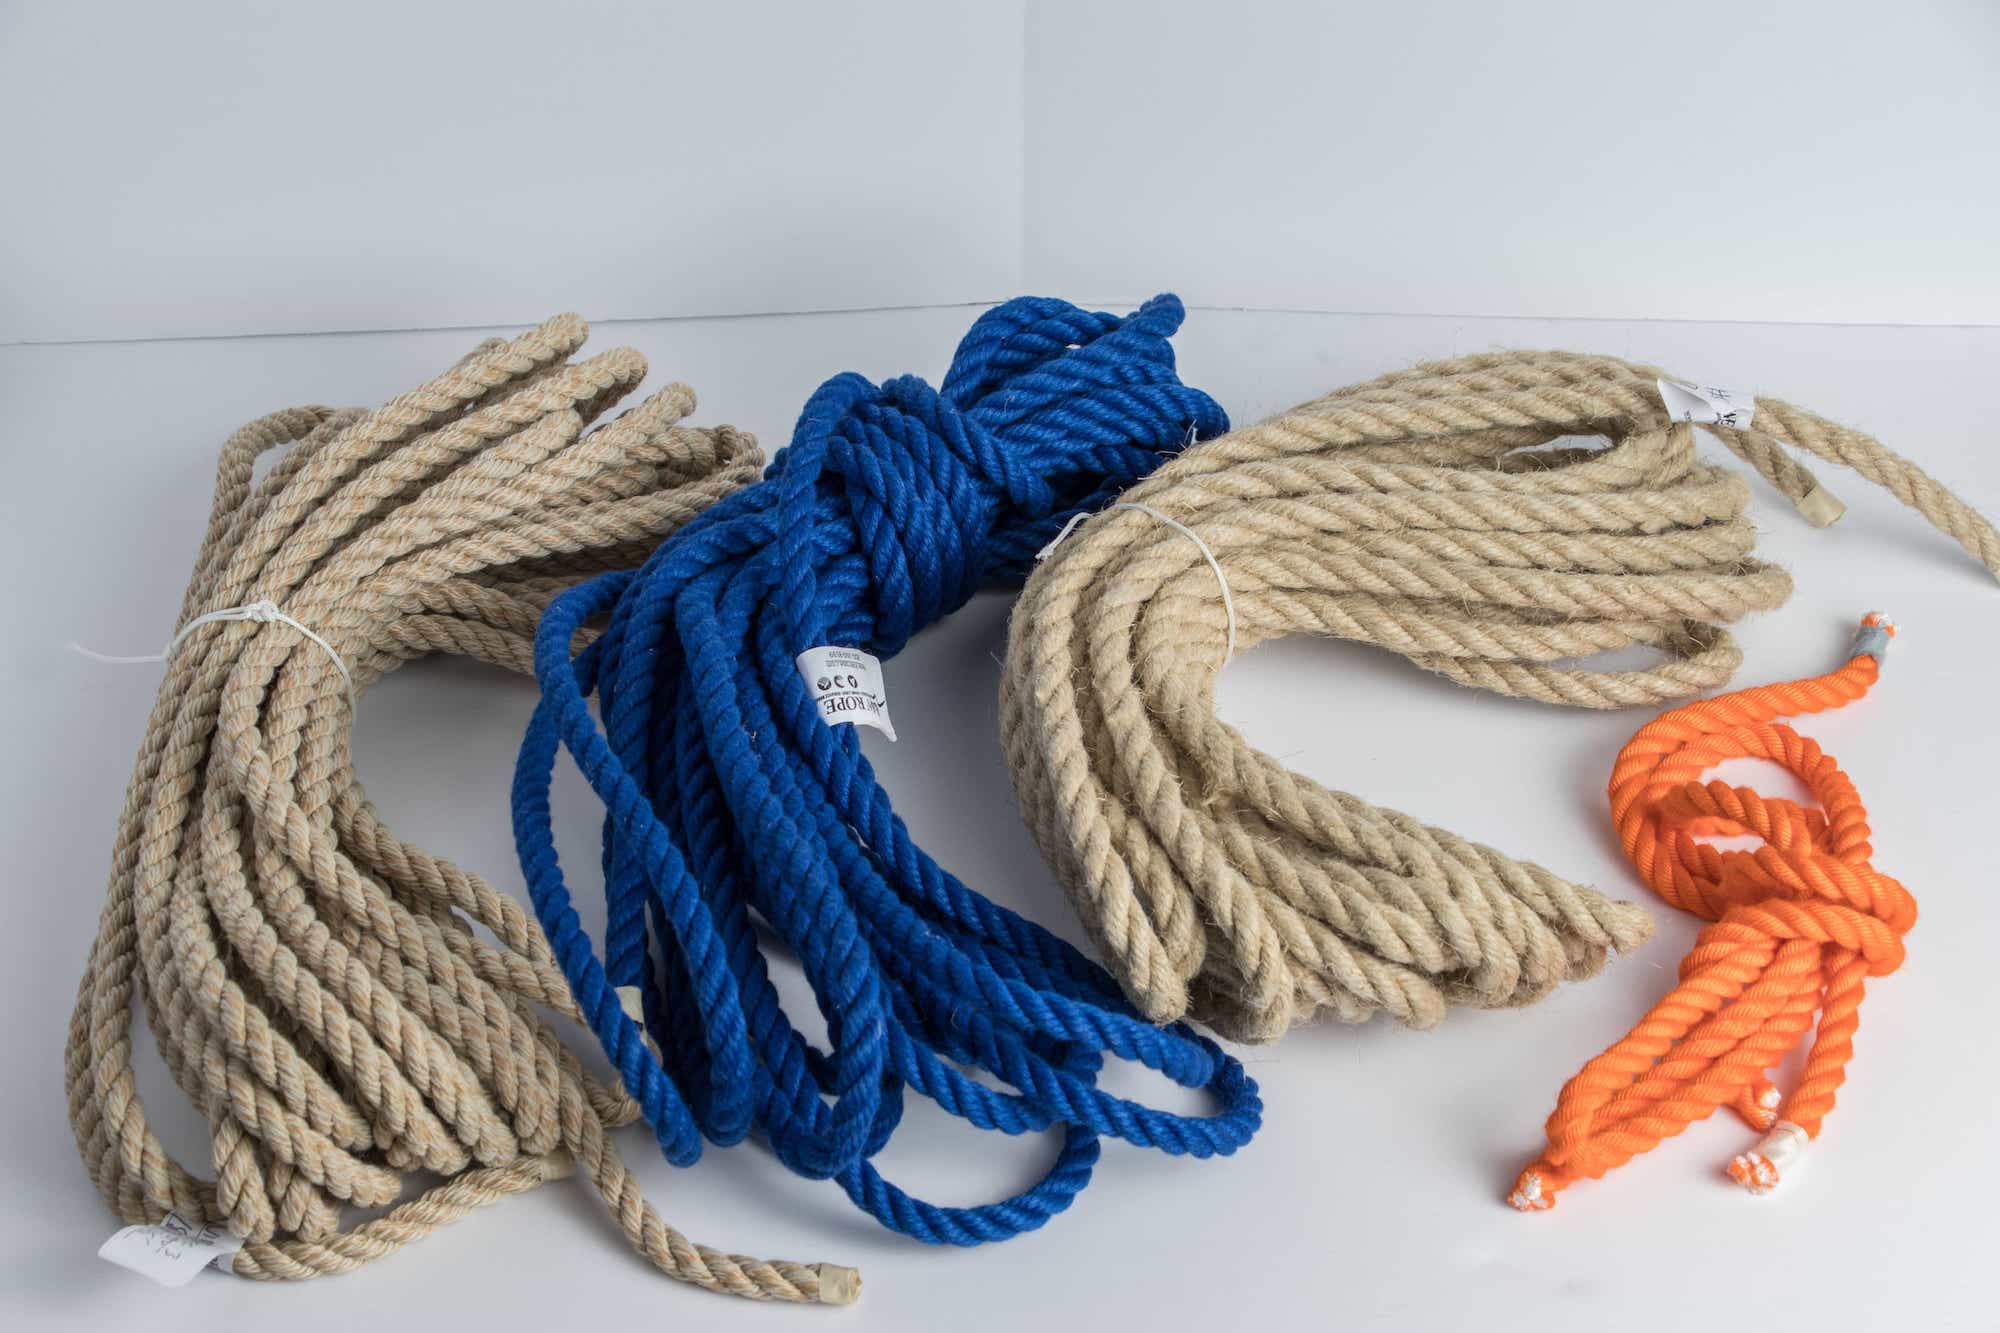
  4. POSH - a synthetic rope I recently became aware of and decided to try out. It stretches less and holds knots better than kuremona, but the main disadvantage is its stiffness. I would think that the rope will eventually soften, but I have only used it once. The lack of suppleness make it hard to get the slack out of knots before you tighten, and this doesn’t allow you full control of how much tension the rope creates on the drum heads. If this rope softens, it would be my top choice. I purchased this rope online at R & W Rope. It has been suggested that perhaps putting the rope through a wash cycle might soften it. The photo below shows the impressive array of POSH color options at R & W Rope. This photo was emailed to me by Ray, who was very helpful in helping me narrow down the choices. The online store shows less color selection, so you might need send them an email to order a specific color.

  5. Vintage 3 Strand - another synthetic rope I recently learned about and purchased to try. This is softer and easier to handle than POSH, but with slightly less knot-holding ability. It also only comes in one color, a natural beige. Because it’s cheaper and easier to work with, I would place this rope slightly ahead of POSH in terms of performance. This was also purchased at R & W Rope.

The 4 ropes I tried back-to-back to compare

The 4 ropes I tried back-to-back to compare

Rope samples from Miyamoto - five kuremona colors and hemp (far right)

Rope samples from Miyamoto - five kuremona colors and hemp (far right)

POSH colors available at R & W Rope

POSH colors available at R & W Rope

Rope Diameter and Length

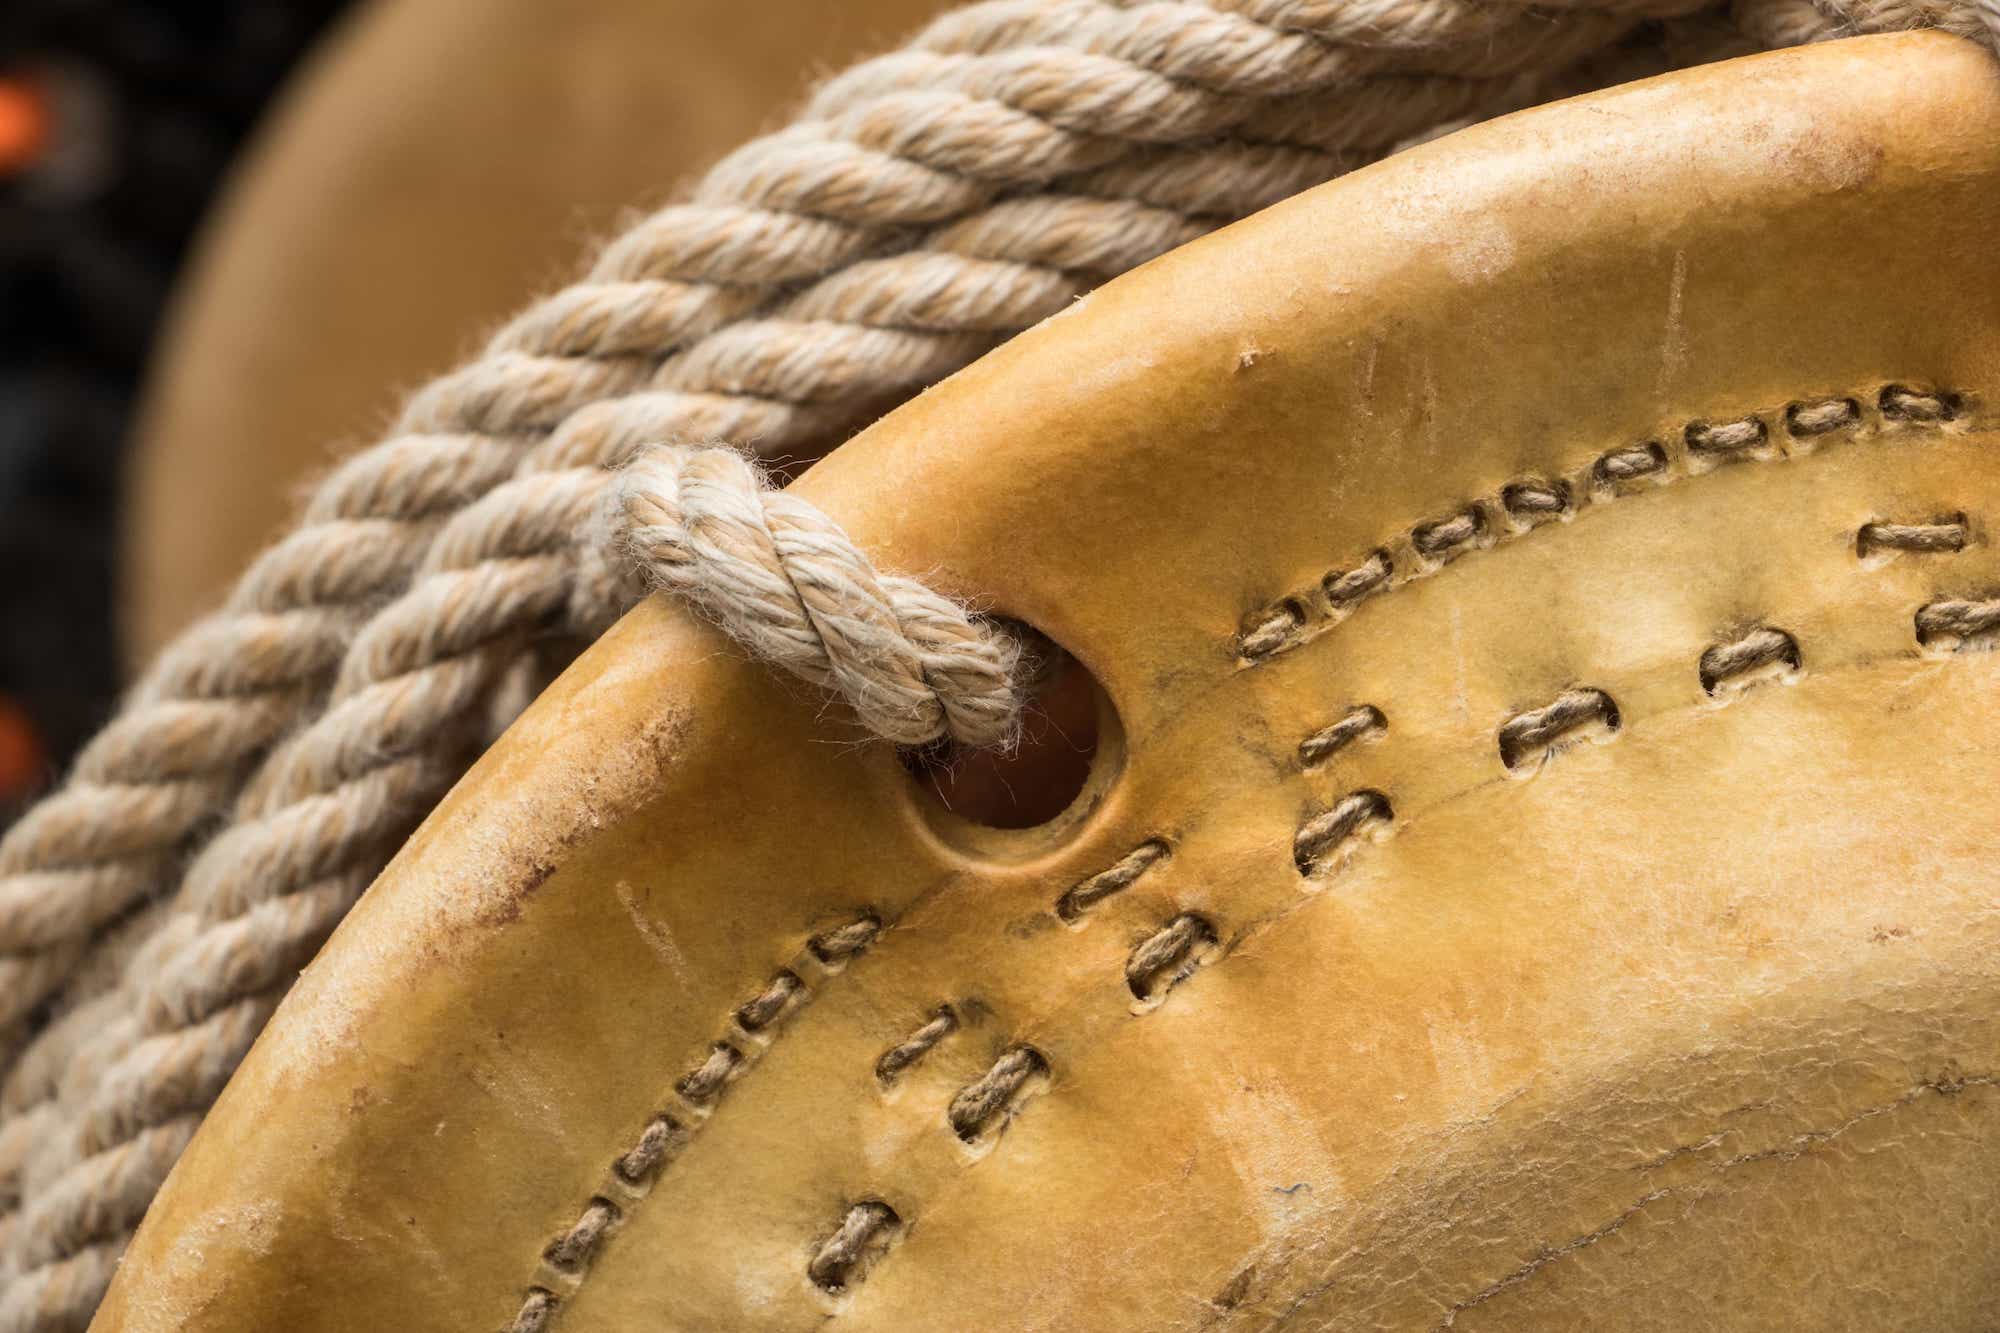
It makes sense to use the appropriate diameter rope for the size of shimedaiko you use. For the typical medium sized (2 or 3 chogake) drum, I think 10 - 12mm works well. A smaller drum might take 8 - 9mm and the biggest drums (4 or 5 chogake) could use 12 - 13mm, depending on the drum maker and rope type. In the US, 3/8 inch (9.5mm) rope is very common and easy to find. Thicker diameter is better for durability and less stretch but a rope too thick can be hard to work with. Take into consideration the depth of the body, how stretched the skins are already, and how large the holes near the rings are. For example, the Edo Bayashi taiko pictured below has a 9mm kuremona rope - it works fine, but I would prefer something slightly thicker for this drum. You can see that the holes are definitely wide enough for a bigger rope. I have learned that both Miyamoto and Asano sell a preset diameter rope for each shimedaiko size, which makes it simpler to order the appropriate rope for each drum size. However, you might want to ask for more detail about the material and diameter of the ropes so that you can choose one that best fits your needs. It’s common in Japan to use the traditional unit ‘bu’ (3mm) for rope, and for our purposes we would look for 3 or 4 bu (9mm or 12mm). But I’m pretty sure that other diameter ropes would be available in 1mm increments, and will continue my research to learn more about our options.

Miyamoto Edo Bayashi shimedaiko with 9mm kuremona

Miyamoto Edo Bayashi shimedaiko with 9mm kuremona

The taiko companies also seem to provide a set length for each shimedaiko size, but I think it would be possible to place a custom order. After the drum is tightened, I prefer to follow the common practice of winding the rope 3 times around before tying off. I have noticed that Kodo and Hayashi Eitetsu both wind the rope 2 times, so I can understand people using this method as well. For me, it’s like the martini olives rule - you should have an odd number, and 1 is too few (and 5 won’t fit). Because each drum will have differences in the length of rope required, I ordered 36 feet (11 meters) of rope for my testing and cut off the excess after tightening the drum for the first time. I feel more at ease knowing that I will have plenty of rope to work with, but you can certainly order less than this. If you are ordering from Miyamoto or Asano, it might be a good idea to ask about the set rope length and see if you can purchase your preferred length in addition to the diameter.

Whipping on the end of the rope

Whipping on the end of the rope

General Tips

1. It’s worth learning how to tie a proper whipping knot on the end of the rope to prevent it from fraying or unraveling. Tape can do the job, but it’s less aesthetically pleasing and it can come off with some pressure. A quick online search will give you many photo and video tutorials on how to whip the end of a rope.

2. Prioritize function over appearance. I have seen many drums with beautiful ropes that don’t work well at all, resulting in less than ideal sound and tightening performance. Instead of trying to find a rope that takes dye well (such as cotton) at the expense of function, search for rope that is already the color you are looking for within the category of acceptable performance.

3. Experiment to learn your individual preferences on material, diameter, length, and price. Then ask questions so that the supplier is sending you exactly what you are looking for. For example, I should have asked the salesperson about the smell of their hemp rope before ordering. Ask other taiko players, makers, and stores for detailed information so that you can build your base knowledge and find the best rope for you. I also found it interesting to learn about the wide the variation in pricing, so don’t forget to make note of the differences carefully. Let me know if you have any recommendations and I will add them to my list.

4. Learn proper tightening technique so that you value the performance of the rope. There are several different tightening methods that are commonly used. Choose one that works best for you and practice a lot. And boosting your ability to play the drum will increase your appreciation of the sound and condition of the skins over time.

5. Understand that your treatment of your shimedaiko can impact not just the sound, but also the longevity. A clamshelled shimedaiko will not last as long as a more evenly tightened one. And keeping a drum tightened all the time will result in a shorter lifespan than one that is loosened between uses. Of course, other factors like stick selection, playing technique, stand design, weather, and general handling practices will all affect how long your heads will last.

6. Links to suppliers:

Miyamoto Unosuke Shoten

Asano Taiko US

R & W Rope

Partially tightened Edo Bayashi shimedaiko by Miyamoto Unosuke Shoten

Partially tightened Edo Bayashi shimedaiko by Miyamoto Unosuke Shoten

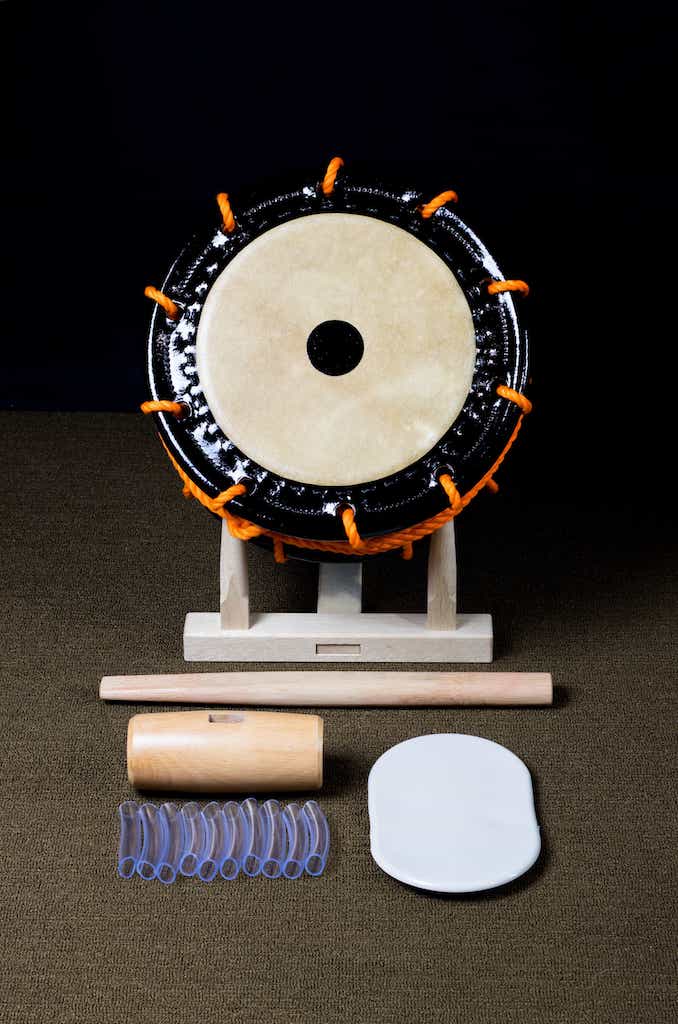
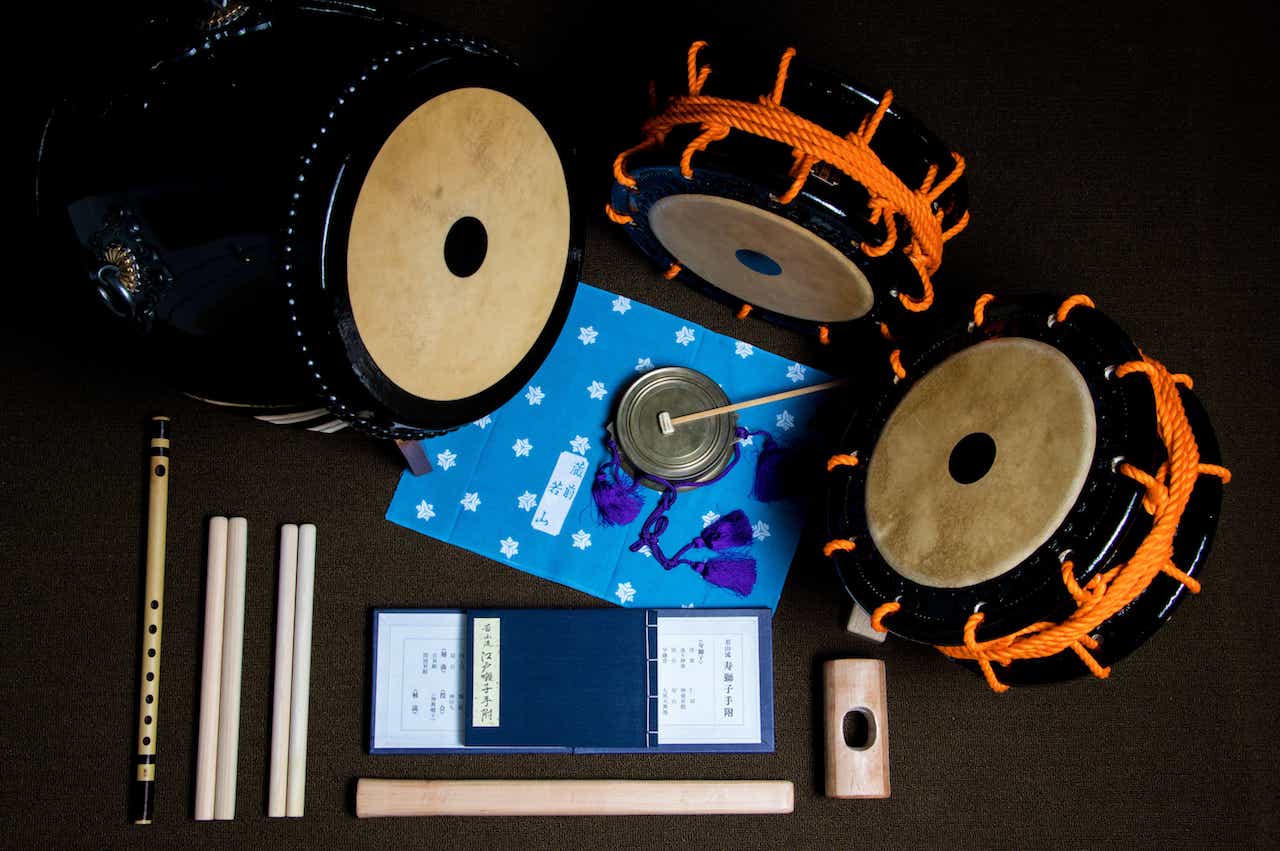
Complete set of Edo Bayashi instruments and accessories

Complete set of Edo Bayashi instruments and accessories

Useful Information About Portland & My Recommendations

Columbia River Gorge

Columbia River Gorge

For those of you visiting the area next week, I thought it might be helpful to provide some information about Portland. Feel free to send me an email if you have any questions.

Send me an email

Public Transportation
The Portland TriMet bus and rail system is good, but unfortunately there will be some disruptions to its regular operation due to construction starting August 4. There is also a separate rail system called Portland Streetcar, which is especially useful in the downtown area and provides an alternative transit option to TriMet. Normally, traveling from the airport to downtown is easy by TriMet rail (called MAX), but extra research will be needed to find your way during this construction. Here is more information.

A Rose City rose

A Rose City rose

Portland TriMet Rail System Map

August 4 - 17 TriMet Temporary Map

Portland Streetcar Map

Lyft and Uber are plentiful and convenient. At PDX (Portland Airport), there is a ride share pick-up area after you exit the baggage claim on the lower level. It is on the island across the street and is clearly marked.


Parking
Street parking uses a system where you pay for the desired amount of time at a pay station, usually somewhere on the block where you parked. The machine takes coins or credit card and prints a ticket which you display on the window facing the sidewalk. The good part is that you can move your car to another spot and use any leftover time on the ticket there. There is also a parking app, which I haven’t used. There are various parking zones with different rates, and it’s also important to know that there are parking spots for 2, 3, 4, or 5 hour time limits, which are shown in big numbers on each block. You can find this information on these interactive maps:

City of Portland Parking Zones

Parking Meter Rates and Hours

There are also a few parking garages around Portland State University (PSU). Below is a map where I circled the two buildings where all activities will take place along with the two closest parking garages. There are a lot of one-way streets in the downtown area so it’s good to make note of this.

PSU Buildings and Parking Garage Map


Things from my garden, but these and more are found at the farmer’s market

Things from my garden, but these and more are found at the farmer’s market

Farmer’s Market
There is a fantastic farmer’s market right next to PSU at the Park Blocks on Saturdays 8:30am - 2:00pm. It’s huge and there are lots of samples, coffee, prepared food booths, live music, and more. I highly recommend getting up early and checking it out before it gets too crowded. This also means that parking and traffic will be very busy all around PSU that day so it would be a good idea to plan ahead.

Portland Farmer’s Market Website

Powell’s Books
Powell’s is a legendary bookstore for good reason. Don’t miss going there. There’s a coffee shop inside, plus lots of quirky non-book merchandise that would be perfect gifts for yourself or someone at home. If you are like me, you won’t be able to leave the store empty handed so it might be wise to plan your luggage situation with this in mind. There are a few locations but the downtown one is the place you want to be. It’s also a one-minute walk from Deschutes Brewery.

Powell’s City of Books


The famous and delicious Deschutes beer

The famous and delicious Deschutes beer

Great Beer
Portland is called Beervana, which I think is quite appropriate. There is a dizzying number of breweries and great beer bars here. As difficult as it was, I narrowed down my list of favorites to just 10 places. There are many, many more.

Belmont Station
Deschutes Brewery
Montavilla Brew Works
Cascade Barrel House
Occidental Brewing
Breakside Brewery
Von Ebert Brewery
Wayfinder Beer
Hopworks Urban Brewery
Saraveza

Montavilla Brew Works flight

Montavilla Brew Works flight


Fish and Chips at Portland Fish Market

Fish and Chips at Portland Fish Market

Great Food
There is also a lot of good food in Portland, and the town is well known for the many food cart pods scattered around. This website will help you plan a pod pilgrimage.

http://www.foodcartsportland.com/maps/

Here is a list of some of my favorite food places:

Multnomah Falls

Multnomah Falls

Pine State Biscuits
Ken’s Artisan Pizza
Ken’s Artisan Bakery
Trifecta Tavern
Cheese Bar
St. Honore Boulangerie
Kale
Lardo
Bunk Sandwiches
Ruby Jewel Ice Cream
Stumptown Coffee
Water Avenue Coffee
Barista
Ota Tofu
Olympia Provisions
Kayo Ramen
Portland Fish Market Fish & Chips

For more food info, the main Oregon newspaper made their own lists of 40 top restaurants and 40 top inexpensive restaurants:

Oregonian 40 Best Restaurants

Oregonian 40 Best Inexpensive Restaurants


Other Activities
Multnomah Falls - a 30 minute drive into the Columbia River Gorge
Portland International Rose Test Garden is beautiful and free (Portland is also called Rose City)
Portland Japanese Garden
Shopping: Mississippi Avenue (I recommend The Meadow for salt and chocolate)
Shopping: NW 23rd Avenue (there is also a second location of The Meadow here)
Washington Park - great escape into the woods next to downtown
Belmont Goats - local celebrities
Oregon Coast - Cannon Beach is beautiful and worth the drive from Portland
Uwajimaya - big Japanese grocery store in Beaverton
Giraffe - little Japanese deli with bento, onigiri, sandwiches
Wineries - Oregon pinot noir is well known, but there are a lot of other great wines made here
Distillery Row - you can walk and hit several craft distilleries
PDX - the airport here is always rated at the top of national rankings, with good food, beer, coffee, gifts, movie theater, etc.

Cannon Beach

Cannon Beach

IMG_1082.jpg

My Favorite Shimedaiko Tightening Method

Edo Bayashi shimedaiko courtesy of Miyamoto Unosuke Shoten & tightening tools

Edo Bayashi shimedaiko courtesy of Miyamoto Unosuke Shoten & tightening tools

I have used several different methods for tightening shimedaiko over the years, and my single favorite technique uses a kizuchi (wooden mallet). I first learned about it from Kenny Endo many years ago when I moved to Hawaii to study with him. Last year, during my Edo Bayashi intensive with Kyosuke Suzuki sensei in Tokyo, I was taught all the details for Wakayama Shachu’s version of this method. Suzuki sensei is always very open in sharing his knowledge, and his terrific teaching skills are always present, whether I’m learning Edo Bayashi, shishimai, or shimedaiko tightening. You can read more about the intensive here:

https://www.eienhunterishikawa.com/blog/my-edo-bayashi-year-2018

The biggest advantages for the kizuchi method are: you can tighten a drum by yourself, muscle power is not needed due to the use of leverage, there is no need to weaken the rope by hitting it, and there is minimal strain on your back. Last year I started offering instruction on this method, and it has been great to see people sharing my enthusiasm for tightening shimedaiko this way. The two most common problems I see with rope shimedaiko are not getting it tight enough and repeated uneven tightening resulting in the ‘clamshell’ effect. I have no doubt that learning the kizuchi method will help groups improve the sound and longevity of their drums.

The taiko pictured here is courtesy of Miyamoto Unosuke Shoten, an Edo Bayashi drum and stand made to Wakayama Shachu specifications. Next to it are my oak agebachi (43cm), a kizuchi head modified to fit the agebachi, vinyl hose pieces, and a plastic pad for protecting the drumhead. Thank you to Yoshihiko Miyamoto san for the continued support!


Here are ten pieces of advice about shimedaiko tightening that I learned from Suzuki sensei:

  1. Play the lower-pitched side of the shimedaiko. It sounds fuller and richer.

  2. Tie the rope to the playing side using a bowline knot (moyai musubi). This knot is included in my blog about atarigane knots.

  3. Make sure the tate rope (tsuna) is evenly tightened before going on to the next step. If uneven, the drum will clamshell in the long run.

  4. For new drums, use slitted pieces of hose to protect the rim as you use the agebachi.

  5. Use a kizuchi (approximately 7 x 15cm head, 40cm handle length) to get the drum tight through the use of leverage. You can make it yourself or order custom-made mallets from my friends Abby or Chris. Contact me for more information.

  6. Protect the drumhead when using the kizuchi.

  7. To save time, find the middle point of the rope and pull the doubled rope through.

  8. At the end, the rope should wrap around the drum 3 times, tying the very last knot at the same place as the very first bowline knot.

  9. Place the knot side on the bottom when you place it on the stand.

  10. Always loosen the drum after playing. The advantages are: better sound, longer-lasting heads, any unevenness will not become permanent, and it provides valuable tightening practice to improve your skill.

Decorative Knots for Atarigane and Shumoku

Angled kane and shumoku.jpg

I recently started a serious study of knots and quickly found out how bottomless this world of knot-tying really is. During my Tokyo Edo Bayashi intensive (read about it here) last June, Suzuki sensei showed me his method of tightening shimedaiko including all of the knots. But for the atarigane and shumoku, sensei simply showed me his instruments and advised me to look up some decorative knots and experiment after I got home. While this was a fun activity, I realized the challenges of not only learning how to tie them, but to find the correct knots in the first place. The internet usually makes information searches fast and easy but my of lack prior knowledge made it frustrating to comb through hundreds of tutorial photos, videos, and useless web links. For knots, it turns out that you need to know the exact name of the knot before any good search results will show up. This was even more difficult when I was trying to find the English name of Japanese knots, or trying to reverse engineer knots from photos. Fortunately there are a lot of great tutorials online when you start with the correct knot names, and I list all of the ones I use here.

My research is knot done yet, but these labeled photos will provide a good starting point for anyone looking to add some color and style to their atarigane and shumoku. I don’t believe that there is a single correct way to approach this, and I would encourage everyone to experiment with different combinations of these and other knots. Much like the study of the Edo Bayashi music, there is no end once you start going deeper and deeper down this path. It would be fun to see everyone’s versions so please send me a photo if you try this yourself.

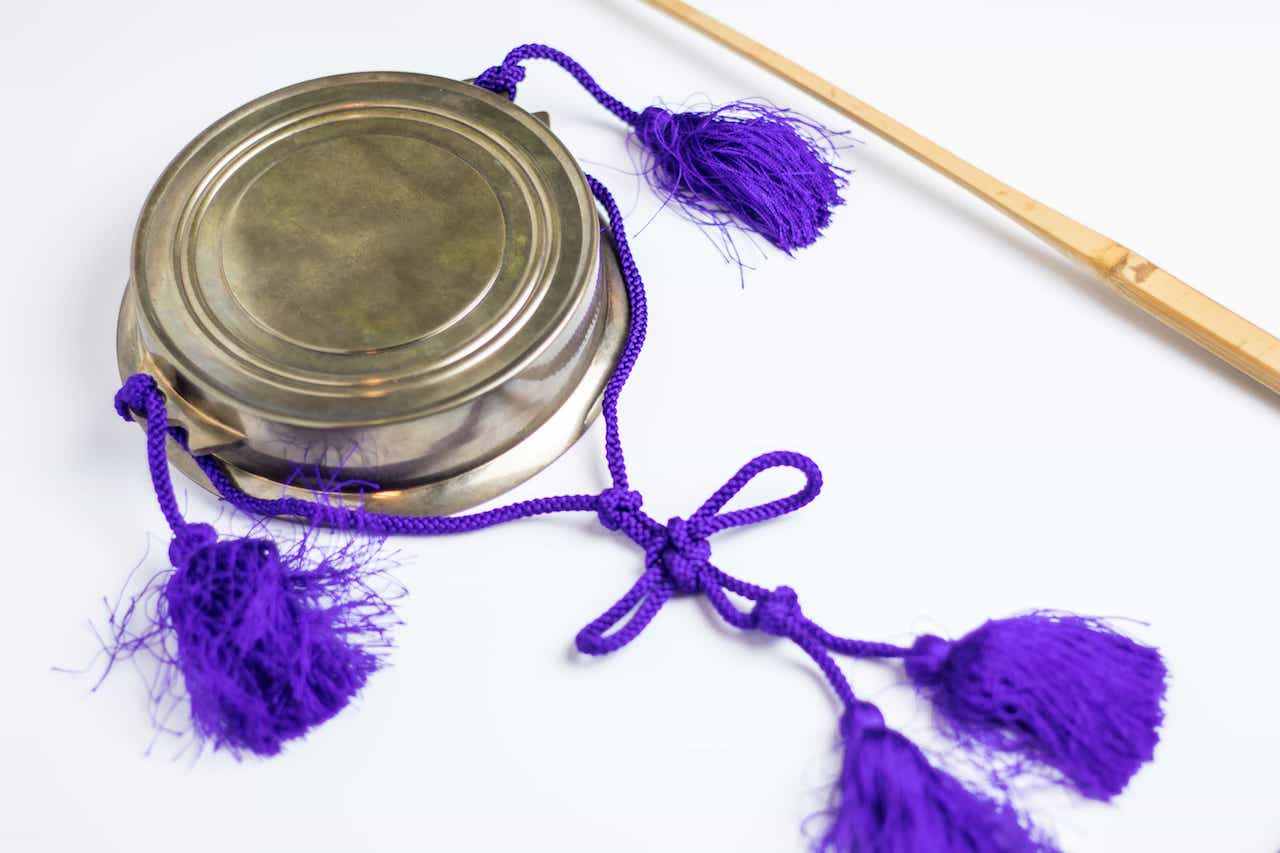
The left-side photo below shows a 5.5 Betsubiki atarigane with some decorative string I repurposed from a pair of chappa. The shumoku (Marukuma Edo Bayashi) string was originally on one of my other kane, and at 93cm it’s probably too long. I might go with something like 60 - 70cm for the shumoku string (length before tying). The common colors I see are purple, red, orange, and white, but it might be interesting to try other colors or combinations. The right-side photo (orange string) shows my experimentation with locking loop knots so that the string length is easily adjusted for different playing styles. Of the two, I prefer the adjustable grip hitch for its ability to hold more firmly. I added a variation so that the end of the string points down rather than out to the side. This photo also shows the proper orientation of the kane where the string holes are toward the bottom.

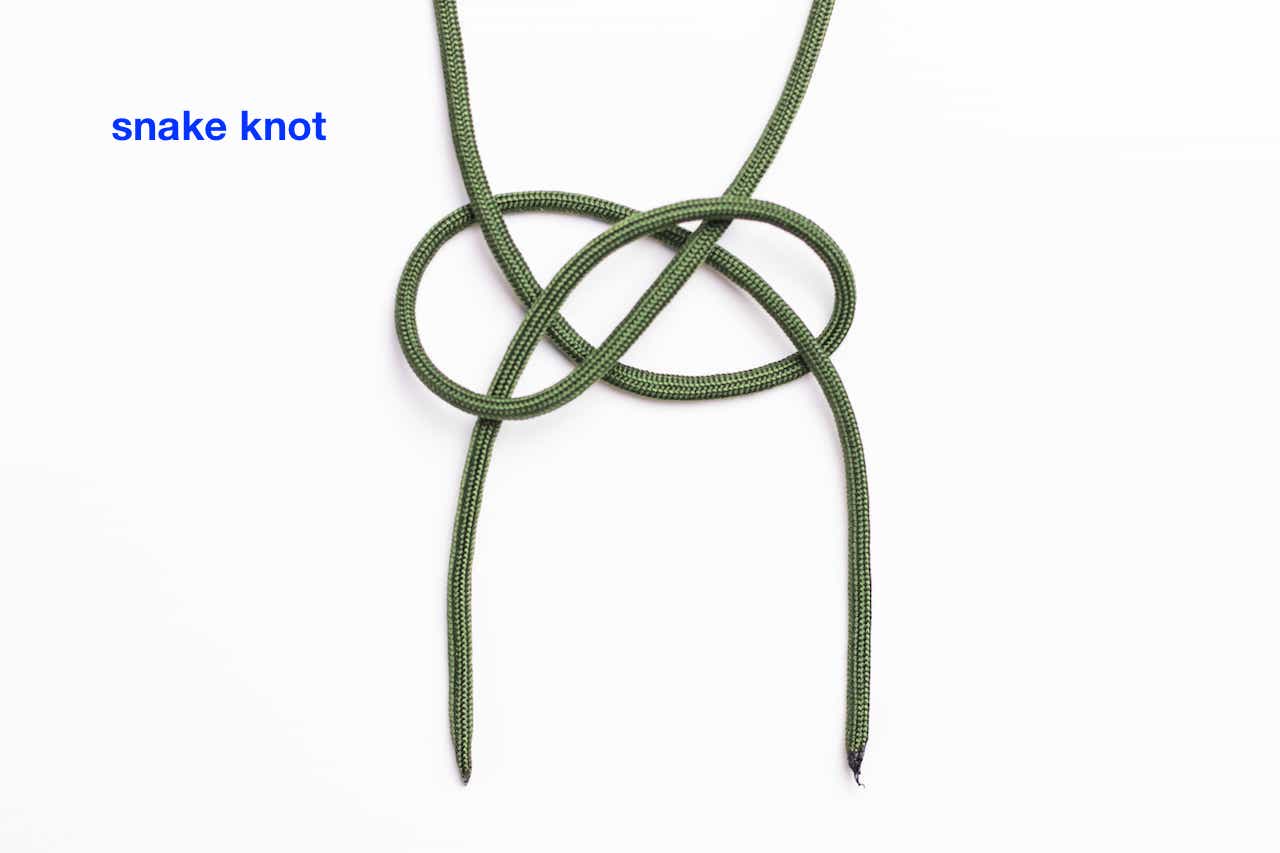
There are some bonus photos at the end showing two knots: the cowboy bowline and the snake knot. I used an old piece of string from my vibraphone to practice these knots before trying it on the real material. I would highly recommend doing this to get more familiar with the many different techniques. The cowboy bowline is typically used as the starting knot for shimedaiko and is called moyai musubi もやい結び in Japanese. Although I considered similarly breaking down all of the knots I list here, I decided knot to because doing your own research is invaluable, and I wanted to keep the length of this blog entry reasonable. Feel free to send me any follow-up questions. Good luck and happy tying!

Purple kane with shumoku.jpg
Orange kane and shumoku.jpg

Poacher’s knot

Adjustable grip hitch
(variation of passing the string through the last loop down)

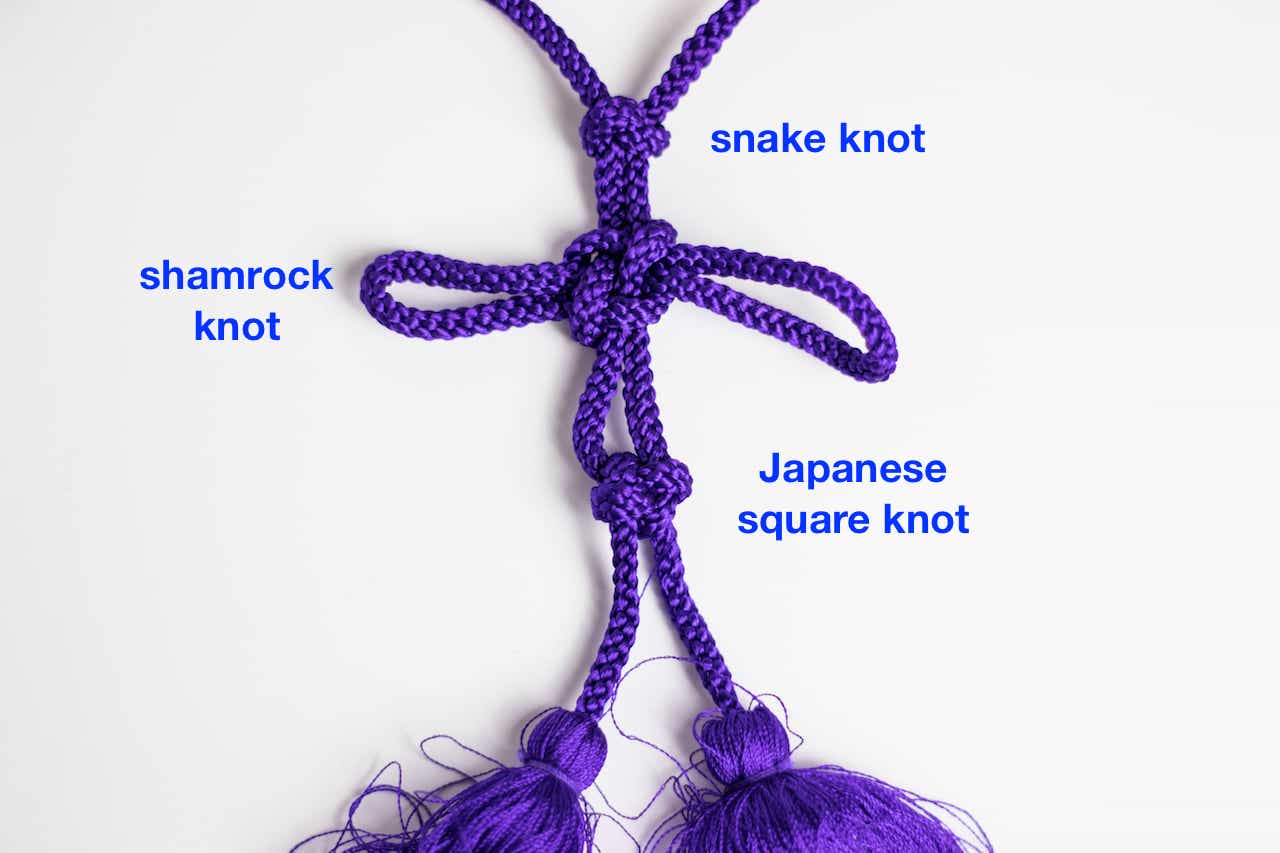
Snake knot
Tsuyu musubi つゆ結び

Shamrock knot (sailor’s cross)
Agemaki musubi あげまき結び

Japanese square knot
Kanou musubi かのう結び

Purple close up copy.jpg
Orange close up copy.jpg

Snake knot

Japanese square knot

Triangle lanyard knot

Double connection knot

Overhand knot

shumoku top copy.jpg
shumoku bottom copy.jpg

Snake Knot

snake knot loose copy.jpg
snake knot tight copy.jpg

Cowboy Bowline Knot

Cowboy bowline loose copy.jpg
Cowboy bowline tight copy.jpg
green string.jpg